Saturday, May 30, 2020

Katie Smith and FERNS 6 Stencil


Today's post focuses on innovative artist Kathie Smith, who used Ferns 6 to decorate a piece of sliced wood from Walnut Hollow, thus embarking on brand-new creative territory! 

Katie shows how much fun it is to find ever more ways to use stencils and masks.
You can get full step-by-step directions behind these photos by clicking on Kathie Smith's blog.  


For this project, Kathie used my 6" x 6" Ferns 6 stencil, which looks like this:


You can also keep up with Katie Smith on Facebook.


Thanks for stopping by my blog today!

To scroll thru the pages of my StencilGirl stencils and masks, please start here.

To follow this blog, just sign up for emails on the upper right.

Wednesday, May 27, 2020

Wendy Baysa's Art with MIKKI'S FLOWERS (6" x 6") and GARDEN MONTAGE (9" x 12")


Wendy Baysa has been playing with 6" x 6" Mikki's Flowers Stencil, 6" x 6" Mikki's Flowers Mask and the mask Garden Montage (9" x 12") -- with wonderful results!  Her color blends make for gorgeous eye candy!


6" x 6" Mikki's Flowers Stencil, 6" x 6" Mikki's Flowers Mask


Garden Montage (9" x 12")


6" x 6" Mikki's Flowers Stencil, 6" x 6" Mikki's Flowers Mask

After making the last print above, Wendy cut and folded the paper to make a greeting card --


My mask Garden Montage (9" x 12") has been put to work by my own hands, too, numerous times....


Above:  Part of this mask was used to make a print on a sheet of foreign newsprint.

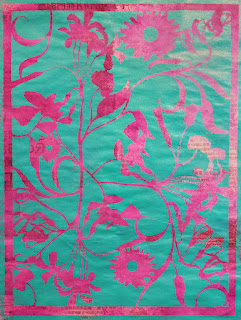
Below, I spread a base coat of light-magenta acrylic paint; after that dried, I placed Garden Montage atop it and went over the mask with a sponge brayer loaded with heavy-body aqua acrylic paint.


Above:  My first step was to play the mask onto a white substrate and spray over it several times with aqua and green spray paints.  After both the sprays and the mask had dried, I glued the mask itself atop the substrate with heavy matte medium gel.

  
Thank you to everyone who came to see my blog today!  To scroll thru the pages of my masks and stencils at StencilGirl, please start here.

Sunday, May 24, 2020

Black and White Prints with PALM FRONDS SILHOUETTE and Friends


Today's post focuses on black-and-white prints made when I was taking one of the online classes of Jane Davies.  

For today's art samples, I started with white paper and used the sponge brayer method that's so quick and easy for me.


I had no black papers on hand, so I created some with black gesso.  I wanted some black backgrounds so I could print thru my stencils and masks with Titanium White heavy body acrylic paint.

I left some papers white so I would have white backgrounds for prints made with black gesso. 


Above:  A group photo of most of the prints.  A few more are included in the close-ups below.


Above Left:2 prints with 4" x 4" Palm Fronds Silhouette Mini.  Right: Sassy Spray (6" x 6") 


4" x 4" stencil Palm Fronds Silhouette Mini. 


Above Left:  6" x 6" Palm Fronds Silhouette Small. Right: 4" x 4" Palm Fronds Silhouette Mini. 


6" x 6" Ferns stencil.


6" x 6" stencil Sassy Spray.


6" x 6" stencil Swatton Grid.


6" x 6" stencil Swatton Grid.  This is a reverse print:  I used the still-wet-with-paint stencil like a rubber stamp, pressing it to a fresh paper.


 6" x 6" stencil Swatton Grid.


6" x 6" stencil Swatton Links.

Options abound with these black-and-whites.

One option will be to cover them with translucent acrylic paints to fill the white areas with rainbows of color.  The black areas will appear different, too, once they've been coated with translucent color.

Another idea is to use them as black-and-whites in collage.  I've already put together a few of those --

Above:  This collage was created on 120-lb. white watercolor paper.  The central image is a print made with 6" x 6" Palm Fronds Silhouette Small.


Above: 6" x 6" Palm Fronds Silhouette Small made the print at the upper right as well as the piece-of-a-print in the central area under the focal point.  The focal point itself is a print made with my 9" x 12" mask Blooming Where Planted.  In the upper left is a partial print created using my 6" x 6" mask Sassy Spray.  The lined pieces in the central and lower right areas were cut from my original drawing that became the basis for my 9" x 12" mask Loopy Ladders.


9" x 12" mask Loopy Ladders

9" x 12" mask Blooming Where Planted


Sassy Spray (6" x 6")


To scroll thru all my StencilGirl masks and stencils, please start here


Thanks for stopping by my blog today!

Friday, May 22, 2020

PALM FRONDS SILHOUETTE Prints on Old Catalog Pages


I continue to flip thru my collection of earlier art-making projects that'd called for my 6"X 6" mask Palm Fronds Silhouette Small and my 4"X 4" mask Palm Fronds Silhouette Mini.

 -- poking around to see what went well before this series became three in number, with the advent of.  

Unlike me, art-explorations never grow old!  Previous ideas can grow into ideas for new projects.  Right now I'm looking for inspiration to bring together all three masks in my palm-fronds series.  

The masks that helped me create the two art samples below are  the 6"X 6" mask Palm Fronds Silhouette Small and the 4" x 4" mask Palm Fronds Silhouette Mini, but they spark glimpses into the future when I'll use these smaller masks with L791 Palm Fronds Silhouette (9" x 12").

Both of these samples started as simple prints that I made on pages of am old clothing catalog.  I love receiving this catalog because its garments are always brilliant in color and design.  They make great backgrounds.


Above is one sample print, made with Palm Fronds Silhouette Small and (on the far right) the 4" x 4" mask Palm Fronds Silhouette Mini More layers of acrylic paint will be added to this print with the 2-pronged goal of making the background somewhat less recognizable while retaining the bright colors and intriguing pattern.

Below is a greeting card cover made with a similar print:


Here the background is a large part of the original print (also made on a page of that clothing catalog.)  Over that, I've used a gluestick to add white lace-edged paper (source given below); and atop that are 3 butterfly images punched from another part of that same original print.

The butterflies were created with Bira Butterfly Craft Punch.

The lace-edged paper came from DIY Scrapbooking Lace Paper.

Thank you for taking time to stop here at my blog today!  To scroll thru the pages of my StencilGirl masks and stencils, please start here.

Thursday, May 21, 2020

9" x 12" L791 PALM FRONDS SILHOUETTE ... and Its Possibilities


Now that Palm Fronds Silhouette L791 (9" x 12") has been released at StencilGirl --


-- I'm looking over past projects that had put to use my 6"X 6" mask Palm Fronds Silhouette Small and my 4"X 4" mask Palm Fronds Silhouette Mini -- poking around to see what went well before this series became three in number with the advent of Palm Fronds Silhouette L791.  Previous ideas can be launching pads for new projects -- this time, bringing together all three in my palm-fronds series.

The masks used below are my 6"X 6" mask Palm Fronds Silhouette Small and my 4" x 4" mask Fern Fronds Silhouette Mini.

Resist techniques are among my special favorites.  Please pardon the wrinkles in the first photo below.  Those happened because I had started with (cheap) foreign newsprint, then, as a last step, had covered it with a coat of acrylic gloss medium gel.  In hindsight, I know I should have used illustration board, or some other smooth rigid substrate.  


My starting step had been to cover a sheet of that foreign newspaper with a coat of amber translucent acrylic paint.  After that'd dried, I added a layer of contrasting color using Pan Pastels --


After that, I set two of my masks onto the surface ....


... and, while holding them down with one hand, I used an old terry washcloth to rub away Pan Pastel color from the exposed areas within the masks.


Above:  the substrate after the rubbing and the removal of the stencils.


The last step was to spread the glossy gel medium across the surface of because I wanted a fixative to keep the Pan Pastel color intact.  This topcoat of glossy gel medium also darkens and enriches all colors it covers. 

To avoid smearing the Pan Pastels when adding this kind of fixative, I took the time to secure the paper to my work surface with masking tape.  Next, I added a long ridge of the gel all the way down the side of the imprints.  Then I spread it in one smooth stroke -- just one swipe -- using a 12-inch-wide taping knife from a house-paint supply store.  It was important to go over the surface only once because two or more swipes would have smeared the pastels.

 The placement of the gel and the scraping tool are shown here, where I used the same approach in a different project. 

Thanks for visiting here today!

Monday, May 18, 2020

PALM FRONDS SILHOUETTE L791 and Its 2 Smaller Versions


Today's first two artworks are part of a series I created on 12" x 12" stretched canvases, back when I was preparing to enter the juried process at my local art guild to see if I qualified for Exhibiting Membership.  (Yes, it turned out I qualified!)


My final touch in this collage was to glue on pieces of masks -- 9" x 12" Prayer Flags and Palm Fronds Silhouette Small (6" x 6") -- that were stained with black acrylic paints.


In creating these, two of the art-making tools that I used were my 9"x 12" mask Prayer Flags as well as my 6"x 6" Mimosa stencil.  

But the reason I'm sharing these pieces today is -- now that I've created a 9" x 12" version of L791 Palm Fronds Silhouette -- is that  I want to re-show art made with my other two in the series:  Palm Fronds Silhouette Small (6" x 6") and Palm Fronds Silhouette Mini (4"x 4"); I want to cast light on just some of the possibilities available with this palm fronds-inspired design.

I layed in these two backgrounds using Golden High Flow acrylics; after those colors had dried, I painted out some areas with liquid acrylics to work toward optimal composition.  

You can click on these two pieces to enlarge them and better see details.  What I've done with Palm Fronds Silhouette Small (6" x 6") and Palm Fronds Silhouette Mini (4"x 4") can now be done on a larger scale with 9" x 12" Palm Fronds Silhouette L791!

Even better, the three masks can be used together!  Below is another 12" x 12" stretched canvas, this one with a base layer of gold acrylic paints that bear imprints I made with L791 Palm Fronds Silhouette.  (Again, you can click on the photo to better see details.  The background details are subtle, but make for an enriched base surface.)


Above:  The top layer is made up of my smaller palm-series masks -- one Palm Fronds Silhouette Small (6" x 6") and two Palm Fronds Silhouette Mini (4"x 4") --  and these have been stained with red, black and gold acrylic paints.  

Below begins a series of artwork created with L791 Palm Fronds Silhouette alongside Palm Fronds Silhouette Mini (4"x 4").  The complexity of each image was achieved via multiple printing sessions.  Again, my goal here is to show how well the different sized palm fronds series stencils work together.


9" x 12" L791 Palm Fronds Silhouette looks like this--


Thanks for coming to check out my blog today!  To scroll thru the pages of my StencilGirl stencils and masks, please start here.

Friday, May 15, 2020

More Prints Made with New 9" x 12" Mask L791 PALM FRONDS SILHOUETTE


My recently released Palm Fronds Silhouette mask --


9" x 12" L791 Palm Fronds Silhouette

-- has been keeping me busy making prints!


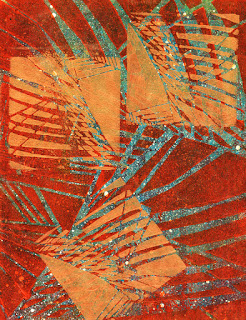
Above and below:  These 2 predominantly red prints sport background prints previously created with my 6" x 6" stencil Mimosa 6.


The prints below were made with Palm Fronds Silhouette 9x12 z640 and 4" x 4" Palm Fronds Silhouette Mini:


A third mask was used in developing the above print:  Ski Lift Works from ATC Mixup Swatton # 1.

Thanks for coming to my blog today!  To scroll thru the pages of my StencilGirl stencils and masks, please start here.