Monday, September 28, 2020

Sadly for me, this month brings to an end a fantastic online class I've been taking on abstract art-making; the class was given by Jeanette Goulart.  Starting October, I'll join her in another online adventure that she leads, Deep Dive Design.  I invite everyone interested in abstract art-making to check into Deep Dive Design and make sure it's the one offered by Jeanette Goulart, since that title brings up several websites. 

I'm amazed at the number of artworks I've turned out since signing up for the 6-month class now nearing its end....

One of our projects called for further development of pieces that we had already started and had yet to finish.

Below:  Call this one "Before."  It had been previously printed in the center with Artist Trading Card-sized Ski Lift Works, followed by Palm Fronds Silhouette Large (9" x 12") and Palm Fronds Silhouette Small (6" x 6".)


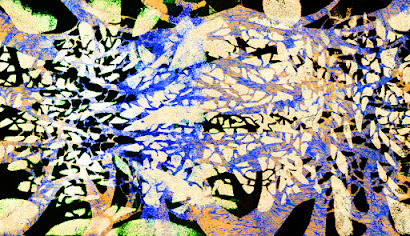
 Below:  Call this one "After." After rotating the background paper, I covered selected areas of the background with a coat of translucent green mixed with zinc white acrylic paints (zinc white being translucent, compared with Titanium White, which is opaque.)  Then I added collage pieces that included a paper printed with the May 2019 StencilGirl Stencil of the Month set.


Below:  One in a series of abstracts created for Jeanette's class; the final touches on this one were prints made with 6" x 6" Palm Fronds Silhouette Small and 4" x 4"Palm Fronds Silhouette Mini.


Below:  Another piece for that online class, this one with an imprint on the upper right that I made using Sassy Spray (6" x 6".)


The finishing touches on the following three artworks are prints made with 6" x 6" Ski Lift Works.


More of the pieces done during Jeanette's online class will be posted here later.  Thanks for stopping by today!  To scroll thru the pages of my StencilGirl masks and stencils, please start here.

Friday, September 25, 2020

It's a delight to play with new-to-me "toys" for art-making!  My two sheets of Artist Trading Card-sized stencils aren't new, but I've enjoyed pairing them with new-to-me embellishments.


Above and below: Two greeting cards were printed with Fern Fronds Silhouette from ATC Mixup Swatton # 2.  On the metallic silver card above, the Bresden embossed foil trim came from Etsy; the butterfly was created with a crafter's hole punch.  Both the hole punch and the Bresden trim are fairly new in my studio -- so much so that I'm still finding different ways to work with them.  The greeting card below, likewise printed using Fern Fronds Silhouette from ATC Mixup Swatton # 2, is embellished with a bronze medallion (another piece of Dresden embossed foil trim) as well as a lacy-edged paper doily -- the likes of which are numerous once you Google "paper doily."  So many doilies will come up that you will barely be able to pick out favorites! 


Below is a third greeting card also making use of Bresden embossed foil trim that came from Etsy.  The background is watercolor paper previously decorated with -- believe it or not -- soap bubbles tinted with paint and applied by me blowing thru a straw!  Onto that paper, I made a print using Sprigs, another of the 9 stencils included in ATC Mixup Swatton # 2The butterfly was a gift received in one of the monthly exchanges for members of StencilGirl StencilClub 


My go-to adhesive for these laser-cut paper embellishments, as well as the Bresden embossed foil, had long been a gluestick.  I still use my gluesticks a lot, but now it's just for solid papers like the watercolor paper on the greeting card above.  

For these two types of delicate paper decoration -- both the Dresden and the doilies -- I've started using Artist-tac dry adhesive sheets by Grafix.  These dry adhesive sheets allow me to apply adhesive to every part of the delicate laser-cut papers, but -- this is important -- without adding unwanted adhesive within the many laser-cut openings that make these papers so pretty. 

Directions for using Artist-tac dry adhesive sheets are right on the product's package, and they're a cinch to follow, with good results.  The only warning I need give is to avoid touching the adhesive with your fingertips!  Any area that your fingers touch will not be usable because the glue in that area will be on your fingers!  Any unwanted adhesive is very easy to remove, especially if you have an adhesive"pick-up" square

Thanks for stopping by my blog today!  To scroll thru the pages of my StencilGirl stencils and masks, you can start here.  To follow this blog by email, please use that option in the upper right sidebar.


Tuesday, September 22, 2020

 My 6" x 6" Cats stencil ...


... has paired with my 6" x 6" Quilted Flower Garden mask...


... for a fun time in the studio.


First, I chose a paper already layered with leftover paints and made a print with part of Cats:


(For me, the easiest way to use part of a stencil is to place masking tape over the areas that I don't want to print.  The shot directly below gives an example, using one of my Hot Air Balloon stencils.)


For today's project, the next step that I took was to make a mistake! -- without realizing it, at the time.  I placed Quilted Flower Garden right over my cat print.  I'd meant to cover the cat print with a mask of scrap paper before moving ahead, but as it turned out, I discovered a way of correcting this mistake, when I got to my last step.


Moving ahead, I loaded a sponge brayer with 2 hues of green paint --


Above: Above the brayer are the two daubs of heavy-body acrylic paint; I've started to roll them down across the tablet of pallet paper.  Below:  a close-up of the brayer ... 


The shot below shows the first application of paint that I have applied with the brayer.


Next, I turned the brayer over, as shown below; this way, the dark green paint stayed in the middle of the print and the lighter shade bracketed the print on the left and on the right.


Below:  I've lifted off the stencil to discover my mistake in having forgotten to mask off the cat to keep the stencil from printing over it.  


But one thing an artist learns along the way is that there's always something to try, just to see whether it might work ... so I grabbed a damp paper towel and started to gently remove the still-wet green paints, cleaning the cat's area while leaving the surrounding print intact.  This was the result --


This quick-fix trick worked because the cat's print was completely dry and because the green brayer-applied paint was still moist enough for the damp paper towel to do what I wanted.

Somewhat similar steps could be done on a Gelli Plate and the results would probably be similar.  For me, it's just a matter of which art-making tool to use; and I like the brayer approach more than making prints with the Gelli Plate. 

Thank you for stopping by today!  To scroll thru the pages of my StencilGirl stencils and masks, please start here.


Saturday, September 19, 2020

 Artist Luci Sweet, a StencilGirl StencilClub member, has created a fossil-like image with this beautiful print, using my 9" x 12" Longwood Florals Mask --


-- and Luci achieved this wonderful three-dimensional look using a gel plate. 

My 9" x 12" Longwood Florals Mask, in its entirety, looks like this:


Parenthetically, I've recently noticed that the majority of my StencilGirl "stencils" are actually masks.  The word "stencil" has segued into a generic term, referring to both stencils and masks.  You can see this easily when scrolling thru my pages at StencilGirl; almost every item is listed as a stencil.  

This "blurring together" of the two words, stencil and mask, is easy to understand.  Depending on how you look at it, they both do the same thing -- but in directly opposite ways!  

Notice the difference between 9" x 12" Longwood Florals Mask, above, and 9" x 12" Longwood Florals Stencil, below:


The basic design is identical.  But with a stencil, the white area represents a sheet of sturdy StencilGirl mylar.  The black areas represent the openings that let paint to pass through, in creating a print.  Those tiny white lines (called "bridges") hold the stencil together.

Scrolling back up to Longwood Florals Mask, you can see that the white areas represent the areas of the Mylar sheet that will block -- or mask -- the areas underneath, while a print is being made.  The black areas that surround these white shapes represent places where the Mylar has been cut away; and it's these cut-away areas that let paint pass thru, as the print is being made.

In my own designing, I've come to favor the mask approach because I  like the way it enables the design to "hold together."  But not all images work as masks, so stencils still have their place.   

In making the gorgeous print at the top of this post, Luci Sweet was following the steps of a "shadow"-printing technique developed by another StencilClub artist, Shel Cee.  Those steps are shown in this video made by Shel Cee.

Thanks for stopping here today!  To follow this blog by email, please use that option in the upper right sidebar. 

Wednesday, September 16, 2020

When my 6" x 6" mask Looking Up Through Trees Small was released, I quickly fell in love with the idea of creating mirrored images.

At first, I tried a simple approach:  Making two prints on one 12"- long sheet of paper -- being careful to line up the bottoms of the tree trunks along one side of the mask; the two photos below show my approach; the second is a close-up of the first:


Having made a series of these simple mirror-like prints, I decided that adding complications would make images more complex and satisfying.  And so began a journey toward these art samples ...


Above:  a mixed-media collage that started as a simple double print.   The lower half of the mirrored image has been muted with a layer of translucent acrylic paint (Titan Buff by Golden Paints.) 
Covering that background are collage pieces that came from 3 sources:  (1) a Spin-Art print; (2) another print that I'd made using Looking Up Through Trees Small; (3) a print made with the May 2019 Stencil-of-the-Month set.   These papers shared a color scheme with one another as well as with the double-printed background.  I had fun creating that collage and had the extra pleasure of selling it to someone who's giving it a good home.:-)    


Below are 2 more pieces that'd begun as mirror-like prints ....


The above two horizontal images gained complexity via my returning to them over and over with my 6" x 6" mask Looking Up Through Trees Small.  Each time I used the mask, I turned it in a different direction.  My goal was to create two abstract art samples that most likely will be cut into pieces and worked into new collages.  But other possibilities spring to mind, too!

Thank you for stopping here at my blog today!  To scroll thru the pages of my StencilGirl stencils and masks, please start here. To follow this blog by email, please use that option in the upper right sidebar.

Sunday, September 13, 2020

3 Approaches to Making Rubbings with Stencils and Masks

1. 

Dry rubbings!  

What tools can we use?  Let's not stop with crayons!  

What papers can we use?  Thin papers are favorites because (1) rubbings are easier to make on them; and (2) they're the easiest to use as overlays or backgrounds on the pages of art journals. 

Many dry media will work for dry rubbing, but I usually opt for a water-resistant or waterproof medium  -- china marker, oil pastel crayon, regular crayon, Shiva Stick, color pencil, charcoal, graphite pencil, etc. -- because after the rubbing is finished, a waterproof or water-resistant medium will allow me to come back in with a wet medium like acrylic ink, Golden High Flow acrylics, watercolor, etc.

Sara Sissenwein Norris recently threw a surprise party for my eyes when she used 9" x 12" Clustered Leaves and other StencilGirl stencils in making these rubbings:


Above:  Sara did this crayon rubbing on Japanese calligraphy practice paper.  Her crayon rubbing below was done on deli paper --


Sara also used white tissue paper in experimenting with rubbings.  It's challenging to find tissue strong enough for this technique.  In future, Sara may use dollar store white tissue or Lineco tissue paper; the latter is available from bookbinding suppliers, Amazon and other vendors.  I see that it comes "buffered" as well as "unbuffered," so before I buy my next batch, I'll be looking up the difference!  I bought some years ago but have no idea which version it was. 

Using one of the nine stencils included in the 9" x 12" ATC Mixup Swatton #2, I made the rubbing below with a reddish Art Bar crayon and textured off-white (creamy) paper.  This Artist Trading Card-sized stencil, Sprigs, is similar to, but not identical with, my 6" x 6" Sprigs.


For the next rubbing, also made with the ATC-sized Sprigs, I used gold foil paper and a black crayon --


2.  

I made a short video -- here -- that starts with the history of dry rubbings, as I understand it; then it segues into showing how to make "rubbings" solely with wet media.  It's worth a watch!


3.

Coming up below:  Today's third and last segment covers several approaches to mixing wet media with dry media in making rubbings.

My 9" x 12" Blooming Where Planted mask looks like this .... 


... and I decided to try using this mask to make more dry rubbings, using mineral paper.


Mineral paper comes in tablets like the one shown above; it comes in three sizes.  If I remember correctly, it's made from calcium carbonate.

There were two reasons I wanted to try this paper -- (1) it's thin and translucent enough for a stencil to be placed under it for the technique of dry rubbing; (2) it accepts wet media without warping.

I did three quick tests.  

For my first approach, starting with the photo below, I slid my mask under the paper --


Below: Next, I used a china marker (grease pencil) to do a dry rubbing across the top of the paper.   I chose a china marker because I wanted a medium that would repel water.  


Next, I sprinkled the dry rubbing with alcohol ink, then I tipped the paper to cause running:


Below:  the paper after it had dried --


For another test to see what can happen with mineral paper, I pulled out watercolor pencils.  This time, I wanted to use a dry medium that would be soluble in water.  The photo below shows the dry rubbing created with these pencils.


The next step was to spray the surface with water.  (I was to discover I'd used too much water!)


The photo above is a close-up of the final results, after the paper dried.  Because I'd sprayed on more water than needed, the effect was a washed-out look.

(If you think I learned my lesson about a heavy trigger-finger on the water spray bottle, you would be guessing wrong!)


Above is the start of my last test on mineral paper.  This time I used Art Bar crayons.  These were the easiest to use for the dry rubbing technique since 
they can be laid completely sideways, reducing the number of strokes you need to make across the top of the paper.

The photo below shows my water spray bottle and my box of Brusho powdered pigments.  


Next, I sprayed the surface with water -- again using too much! 


While the surface was still wet, I sprinkled Brusho powders across it:


My close-up below shows the final result --


Of these three approaches to making dry rubbings on mineral paper, my favorite is this last one.  

In testing the mineral paper, I used the pencil/crayon/marker on plain white paper before adding liquid media.  

But rubbings can also be made on painted papers as long as the papers remain thin under a coat of acrylic paint.  

A quick example:  I grabbed paper previously printed with wet media, using Palm Fronds Silhouette Small (6" x 6") and Palm Fronds Silhouette Mini (4" x 4"); and I got out a new-to-me kind of grease pencil (see below), along with masking tape and my 9" x 12" Prayer Flags.


The Listo pencil's blue went well with the yellows and oranges of this paint-coated paper .... 


Important note:  Artist Sara Sissenwein Norris got the idea for making her prints from artist and teacher Carolyn Dube, here.

My sincere thanks to all who stopped here today!  To scroll thru the pages of my StencilGirl stencils and masks, please start here.  To follow this blog by email, please use that option in the upper right sidebar.

Stay safe and stay well!