Saturday, October 21, 2023

Bogus!

 Temu is an online retailer that will never receive any of my business.  

My quick internet search pulled up the following:

Temu is an online marketplace operated by the Chinese e-commerce company PDD Holdings Inc. and headquartered in Boston. It offers heavily discounted goods, which are mostly shipped to consumers directly from China.

Temu advertises itself as a venue selling StencilGirl stencils at "discount prices."  

Bogus!

They sell other items as well but I will never buy anything whatsoever from them.  

Dishonesty and theft are despicable qualities.

Thursday, October 19, 2023

Wet-Strength Tissue with Stencils and Masks -- More Prints put into Artwork

Although many of my recent posts have detailed the use of wet-strength tissue paper with stencils and masks, more examples still wait in the wings.

The advantage of artist-quality, wet-strength tissue is that when added to a collage, its plain white background disappears, or nearly disappears, leaving a layered look that's much more entertaining for the eye of the viewer.  

Giftwrap tissue has no "wet strength" so it'll try to dissolve if used in the way I'm showing here.  I knew this in advance, yet I experimented with printing on giftwrap-quality black tissue using white acrylic paints.  I'll show those prints in a future post, after I've finished using them in collages.  At this point, all I've done is to test them on scrap paper.  Pre-testing is always a good idea when working with something known to be fragile!  Likewise, with anything that's an unknown!  Pre-testing takes time, but it's time well spent.


Note:  The silver print was made on one side of the tissue.  The white print was made on the flip-side of the tissue.  Rather than using a gel plate to create this print, I used the brayer method described in an earlier post.


Above:  Wet-strength tissue paper printed with 9" x 12" Winter Berries Stencil L678 (using metallic silver acrylic paint) and 9" x 12" mask Prayer Flags L371 (using Golden Titanium White acrylic paint.) In the photo above, the Prayer Flags L371 print appears nearly black -- because I've placed the tissue onto a black background, to clearly show the paper before it's cut or torn into pieces for collage.


The abstract mixed-media collage above is still in progress.


A piece of the tissue printed with Prayer Flags L371 and Winter Berries Stencil L678 is subtly visible on the far right and lower 2/3 of this artwork-in-progress.  (This subtle presence creates an "implied" texture to give depth/interest to the overall artwork.)  Here, the Winter Berries Stencil L678 part of the print is nearly invisible because I had a choice of which way to place the collage paper. Placing it with the printed side down, I achieved a look that featured mostly the Prayer Flags L371 aspect of the print.  Had I chosen to place the tissue printed-side-up, both prints would have been more clearly visible.

Since the above art-in-progress heavily incorporates linework, I've included linework imagery using pieces of other printed tissues, as well as 3 pieces of heavier stencil-printed paper --

(1)  In the upper right:  Part of a purple acrylic paint print made on wet-strength tissue using my 6" x6" mask Chandelier s971 .   

(2)  Directly below that, in the focal area: a partial print made with 6" x 6" s238 Palm Fronds Silhouette Small (purple and yellow acrylic paints on wet-strength tissue.)

(3)  Scattered across the upper left quadrant:  wet-strength tissue pieces printed using 6" x 6" mask Champagne s960.

Pictured below -- a close-up of one piece of tissue gel-plate printed with 6" x 6" mask Champagne s960 using Golden High Flow acrylic paint-- before it was adhered to the collage using matte medium gel.


To scroll through the pages of my stencils and masks at StencilGirl Products.com, please start here.

Thanks for your visit here today!

Sunday, October 15, 2023

More "Bubble" Prints

In my October 7 post I detailed the way that I got a subtle bubbly look on wet-strength tissue.  For that approach I used a hard rubber brayer to spread color over the gel plate -- but in that case, what I used was a thinned mixture of paint. The thinness of the paint mixture -- combined with the surface of this type of tissue -- resulted in a faint bubbly look that, to my eye, enhanced the prints made with 6" x 6" mask Chandelier s971 and 6" x 6" mask Diatom s972.   

Some other time, if I wanted to use a full-strength acrylic paint, I could apply that the paint using a textured roller.  But that would result in a "heavy" look, which would be fine for some projects; but not exactly what I was shooting for, with that particular project.

(To get yet a different kind of bubbly look, I could have spread full-strength liquid acrylic paint across the gel plate and, while it was still wet, I could've used kids' bubble-blowing solution and wand, aiming for the wet paint.  That would lay soap bubbles down into the paint.  But if I were to do this, I would use it for monoprinting; I wouldn't use it with a stencil or a mask because the design of the mask or stencil would be nearly obliterated by the bubble patterns.  This is the kind of project I would do just for fun.  I wouldn't use the results in a collage on stretched canvas, since I doubt I could fully trust matte or gloss gel or liquid to seal it enough to make it archival.)

But I digress!  Below is a close-up shot of the wet-strength tissue showing both "bubbles" and a corner of a print made with Diatom s972.


After making a series of wet-strength tissue prints this way, I allowed the paper to dry.  

Then I squiggled random designs across the paper using colorful waterproof markers.  

My step was to lay out some solid-color dark purple paper.   

I then spread an adhesive over the purple paper and pressed these printed tissues into the wet adhesive.  (Matte gel is my favorite adhesive for this kind of project.)

After cutting up this layered/laminated paper -- with a goal of creating interesting shapes -- I adhered pieces to a collage-in-progress on stretched canvas.  

My next step was to give them a faint yellow overcoat using liquid acrylic paint thinned with matte medium liquid.

Piece by piece these bits of laminated/layered papers dropped into assorted areas in a collage-in-progress (upon stretched canvas). Because they had received a faint yellow tint, their designs have become quite subtle.  Here are some close-ups:


While that collage was still taking shape, I veered off onto a tangent, making darker prints using the same gel plate approach....


Next:  a shot of a different collage-in-progress.  This collage incorporates some of the wet-strength tissue prints shown directly above--


The collage-in-progress above also incorporated a print made on wet-strength tissue, but this print was made directly onto the paper with a paint-loaded sponge brayer; no gel plate involved, therefore, the result is "heavier" to my eye, and contains no "bubbly look."

For me, it's not a completely new -- yet still, somewhat fairly new -- approach to work on several collages at a time, alternating my attention from one to the next, in an ongoing cycle.  Mt goal is to bring "fresh eyes" to each piece as I focus on it.  This approach, like everything else, takes practice ... and never reaches perfection, but it's lots of fun to take the visual journeys! 

Masks I used in making prints shown today:


9" x 12" Blooming Where Planted L449

6" x 6" Chandelier s971

6" x 6" Diatom s972

6"x6" Champagne s960


Many thanks for checking out my blog today! To scroll thru the pages of my masks and stencils at StencilGirlProducts.com, please start here.  

Friday, October 13, 2023

Assistive Technology in Art-Making

Long ago, I worked in the field of assistive technology.  That work focused almost entirely on computer usage.

Recently, my friend Judi Kauffman gave me a germ for the idea of applying the concept to art-making, with a focus mostly on a hands-on approach.

My original idea had been to wonder whether Pan Pastels might work for anyone with finger disability, since it would take just one finger to collect this soft, chalky color and apply it.  Many of you readers probably already know that textures surfaces work nicely with this medium ... especially  black watercolor paper.

Of course, to get crisp imagery with stencils or masks and Pan Pastels, a smooth surface would work much better than a textured one.  Think mineral paper, Yupo, etc.

That original idea became my launching pad.  I did internet searches for assistive technology, as applied to art-making.  Some of my findings would work well with stencils and masks.  Experimenting would be half the fun!

In no particular order, here are tidbits from my research--

 Amazon.com: Sky Castle DoodleJamz JellyBoards — Squishy Drawing Pads Filled with Non-Toxic Sensory Gel – No-Mess Fidget Art – ASMR – Re-usable for Endless Artistic Creations (Blue and Red Gel) : Toys & Games--

(About this first one, above:  There exists a larger version, considered a toy, that I bought for my grandson -- but the minute I opened its box, I fell in love with it myself.)

**********************


(Above:  Many versions of this exist.  Some are foam plastic tubes of various shapes and thicknesses.  Next up, below:  something similar. Both this one and the one following below would work with stencil- and mask-art-making.)

***************************


****************


(Above:  Many of us who make art using stencils and masks have already added these to our supply of tools.)  

********************************************


(Above:  I wonder whether this might work with pastel sticks, Stabilo Woody Pencils, Marabu Mixed Media Art Crayons and the like.   For results that you may like best, I strongly recommend that pastel sticks and similar media be used with masks and stencils that have a maximum of wide-open areas and a minimum of finely-detailed areas.  Examples:  Hot Air Balloon And Mask s547;  Penguin Family s393; Pair o' Parrots s395Cats s183; Osprey Wings s176. The best choice might be Stabilo Woody Pencils because these often come with specially-sized sharpeners that create a fine-point tip.


****************************************


(Above:  It looks as if the plastic "caps" can be removed from these scissor blades, which might make more sense for adults.  I'm including scissors for those of us who like to cut apart our papers printed with stencils and masks, for collage, etc.)

****************************************************


(Above:  There are lots of versions of watercolor brushes. Some appear to have better handles than others, depending on the needs of the individual.  I used to use these when traveling because all you need is a watercolor brush and pan watercolors or watercolor crayons or pencils.  When using watercolor with stencils and masks, I recommend minimal amounts of water for best results.)

Thanks for checking out my blog today! To scroll thru the pages of my stencils and masks at StencilGirlProducts.com, please start here.

Tuesday, October 10, 2023

More Prints on Wet-Strength Tissue


I chose my sponge brayer approach* in making some of the prints in today's post. For others, I used a gel plate.  


Longwood Florals Mask L675


Garden Montage L652 (9" x 12")


Top print:  Fire Cherries L879 (9" x 12") Bottom print: Garden Montage L652 (9" x 12")


Prayer Flags L371 and Winter Berries Stencil L678  (both are 9" x 12")


L676 Longwood Florals Stencil and L141 Mimosa Stencil
(both are 9" x 12")


L676 Longwood Florals Stencil (9" x 12")  Note: All of the other sample prints in today's post were made on wet-strength tissue paper.  Above is an exception. It was printed on a sheet of vintage paper. 


9" x 12" mask Facets L283 and 9" x 12" Vintage Script Stencil L267


9" x 12" Vintage Script Stencil L267 and 9" x 12" mask L283 Facets


*My sponge brayer approach is simple and it saves my wrists and hands; they suffer if I indulge in too much sponge-pouncing to make prints with my masks and stencils.  My steps are below: 


I squeeze out heavy-body acrylic paint (shown at the top of the photo above); then I load the sponge brayer by rolling it repeatedly over the acrylic paint.  Often I add more paint as I go, since the sponge soaks up a lot of it while getting the outer layer loaded.


Above:  A sponge brayer being loaded with heavy-body acrylic paint.  This old photo shows my using a disposable foam plate. Now, I use a tablet of pallet paper.


After loading the brayer with paint, I place a stencil or mask atop a substrate, secure it with masking tape, and roll the brayer across the top.  See below:


Thank you for checking out my blog today! To scroll thru the pages of my masks and stencils at StencilGirlProducts.com, please start here.

Saturday, October 7, 2023

Wet-Strength Tissue Printing with Masks and Stencils

 I have more to say, and show, on the topic of wet-strength (artist-grade) tissue papers.  (These papers may be available from other sources, besides the one cited in the link above.  When ordering, simply make sure you've landed on "wet-strength" papers.  Giftwrap tissue won't work when creating papers for use in collage.)

Sally Hirst teaches online classes that have prompted me to bring out these tissues.  I highly recommend her classes!

Upon arrival, these papers appear mostly white, with only a faint translucence, until they're glued to a background. Once they're saturated with any gluing medium, they become more translucent; in some cases, they go all the way to transparency.

Today's post will end with a series of photos, with close-ups, that show this translucency and transparency.  I adhered these printed papers by brushing matte medium liquid across the area to be covered with the paper. Then I pressed each piece of cut-out print into place.  After pressing it flat, I brushed another light layer of medium across the top, making sure to secure all paper edges to the substrate.

Today's prints was made on a gel plate using leftover a batch of leftover glazing mixture (roughly 3 parts matte medium liquid to roughly 1/2 part zinc white liquid acrylic paint and roughly 1/8 part violet.  Golden Paints Permanent Violet Dark liquid acrylic paint is what I've used.)

Since I was using leftover glaze to make these prints, the prints are pale.  (This glaze was left over from another project.  Having made too much of the glaze mixture, I wanted to avoid any going to waste.)


(Above: The uppermost tissue was the result of my first pull and the lower tissue is the result of 3 ghost prints.  Mask used: just-released 6" x 6" CHANDELIER S971.) 


(Mask used:  just-released 6" x 6" CHANDELIER S971.)


(Mask used: just-released 6" x 6" CHANDELIER S971.)


Above:  a collage in progress.  The pieces of blue masking tape are holding in place cut-outs from the gel plate-printed papers  shown at the top of this post.

Below:  A close-up of one area --


Above:  The finished collage.  Below:  A close-up of one area:


Caution:  "Wet-strength" is somewhat of an exaggeration.  This high-quality tissue tolerates dampness while accepting prints via a gel plate and/or a sponge brayer loaded with heavy-body acrylic paint.  But it needs to be treated with TLC when being added to a collage.  What works best is to first brush the adhesive (such as acrylic matte medium gel) onto the substrate, then to gently place the tissue down onto the damp adhesive, letting it wrinkle if you like, or smoothing it with your fingertips. And -- once it's down, it's down.   

Thank you for checking out my blog today! To scroll thru the pages of my masks and stencils at StencilGirlProducts.com, please start here.


Friday, October 6, 2023

Try Combinations!

Again today, I saw a familiar question floating around in online artists' groups.

The question asks whether or not to spend extra dollars for top-quality paintbrushes and high-quality acrylic paints.... especially since cheaper alternatives flaunt themselves.

Years ago I thought a big variety of brushes was necessary.  And it's true that a few different styles and sizes are a must. But with practice I learned that some brushes can serve multiple uses, depending on how they're held, how heavily they're loaded with paint, etc.  Experience has also convinced me that good-quality brushes give results I'm much more apt to like.  So I've invested in expensive brushes. Some of mine are over 40 years old!  They last, if treated with TLC.  Be kind to your brushes and they will be kind to you!

Long ago I drew a personal line banning all cheap acrylic paints.  What few were on hand, I donated away -- with a touch of guilt, because cheap acrylic paint teaches an artist bad painting habits ... habits and practices that will hinder, rather than help, when the day comes that expensive paints become an option.  

It works somewhat the same way as giving a young child a coloring book filled with lined-out shapes -- drawn by someone else! -- and saying, "Color inside the lines!"  This is like telling the child to trust somebody else's idea of what art "should look like."  Sadly, I've met people have grown to adulthood weighted down under this notion -- so now, they want to learn how to do everything "just right." But in reality, art-making yearns to be fueled by an urge to make visible feelings that can't be fitted into vocal expression.   Starting in that first wonderful and dazzling moment of existence, everyone has unique creativity, wrapped up in inherent human dignity.   

Like a youngster being told to "color inside the lines," a beginning painter can become hobbled by using cheap acrylic paints. 

I encourage considering financial investment in each of the three primary colors as well as titanium white and a jar of acrylic medium, either matte or gloss; either liquid or gel. 

Besides building a solid foundation of painting habits and skills,  purchase of top-quality acrylics can prove less expensive in the long run -- because the high pigment load of quality acrylic paint enables it to stretch farther, especially when mixed with one of the acrylic media, either clear (gloss medium) or somewhat cloudy (matte medium.)

Other perks?

Mixing a palette within a tight framework of only primary colors teaches not only valuable mixing skills, but also provides customized colors that will not exactly match anyone else's:  If you mix your yellow with your red, your resulting orange will not be exactly like the orange of someone else who bought orange paint and used it straight from the tube. 

Here's a quick dip into the topic of cool reds versus hot reds, cool yellows versus warm yellows and cool blues or greens versus warm blues or greens.

As the budget allows, it's a worthwhile investment to buy one cool red, one hot red, one cool yellow, one hot yellow and one cool blue or green and one warm blue or green.  Warms/hots play well together.  Cools, likewise. By this I mean that mixing a cool red with a warm blue or green -- just to give one example -- will most likely give you something unexpected.  "Unexpected" doesn't necessarily mean bad.  It's actually just another step in the learning process (a process that never really ends.)

Where are the brakes to stop this soapbox spiel!?

Here!

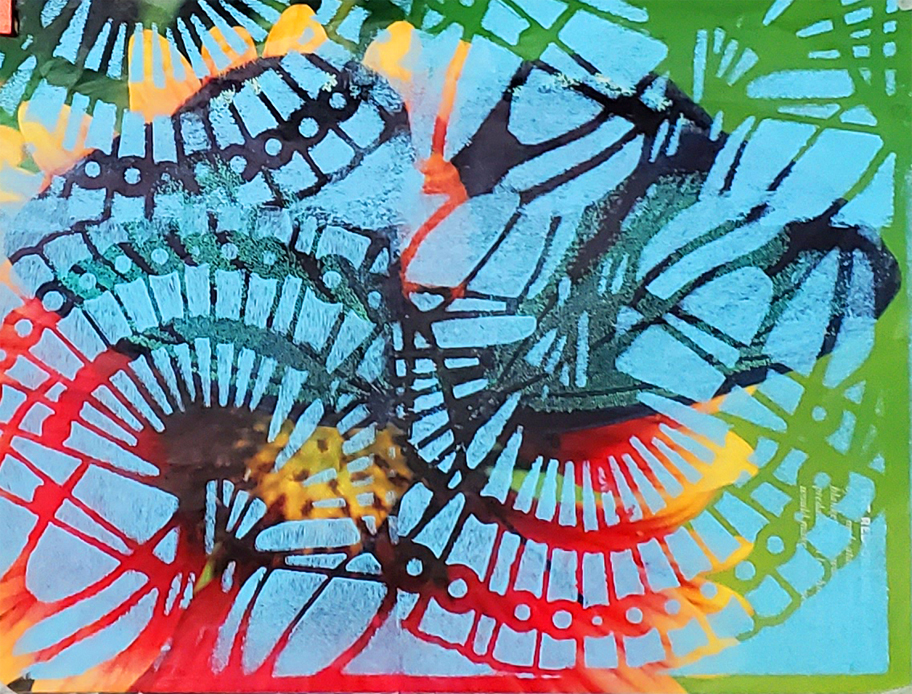
Having used my (expensive) acrylic paints to make enough prints from here to the moon, I find that it's fun to tack prints together, building large sheets of printed paper.  I like to discover what happens when I see a collection as one unit. It can change my perspective on the individual elements!  You may want to try this with your own print collection!


In the upper left of today's final combo, directly above, I've placed a double-print I made on the wet-strength tissue paper described in another post earlier this week.  This tissue will be cut and/or torn to be included in a future collage. Since it's on wet-strength tissue, much of it will turn translucent or transparent after matte medium or gloss medium adheres it to the background support of the collage.  The acrylic paints that I used -- metallic gold and plain purple -- will be nearly the only parts of the printed paper that will remain clearly visible.

Thanks for your interest in my two new 6" x6" masks released September 28 -- Diatom s972 and Chandelier s971!  To scroll thru the pages of my masks and stencils at StencilGirlProducts.com, please start here.


Enjoy making your prints!

Thursday, October 5, 2023

Cherish Color!


Stencils Designed by Cecilia Swatton | StencilGirl Products


 If you get high on color the way I do, here's my latest happy discovery --


Don't be put off by thinking it might be for graphic designers only. Or, consider yourself a graphic designer even if you don't do it for a living!

I fell in love with color all over again, moving through this book by Adams Morioka and Terry Stone.  

Let's all celebrate color!


Above:  My background paper started life as a page from an old picture calendar.  With my new 6" x 6" mask Diatom s972 I made multiple prints using heavy body light blue acrylic paint.  The bright colors of the original print come peeking through the opacity of that paint.


Above: I used both my 6" x 6" masks -- Chandelier s971 and Diatom s972 -- to achieve this "busy" print with fluorescent acrylic paints.  Fluorescent acrylics are color fugitive, so I seldom use them, despite loving their bright hues.


Above:  My background paper started life as a magazine cover showing micro-lifeforms.  Since my new 6" x 6" mask Diatom s972 is itself based on a micro-lifeform, there was no question I would put the two together!  However, I purposely did a color alteration in Photoshop after making a print with Diatom s972, atop the existing illustration, because altho the original color scheme was beautiful, it wasn't mine.  


Above:  With my new 6" x 6" mask Diatom s972, I explored using complementary and near-complementary colors, since colorwheel opposites and near-opposites make the brilliant best of both color families.


Above:  Okay, I went overboard with color!  But I had fun!  Printed with heavy body acrylic paints and my 6" x 6" mask Chandelier s971.

To scroll thru the pages of my masks and stencils at StencilGirlProducts.com, please start here.