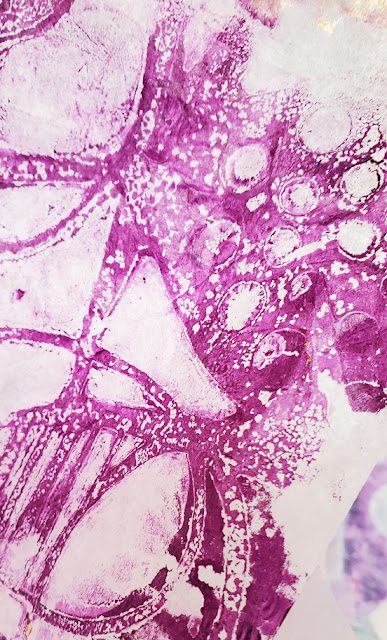
In my October 7 post I detailed the way that I got a subtle bubbly look on wet-strength tissue. For that approach I used a hard rubber brayer to spread color over the gel plate -- but in that case, what I used was a thinned mixture of paint. The thinness of the paint mixture -- combined with the surface of this type of tissue -- resulted in a faint bubbly look that, to my eye, enhanced the prints made with 6" x 6" mask Chandelier s971 and 6" x 6" mask Diatom s972.
Some other time, if I wanted to use a full-strength acrylic paint, I could apply that the paint using a textured roller. But that would result in a "heavy" look, which would be fine for some projects; but not exactly what I was shooting for, with that particular project.
(To get yet a different kind of bubbly look, I could have spread full-strength liquid acrylic paint across the gel plate and, while it was still wet, I could've used kids' bubble-blowing solution and wand, aiming for the wet paint. That would lay soap bubbles down into the paint. But if I were to do this, I would use it for monoprinting; I wouldn't use it with a stencil or a mask because the design of the mask or stencil would be nearly obliterated by the bubble patterns. This is the kind of project I would do just for fun. I wouldn't use the results in a collage on stretched canvas, since I doubt I could fully trust matte or gloss gel or liquid to seal it enough to make it archival.)
But I digress! Below is a close-up shot of the wet-strength tissue showing both "bubbles" and a corner of a print made with Diatom s972.
After making a series of wet-strength tissue prints this way, I allowed the paper to dry.
Then I squiggled random designs across the paper using colorful waterproof markers.
My step was to lay out some solid-color dark purple paper.
I then spread an adhesive over the purple paper and pressed these printed tissues into the wet adhesive. (Matte gel is my favorite adhesive for this kind of project.)
After cutting up this layered/laminated paper -- with a goal of creating interesting shapes -- I adhered pieces to a collage-in-progress on stretched canvas.
My next step was to give them a faint yellow overcoat using liquid acrylic paint thinned with matte medium liquid.
Piece by piece these bits of laminated/layered papers dropped into assorted areas in a collage-in-progress (upon stretched canvas). Because they had received a faint yellow tint, their designs have become quite subtle. Here are some close-ups:
While that collage was still taking shape, I veered off onto a tangent, making darker prints using the same gel plate approach....
Next: a shot of a different collage-in-progress. This collage incorporates some of the wet-strength tissue prints shown directly above--
The collage-in-progress above also incorporated a print made on wet-strength tissue, but this print was made directly onto the paper with a paint-loaded sponge brayer; no gel plate involved, therefore, the result is "heavier" to my eye, and contains no "bubbly look."
For me, it's not a completely new -- yet still, somewhat fairly new -- approach to work on several collages at a time, alternating my attention from one to the next, in an ongoing cycle. Mt goal is to bring "fresh eyes" to each piece as I focus on it. This approach, like everything else, takes practice ... and never reaches perfection, but it's lots of fun to take the visual journeys!
Masks I used in making prints shown today:
9" x 12" Blooming Where Planted L449
6" x 6" Chandelier s971
6" x 6" Diatom s972
6"x6" Champagne s960
Many thanks for checking out my blog today! To scroll thru the pages of my masks and stencils at StencilGirlProducts.com, please start here.


No comments:
Post a Comment