Sunday, May 30, 2021

2 Approaches to Using 9" x 12" Mask CLUSTERED LEAVES

Artist Kathy Waldo, a member of StencilGirl's StencilClub, has used the Club's May 2017 stencil set (designed by Pam Carriker), along with s657 (designed by Wendy Brightbill) as well as my 9" x 12" mask Clustered Leaves L433 --


Clustered Leaves (9" x 12") L433


Here is the eye-catching, bold artwork that Kathy Waldo created using this 3-part StencilGirl collection --


Click/tap on over to this issue of StencilGirl's The Scoop -- you'll find a how-to video by Amy Shawley Paquette.  The video features an artwork of Amy's that stars one of my pet-favorite stencils by Trish McKinney, Bare Branch Thicket.  I'm delighted that Amy also chose one of my 9" x 12" stencils, Clustered Leaves L433, shown at the top of today's post.

The photo below is just one of many that Amy shows in her in-depth write-up for StencilTalk that accompanies her video.


To scroll thru the pages of my StencilGirl stencils and masks, please start here.

Thanks for visiting my blog today!

To see more about Amy, check out the links below --

                                Website: www.amyshawley.com


Announcement:  Because the Feedburner team has released a system update, the email subscription service will be discontinued.  After July 2021, the automated emails to blog subscribers will no longer be supported.

If you want to continue subscribing to this blog by email, please leave a Comment that gives your email address.  Comment options are given at the end of each blog post.  Since I have Comment Moderation, I can read comments but prevent them from being published on the blog.  In other words, your email addresses will not appear here on my blog.  Rather, I will be collecting them and creating my own private list.  

I do not sell anyone's email address, period.  I don't like it when mine gets sold and I try to live by the Golden Rule!  

Wednesday, May 26, 2021

One of Many Approaches to the Resist Technique -- using Stencils

For today's post, I decided to re-visit one of several versions of the resist technique -- a technique nearly as old as dirt; but I hadn't yet tried it with pencils.  

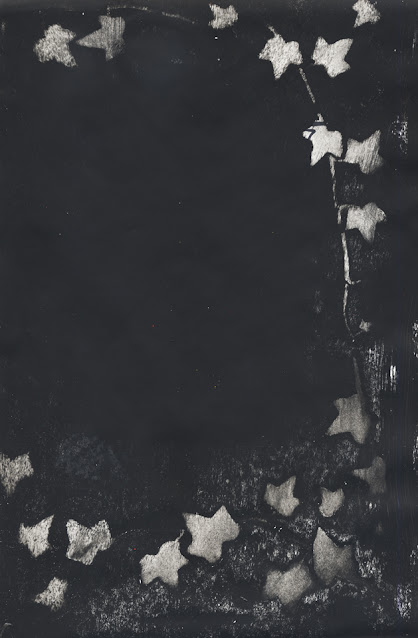
The first photo below shows a white Caran d'ache, which I used to fill in leaf-shaped openings on my 9" x 12" stencil Ivy Frame.  My substrate was a sturdy sheet of white paper. 


Below:  With the same stencil, on a new sheet of sturdy paper, I used a white grease pencil.  These are also called China markers and the brand I happened to buy was Phano.  (I bore down too hard and broke off the tip!)  


After filling in a number of the ivy leaves, I poured some black gesso into a disposable foam plate and got out an old credit card.  I dipped the card into the pool of gesso, then scraped the card across my substrate, as shown below.


Close-ups are below --


Above:  grease pencil as a resist.


Above:  grease pencil as a resist.


Above:  grease pencil as a resist.


Above:  Caran d'ache as a resist.


Above:  Caran d'ache as a resist


Ivy Frame comes in two sizes, the size used today (9" x 12") --


-- and the 6" x 6" Ivy Frame 6 Stencil, which looks like this --


To scroll thru the pages of my StencilGirl stencils and masks, please start here.  Thanks for visiting my blog today!


Saturday, May 22, 2021

3 Artists Tell Us How They Created These Artworks using Stencils

Today's post brings another round-up of artists who've delighted me by using some of my StencilGirl stencils and masks in creating unique artworks, and I thank them for their generous permission to post those photos here.

First up:  Jackie Giammarco.  In in the first art sample below, Jackie has used the Artist Trading Card-sized stencil Hot Air Balloon, one of the 9 stencils and bonus masks that are included in my 9" x 12" ATC Mix-up Swatton # 1.


Above: Artist Jackie Giammarco has had the brilliant idea of using the stencil on pre-printed paper; and adding the blurb is a second stroke of genius.  I'm always happy to see artists like Jackie use my stencils and masks in ways that had never occurred to me when I'd designed them.


Second up: Kathy Waldo, a StencilGirl StencilClub member, has shared with us her method for developing these two tags, charmingly antiqued --


Kathy started with un-gessoed craft paper tags.  She imprinted them using Small Thistles s583 and Payne's Grey acrylic paint.  After letting that dry, the artist used a large, damp brush to apply Deco Arts Transparent White acrylic paint -- purposely leaving some areas unpainted.  Having allowed another period of drying time, Kathy then used the stencil again, with the same gray paint, but moved the stencil a little off the original placement.  Following another drying period, Kathy edged the tag with black (Liqorice) Gelato and smudged that with a damp finger.  It was the random swipes of white paint and the Gelato edging that combined to give these tags their delightful antiqued look.  

Small Thistles s583 (6" x 6") looks like this in its entirety --


Above: This is the 6" x 6" size. Similar, but not identical, thistles are 9" x 12" Thistle and an Artist Trading Card-sized stencil included in ATC Mixup Swatton #2.


To shine the spotlight on today's third artist, I gladly present Suzanne Clover, who has used my stencils in several of her artworks.  My 6" x 6" Heron stencil has been trotted out more than once.  

In developing the glimmer-rich hanging art below,
Suzanne went thru a step-by-step process.  She used Heron to stencil an image on a sheet of Wonder Under. Next, she paired that sheet of Wonder Under with a sheet of the matching size.  Between these two sheets she added a layer of light molding paste on cheesecloth as well as a layer of Angelina fibers.  The two pieces of Wonder Under became the outer layers of a sandwich that she secured together with the help of the metal spiral embellishment.  Her last step was to use painted ribbon, attached with fusible web, to hold the eyelets for the ties.


Suzanne also 
used Heron in developing Calm Waters, below; it's an acrylic painting on cradled board --


Blooming Where Planted, a 9" x 12" mask I've designed for StencilGirl, was what Suzanne Clover used in making this spectacular work of art:


Above:  Moonstone Pebbles by Suzanne Clover


Blooming Where Planted, in its entirety, looks like this:


Blooming Where Planted (9" x 12" mask)


I've enjoyed visiting Suzanne Clover's Pinterest page, and invite everyone else to share in that same treat.

Thanks to all who came to check out my blog today! To scroll thru the pages of my StencilGirl masks and stencils, please start here.

Announcement:  Because the Feedburner team has released a system update, the email subscription service will be discontinued.  After July 2021, the automated emails to blog subscribers will no longer be supported.

If you want to continue subscribing to this blog by email, please leave a Comment that gives your email address.  Comment options are given at the end of each blog post.  Since I have Comment Moderation, I can read comments but prevent them from being published on the blog.  In other words, your email addresses will not appear here on my blog.  Rather, I will be collecting them and creating my own private list.  

I do not sell anyone's email address, period.  I don't like it when mine gets sold and I try to live by the Golden Rule!  

Friday, May 14, 2021

 The synthetic substrate Yupo is a sheet of plastic that comes in tablets as well as a choice of thicknesses per sheet.  

Recently I pulled out a sheet with plans to explore its slippery surface in combination with some of my Abstract Composition Backbones Masks; and in this experiment, I used masks that I'd cut free from their original 6" x 6" frames.

Basically what I did was to, step-by-step, layer after layer, pour wet media onto the Yupo, with my customized masks included with each additional wet layer.  (I allowed the Yupo to dry between layers.)  The wet media:

1.  acrylic paints thinned with a mixture of water and matte medium liquid

2  Brusho dry powdered pigment spritzed with water.  


Layer/Step 1:


Above:  When this first layer had dried, I added linework with a permanent marker.  As the project moved forward, the marker line more or less disappeared.


Layer/Step2:


Layer/Step3:


Above:  This is where I should have stopped.  But I went on to add white outlined areas with a pump-style white acrylic marker/pen....


Layer/Step 4:


What you see directly above is the way the piece looks now.  I regret the white outlining but it's permanent, unless I were to try rubbing it with rubbing alcohol, but this would remove the paint layers underneath.

Having painted myself into a corner, so to speak, I'm considering adding more layers of translucent acrylic paint, filling in each of the marked-off sections with something slightly different from its next-door neighbors.

Abstract Composition Backbones Masks 1, 2, 3 and 4 look like this --


s864


s865


s866


s867


Thanks for stopping by today!  To scroll thru the pages of my StencilGirl masks and stencils, please start here.

Announcement:  Because the Feedburner team has released a system update, the email subscription service will be discontinued.  After July 2021, the automated emails to blog subscribers will no longer be supported.

If you want to continue subscribing to this blog by email, please leave a Comment that gives your email address.  Comment options are given at the end of each blog post.  Since I have Comment Moderation, I can read comments but prevent them from being published on the blog.  In other words, your email addresses will not appear here on my blog.  Rather, I will be collecting them and creating my own private list.  

I do not sell anyone's email address, period.  I don't like it when mine gets sold and I try to live by the Golden Rule!  

Monday, May 10, 2021

Announcement:  Because the Feedburner team has released a system update, the email subscription service will be discontinued.  After July 2021, the automated emails to blog subscribers will no longer be supported.

If you want to continue subscribing to this blog by email, please leave a Comment that gives your email address.  Comment options are given at the end of each blog post.  Since I have Comment Moderation, I can read comments but prevent them from being published on the blog.  In other words, your email addresses will not appear here on my blog.  Rather, I will be collecting them and creating my own private list.  

I do not sell anyone's email address, period.  I don't like it when mine gets sold and I try to live by the Golden Rule!  

 What a joy, seeing the creative ways that other artists use my stencils and masks!  

Today's fabulous artist whom I want to feature is Sue Ann Hum, who's provided a wonderful video to show development of this drop-dead beautiful artwork--


Above: Among several other stencils and masks from StencilGirl, Sue Ann Hum has used my 6" x 6" Ginkgo 6 Stencil in developing this stunning portrait.  She has us seeing the ginkgo leaves almost as if they were flowers!  The way she builds up a swirling design of them has left me in total awe! 


Above:  6" x 6" Ginkgo Stencil 


My original ginkgo stencil, shown above, later morphed into inspiration for a somewhat different design sized to fit Artist Trading Cards:


Above:  ATC Mixup 2 Swatton is a 9" x 12" sheet of sturdy Mylar that holds 9 artist-trading-card-sized stencils as well as a pair of bonus masks.  In the far right middle row is ginkgo imagery of a smaller size than what's offered in the 6" x 6" stencil.


Thanks bunches for stopping by my blog today!  To scroll thru my pages of StencilGirl stencils and masks, please start here.
Thursday, May 6, 2021

Mimosa Stencil s126 (6" x 6") was, among other stencils from StencilGirlProducts, used by artist Heather Thompson Lynn when she created this brightly cheerful double-page spread in her art journal:


Above: This artwork by StencilGirl's StencilClub member Heather Thompson Lynn uses bold colors and flying birds to lead our attention to the word SOAR; this title as well as the whole spread itself speaks of joyous, sky-high freedom. It shows how I feel now that the vaccines are here!


StencilGirl's StencilClub member Luci Sweet is the artist who deserves recognition -- and certainly has mine! -- for having created the beautiful journal below.  I love her monochromatic colors and am delighted she chose to print the cover using my 6" x 6" stencil Pressed Leaves.  Another reason I love this is that she has used newsprint as her original substrate, so that now some of that original surface peeks out at us from beneath this lovely "peach-salmon" painted paper.  This adds a pleasing touch of mystery and depth to the art.


Another artist who's kindly granted me permission to use her work here is Betsy Harding, who used Longwood Florals Stencil L676 with watercolor to create the cleverly hinged work of art directly below.  What a great idea! -- making an extra print and using tape to hinge it to the journal, thus making a fold-out as a pleasant surprise for anyone flipping thru the pages.


Longwood Florals Stencil L676 looks like this in its entirety:


StencilGirl's StencilClub member Susan Kirchman has worked in encaustics to delight the viewer with this rich and mysterious artwork-- 


Above:  Here Susan has incorporated a lot of imagery yet managed to avoid a cluttered, too-busy final artwork, by including areas where the viewer's eye can rest.  She's used several stencils from StencilGirlProducts.  In the middle of the top third of this artwork, she has subtly used my 9" x 12" Longwood Florals Mask L675, which looks like this:


Want more Susan Kirchman?  Susan's IG page:

https://www.instagram.com/kirchman_gallery/

Susan's Facebook page: https://www.facebook.com/susan.kirchman


Many thanks to everyone stopping by my blog today, and to the artists whose works adorn today's post!  To scroll thru the pages of my masks and stencils at StencilGirlProducts, please start here.

Sunday, May 2, 2021

Rainbow Prints

The "rainbow" technique can be done in at least two ways -- with a Gelli Plate, or with a sponge brayer loaded with heavy-body acrylic paint.  Today's post features the latter.


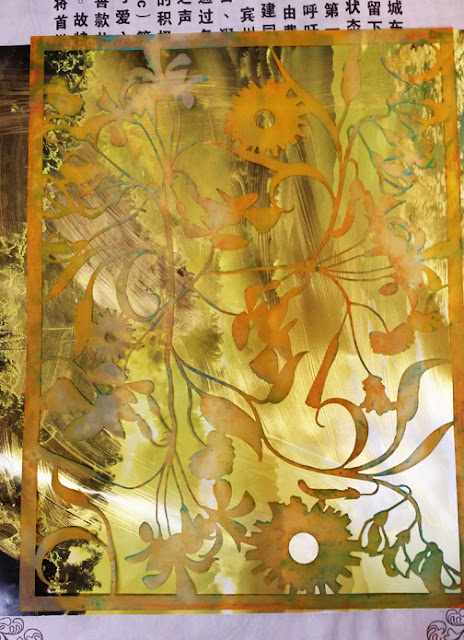
Below:  my mask Garden Montage (9" x 12") laid over a metallic gold substrate.


Below:  a sponge brayer ready for me to load it with heavy-body acrylic paint in two opaque, side-by-side colors....


Abiove:  The paint has been placed onto palette paper.


Next:  I'm loading the brayer with both colors  --


-- and I followed this, using one hand to hold down the mask and the gold substrate, to roll on a layer of paint, top to bottom.....


Having covered the left edge with this two-color application, I flipped the brayer over to start the next downward roll of paint.  Flipping means that the blue strip will be widened and a new white strip will be laid down.


Below:  the paint application looked like this when finished.


Below, the mask has been lifted so that the gold metallic paper shows thru beneath the stripes of paint.


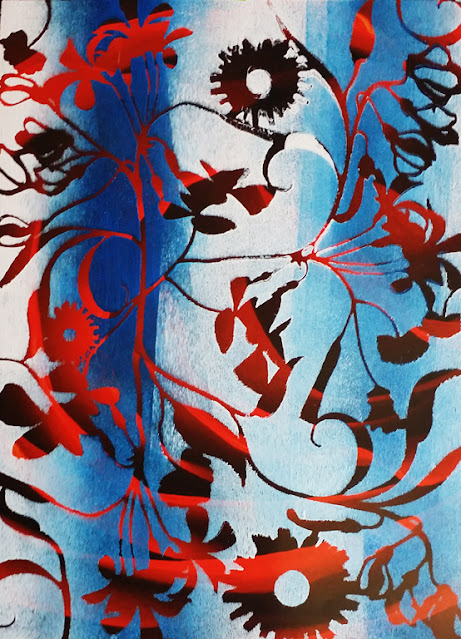
All of these "rainbow" prints below are simple bi-colors.  But a rainbow print can be made using at least 3 colors.  Try it!


Above:  Created with 6" x 6" Trivet B stencil.


Above:  Printed with Garden Montage.


Above:  Created with 9" x 12" Longwood Florals Stencil and Garden Montage.


Above:  Created with Garden Montage 


Thanks for visiting here today!

To scroll thru the pages of my StencilGirl stencils and masks, please start here.