
My friend Judi Kauffman ran a paint-loaded brayer across a sheet of copier paper and voila! -- she had a starting point for a new stenciled card. Those base-coat spatters and smears were to remain visible, since Judi used black paint sparingly when she added the top paint layer using my 6" x 6" mask Silhouette of a Wildflower Bouquet s236.
 |
| Above: A narrow black border and a stamped message of encouragement complete the face of this square fold-over greeting card. (The stamp was designed by Judi herself for Red Castle, Inc.; it's a vintage-font stamp sporting words that Judi wholeheartedly embraces, tho she hasn't yet tried hang gliding or snorkeling! She's going to start snorkeling and hang gliding as soon as I do! LOL) |
The above print is lovely in its subtlety.
But not every print works out as well -- so Judi has a way of dealing with "duds."
Let's see what she does, just in case (cough) any of us should ever make any duds!
Judi's duds get cut down to postcard size. Next she goes into action with her Sakura Gelly Roll #10 pen, favoring that pen for its generously thick lines along with its ability to make perfect dots.

Above: Judi again used my 6" x 6" mask Silhouette of a Wildflower Bouquet s236. Her so less-than-perfect prints became unique beauties in their own right.
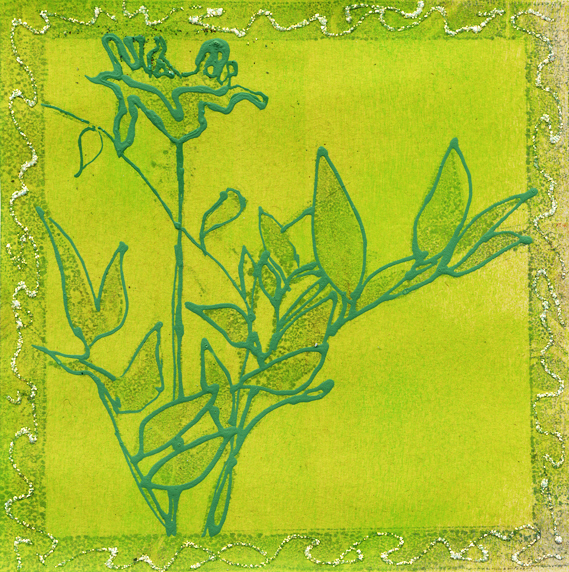
I won't claim to have followed flawlessly in Judi's footsteps, but I too have decorated a dud here and there. Oddly enough, the card of mine below was printed using the same stencil.
When I pulled the green-gold print off my gel plate, I saw that the print of the flower and foliage was too faint to stand out from its background. So I outlined the shapes using a 3-dimensonal fabric paint.
Thanks for stopping here today! To scroll thru my stencils and masks at StencilGirlProducts, please start here.
Me too! But no effort is wasted because we learn from everything. :-)
ReplyDelete