Wednesday, October 26, 2022

SPRIGS -- Two Sizes, 2 Ways

A design I call "sprigs" emerges today from stencil storage -- in two sizes, for two projects. First, the quick one...


Above:  Two papers multi-printed with one of the 9 stencils (and 2 bonus basks) that are included in 9" x 12" ATC Mixup Swatton # 2Both papers are now giftwrap. The red and gray one shimmers with a light topcoat of translucent red metallic paint.  The green and gray paper was a page from an old picture calendar.  The original photo contained a white path that now adds a spark of detail to the finished giftwrap.

Today's second project follows a sequence of steps; it's my take on a technique that I learned from MaryBeth Shaw at StencilGirlProducts.com. 

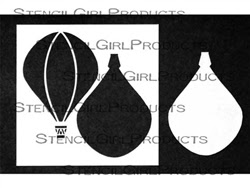
Step 1:  On sturdy black paper, I used a sponge roller to apply gray acrylic paint over two masks, one that comes included in Hot Air Balloon Stencil and Mask s547 and one that comes included in Hot Air Balloon Balloon and Mask Mini m185.


Having lifted off the two masks, I now had two silhouettes, shown above (step 2.)

The photo below shows step 3, when  I continued using Hot Air Balloon Stencil and Mask s547 and Hot Air Balloon Balloon and Mask Mini m185 -- but this time, I switched from the two masks to start using the stencils.  I used green masking tape to secure the larger stencil atop the larger of the two silhouettes. I made sure to align this stencil exactly with the silhouette.


Next, I used a less tacky masking tape (yellow) to cover part of the stencil so that paint would touch only the larger balloon on the left.  For this, step 4, I again used a sponge brayer, this time loaded with heavy body pink acrylic paint.....


Step 4, below, is a close up showing the stencil now covered with pink paint.  Above that, the bottom edge of 6" x 6" Sprigs s523 is visible.


A close up of step 5.


Above:  Having placed Sprigs s523 atop the larger balloon, I used a different sponge prayer to add a layer of white acrylic paint.  I was careful to keep Sprigs s523 pressed firmly down, to ensure good overall coverage with the opaque white paint. Extra firm pressure is needed when using one stencil or mask atop another.  

Below, in step 6, I've lifted off Sprigs s523, then the yellow masking tape and, third in sequence, the stencil from Hot Air Balloon Stencil and Mask s547.


Below is the last step, showing that I've repeated the same sequence with the smaller of the two balloons.


Moving thru these steps, I learned something new.  It happened right after step 4, when I found myself with too much leftover pink paint already loaded into the sponge of the brayer.  

So I rolled the brayer across another sheet of paper. Look at what happened --


Because the paint-loaded brayer had already been rolled across the balloon stencil, it retained not only the extra paint, but also the imprint of the stencil.  As you can see above, this resulted in an interesting border of partial images of the balloon.

From now on, when I have a sponge brayer still loaded with wet paint, having just run it across a stencil, I'll grab another paper and do this again, to see what new trail of partial images will be created.  Fun!

Featured in today's post:


Above:  9" x 12" sheet of artist trading card-sized stencils and masks ATC Mixup Swatton # 2.


Thanks for stopping here today!  To scroll thru the pages of my stencils and masks at StencilGirlProducts.com, please start here.

Saturday, October 22, 2022

Mask s865 Stars in a New Post

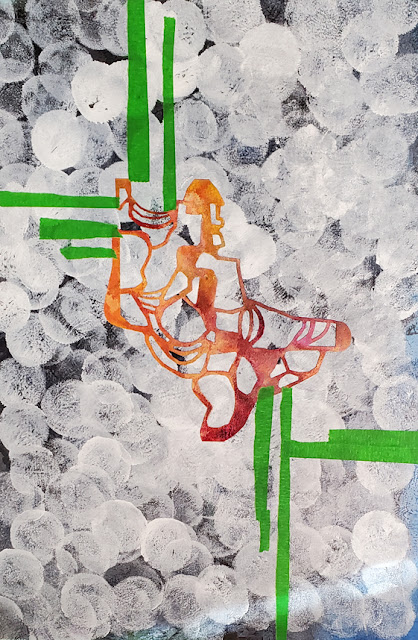
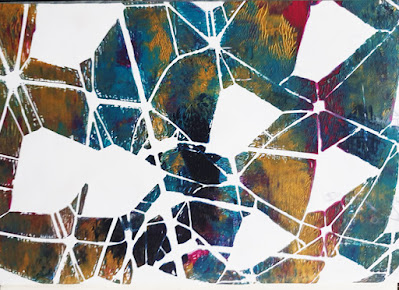
Abstract Composition Backbones Mask 2 s865 arrives in mailboxes measuring 6" x 6" ... but for today's post (and most of my other posts that focus on any mask in this set of 4 ) the mask has been scissor-customized; I've removed the square outside border.


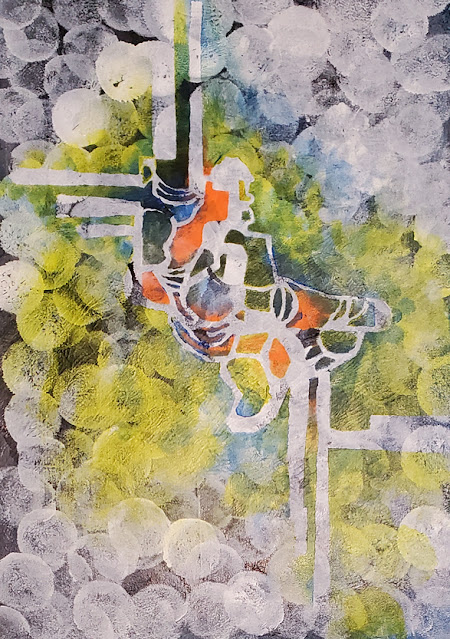
Above: This was my original placement of the (orange-pink paint-stained) mask, on a background that had been blue, but was now mostly white.  (The circular patterning came from the type of applicator I used, a sponge with a bulb shape at one end.)  This original placement proved to be temporary.  I decided to switch to a vertical composition, shown below:


Having switched to a vertical composition, as shown above, I've torn green masking take into strips with irregular edges and used these strips to add length and width to the design I have in mind.  The mask will be the "heart" of the finished artwork, but it will benefit from the taped patterns that will help me build a the type of composition called a cruciform.


Above:  a full-sized view of the painting in progress.


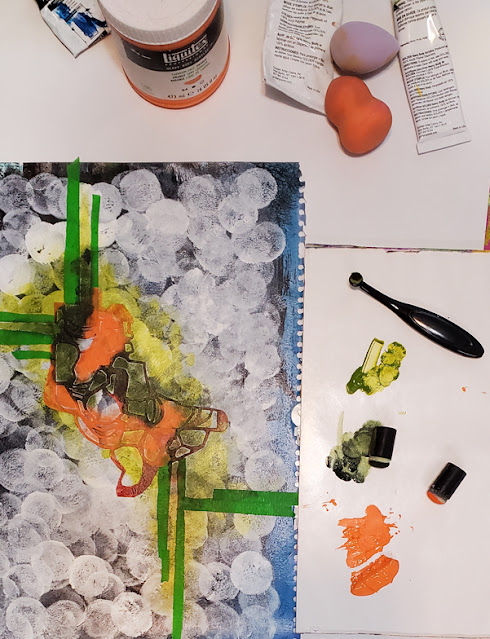
The photo above shows the start I've made, using a brush with a handle, a small sponge-topped paint applicator, and a couple of sponges that are each bulb-shaped at one end.

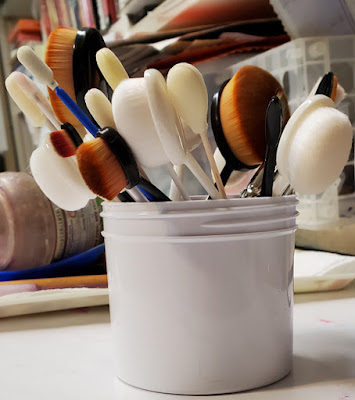
The next shot is a close-up of one of the brushes I used.  These brushes, sold as cosmetic applicators, have soft, ultra-dense bristles, so they make prints very similar to the prints that come when using sponges.  The main difference is that these have long plastic handles, as shown below.


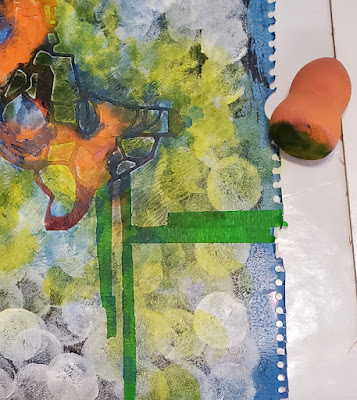
Below:  Another close-up, taken after I had added more of my heavy-body acrylic paints.  The applicator is one of my bulb-ended sponges (which, like the ones with handles, are sold as cosmetic applicators.) At this state of the painting, the masking tape strips are still in place, so as I add paint to the substrate (an old page from a picture calendar) the tapes are keeping paint from covering the areas they cover.


Above: I've lifted off the strips of masking tape.

Below:  A close-up detail of one area.


Above: This photo shows the art with two new developments.  (1)  With a sponge I've added, around the heart of the painting, a filmy layer of zinc white acrylic paint thinned with matte medium gel.  This addition softens the lines left by the masking tape strips without totally removing the lines. When I added this mist-like layer, I used (if memory serves correctly) Sidewalk 3 of Puerto Rico s784, designed by MaryBeth Shaw. (2) I've pulled out a piece of orange "bleeding" tissue paper (shown on the far right) and have started to tear off small bits to place in some areas across the surface.


As shown above, the tissue bits have been sprayed lightly with a spray bottle.  My next step will be to remove the papers themselves, after they have "bled" enough to create scattered bits of bright dark orange.

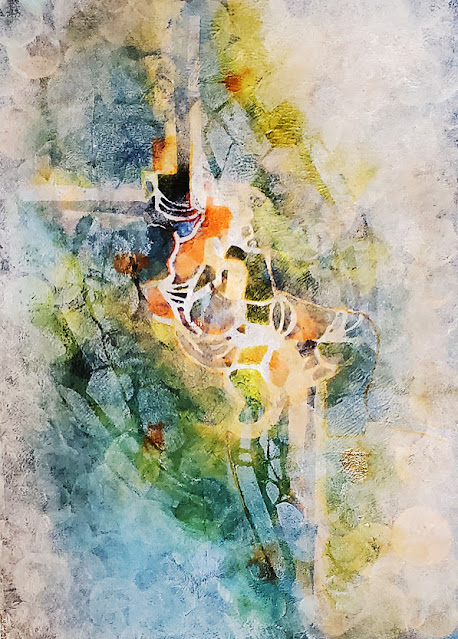
Below is the finished artwork.


Below:  My collection of "cosmetic" brushes with handles (and some narrow-sponge-topped applicators with handles that are normally sold for cleaning guns -- something I will never, never use for anything other than daubing paint thru stencils and masks!)


Thanks for checking out my blog today! To scroll thru my pages of stencils and masks at StencilGirlProducts.com, please start here.

Tuesday, October 18, 2022

Artists using my Stencils and Masks at StencilGirlProducts.com

Artist Tommy Buell McDonell has hit the ball out of the ballpark!  This project took a really long time, but Tommy had patience!  

First she made a print using my 9" x 12" Vases L144Next, on a variety of her collage papers, she traced the shapes that are included in my 9" x 12" Vases L144 ... then she cut out each of those shapes and adhered them to that original print, matching each shape as she went.  Wow!


Notice how Tommy took advantage of the contrast between opposites on the color wheel*** -- blue and a subtly tinted yellow that faintly leans toward orange.  And just look at the variety of collage papers that Tommy used for cutting out her traced shapes!  I've done this kind of work myself so I know it's a labor of love.  

Another artist to highlight in today's post:  My longtime friend Cindy Powell, who several years ago sent me this happy-faced birthday card.  Its image was cut from a larger print made using my 9" x 12" Mimosa Stencil L141.....


Notice that, like Tommy, Cindy took advantage of near-opposite hues on the color wheel, green and red (with a touch of yellow, just for fun!)  Also like Tommy, Cindy heightened contrast by marrying a bright, deep reddish background with a muted green that's much lighter in value than its background.

The value of contrast is showcased in these two artworks.

Moving the spotlight in another direction, let's treat ourselves by looking at the deep rich tones celebrated in the artwork of Netherlands artist Sylvia Lokhoff de Bruijn. The two examples below show two collections of Sylvia's art created with several stencils and masks from StencilGirlProducts.com.


Above:  Along with several other stencils and masks from StencilGirlProducts.com, Sylvia has used my 9" x 12" Longwood Florals Stencil L676 in the upper left and the upper right. In those two art samples, notice the delicious contrast between matte acrylic paint and gold reflective acrylic paint.  This is most prominent in the print in the upper right.  Here Sylvia shows the power of bling!


Above:  Along with several other stencils and masks from StencilGirlProducts.com, Sylvia has used my 9" x 12" Garden Montage L652 in printing the middle top art sample and the bright orange-red-mixed print at the upper right.  Normally in my blog posts, I include links to all of the other StencilGirl designers' stencils and masks.  Now recovering from surgery, my time at the PC is limited, so I encourage readers to go to StencilGirlProducts.com to search out these other stencils and masks that Sylvia has used here.  I promise it your time will be well spent!


Above:  Another Netherlands artist, Claudia Holland, has contrasted white with dark hues, a rich delightful merging of yellow-orange, purple and blue with a "spice color" -- red.  She's used my 9" x 12" Prayer Flags L371.

Closing out today's post is this wonderful artwork by artist Karen Hale.  Because I'm among the many fans who have lovingly followed Karen's art, year after year, I'm beyond thrilled that in this piece Karen chose to use my 6" x 6" Pavilion Shadows s464 Notice how Karen has subtly created areas of special interest by applying parts of Pavilion Shadows s464 in the upper left, the lower central and the lowest right.  This is a classic example of leading the viewer's eye thru a painting.  In our culture we're used to reading top to bottom, left to right, so our attention is drawn automatically to the upper left, to start our happy visual journey thru Karen's painting.


*** To see an example of a color wheel, check out The Color Wheel Company.

Thanks for visiting my blog today!  To scroll thru the pages of my stencils and masks at StencilGirlProducts.com, please start here.

Friday, October 14, 2022

Early Start for Making Christmas Decorations


The Christmas card cover shown above was a challenge to photograph because of its foil base, which reflected everything in sight.  (Can you tell I was wearing blue when I shot this?)  


The quick, easy steps I took to make the card follow ....


I chose my (much-used and paint-stained) 9"x12" stencil Boxed Vines and self-adhesive foil sheets as shown above.


Next, I measured off a section of foil to fit the blank greeting card.  I used a stylus for this step, as well as the following steps, but a ballpoint pen would work.


The red circle above spotlights one of the areas where I have used the stylus to draw indented shapes into the foil (which has been placed under the stencil.)  The openings in the stencil were my guide.  Below is a close-up showing a larger version of these outlined shapes. 


Below:  The stencil has been lifted off the foil. 


Below are 2 close-ups showing glitter glue that I used to outline some of the embedded shapes:


The last steps were to cut this section of the foil off from the full sheet, then to peel off the self-adhesive backing and press it to the greeting card blank that's shown at the top of this post.


Thanks for visiting here today!  To scroll thru the pages of my masks and stencils at StencilGirlProducts.com, please start here.

Monday, October 10, 2022

Boldly Go Where No Artist Has Ever ....

 That heading is a little misleading but my spirit moves me in that direction now that I've been participating in online classes with Louise Fletcher and her team.  These sessions have re-ignited energy that had gone nearly dormant in recent years. My art is changing and I love this feeling!  (This is my humble version of going wild!  It started with combining colors and patterns that I never would have, before; from there, it's skipped to a preference for bright, bold colors slamming up against one another!)

Altho today's post is only the tip of my newly emerging "artwork-iceberg," I have to start somewhere.  So, covers of greeting cards developed with collage:


Above:  This looks somewhat like a completed collage so I include it here.  It's printed with heavy-body black acrylic paint using 6" x 6" Palm Fronds Silhouette Small s238The substrate of many bright colors is a page from a clothing catalog.


The last two paintings above have nearly reached their resolutions; they await only final touches of stencil prints.

Stencils and masks used in today's art samples:


9" x 12" Palm Fronds Silhouettes Large L791


6" x 6" Ski Lift Works s463 


9" x 12" Ivy Frame 9 L141


6" x 6" Kaleid s085


6" x 6" Sprigs s523 (known informally as "the angel stencil")


Thank you for visiting my blog today! To scroll thru the pages of my stencils and masks at StencilGirlProducts.com, please start here.