Monday, March 30, 2020

Wet Paint Scraping Technique with Stencils and Assorted Papers

I've surprised myself by looking back over a number of years and finding how often I've used the technique I'm highlighting today.
I call it the scraping technique -- a "wet" version of the dry rubbing technique that's been around forever.  Immediately below is an example of a dry rubbing that I did with an Art Bar crayon and my 9" x 12" mask Trivet A 9.


Instead of dry crayon (or other soft media such as pastel sticks or an Art Bar), today's wet scraping approach calls for acrylic paint fresh out of the tube or jar. 

I've tried this with both liquid acrylics and heavy body.  I think the latter generally work better.   But experimenting is a good idea, because different papers react differently with each type of paint, when used in this technique.
For the results that I like, I use stencils and masks with medium-to-large openings. 

Below are the six masks and stencils -- all by STENCILGIRL(TM)Products -- that I've chosen for today's first round of art samples.
Top row, L to R -- my 6" x 6"mask Trivet B, my 6" x 6" Mimosa and (far right) Curvie Lattice (by Mary Beth Shaw)
Bottom row, L to R -- two copies of my 6" x 6" mask Kaleid  and (far right) Intersections (by Wendy Aikin) 


Above:  I have used masking tape to secure the stencils and masks to my work surface.


My next step, shown above, was to use more masking tape to secure a sheet of Lineco tissue atop the stencils.  Without that, the tissue wouldn't stay in place during the scraping.  


You can click on the photo below to enlarge it and better see these details:  wet acrylic paint sits atop each column of stencils, ready to be scraped downward over the paper. Far left: blue paint; middle:  Titan Buff paint; far right: red paint.  


Above:  Over the tissue, I've spread the tools I could have used for the scraping.  The shower-wall-cleaning "squeegie" did a better job than the Princeton Wedge (altho the Wedge is great for other projects.)  The paint-covered credit card and the white rigid-plastic wedge (from a home supply store) have been used in the past. 


I've learned that different scraping tools work better than others, depending on the type of tissue used.  


Above:  Paint has been scraped down across the stencils; then more paint was added and scraped down in the same way.  I made sure to keep using steady pressure as I ran the scraping tool downward.

Important tip:  If using Lineco tissue paper, remove the paper from the stencils as soon as you have finished the paint-scraping.  If the paint is allowed to dry first, the paper will stick to the stencils and will be more difficult to remove. 

I used both Lineco tissue and dry-wax deli paper for this technique and found that the Lineco tissue will expand and form wrinkles as it is being scraped by the paint-loaded tool.  This does not happen with the deli paper.  However, the deli paper is more resistant to the paint, and needs to be scraped more than once.
After the above paint had dried, I turned the tissue over and repeated the same technique on the other side of the same tissue.  I used different colors of paint on the second side so that, when finished, the paper would be printed on both sides, with non-matching prints.

Two-sided printing on translucent papers makes for more interesting results.

Important note:  Doing both sides of the tissue makes the finished product stronger.  When cutting up the finished paper, make sure to check both sides before making the final cuts.  Sometimes you will like the "top" side of one section and the "bottom" side of another section of the printed paper.
After paint has dried on the second side, the tissue paper is ready to be cut for use in collages, greeting card covers, scrapbooking, art journaling, etc.


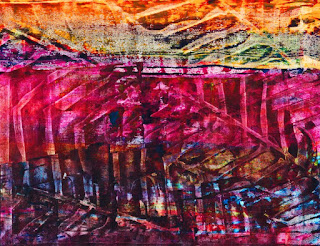
The above photo was taken during another paint-scraping session.  On the far right is the mostly-red substrate (an old Gelli Plate print) as it looked before the scrape.  On the far left is the palette paper holding the off-white acrylic paint that is being spread.  In the top middle is the old motel room key (like a credit card) which I was using to spread the off-white paint across the mostly-red substrate.  My 9"X 12" stencil Mimosa is taped down securely right under the thin but sturdy paper.  Holding the credit card scraper at different angles, while pressing it downward over the substrate, produces slightly different scraping results.

Below:  Yet another sheet of stencil-scraped paper serves as background for the word "Love," which is a freehand cut-out.  Again the stencil used was my 9"X 12" Mimosa.


For the following 2 art samples, I used sheets of cheap paper that had a glossy surface.  This paper was not translucent like the papers mentioned above.

You can on the image below to enlarge it.  The imprint of my 6" x 6" stencil Mimosa 6 runs across the top.  At bottom left, the imprint of Kaleid is visible.


In the photo below,  paint has been scraped across my 6"X 6" stencil  Kaleid -- 


Rounding out today's post is a repeat of a post from about a year ago.  For this, I made a video, here.

I have to smile at adding this segment, because I find I'm now recommending different types of paint and scrapers!  Once again, let me say that experimenting is always a good idea -- try everything!

Supplies for this last segment:

lightweight but sturdy paper (I used Asian rice paper);
a stencil (I used Clustered Leaves);
liquid acrylic paint;
a 12-inch-wide drywall taping knife, sold at home improvement stores, or you can order it here.

This is a quick and easy technique, as the video demonstrates.

Some prints I've made this way --


Clustered Leaves (9"x 12" mask)

Clustered Leaves (9"x 12" mask)


Clustered Leaves (9"x 12" mask) 


 Clustered Leaves (9"x 12" mask)

Clustered Leaves (9"x 12" mask)


Mimosa 9" x 12" Stencil 

 Mimosa 9" x 12" Stencil


Mimosa 9" x 12" Stencil 

Clustered Leaves (9"x 12" mask)

Clustered Leaves  (9"x 12" mask)


Clustered Leaves  (9"x 12" mask)


Clustered Leaves  (9"x 12" mask)

This technique works better with some stencils than with others.  Experimenting is fun!  Art-making is all about adventure!

To scroll thru the pages of my StencilGirl stencils and masks, please start here.

To follow this blog by email, please use that option in the upper right sidebar. 

Friday, March 27, 2020

Flowers Printed with Stencils and Masks


Flowers are starting to bloom!  Outdoors and indoors....

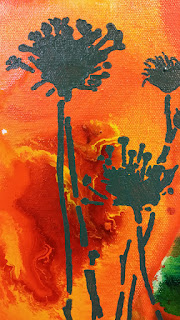
Over a white gesso-coated stretched canvas, I started an art project by spreading a large pool of orange and yellow acrylic paints; next to them, a small pool of green and aqua paints.  

I misted the edges of the pools with water in a spritz-bottle, then did a little tilting to help encourage the spreading paint pools.  

Once the surface was dry, I placed my 9"x1 2" stencil Queen Anne's Lace over it.  With masking tape, I blocked off one of the flowers to keep it from printing.  

My next step was to apply green acrylic paint thru the stencil with stencil sponges

The finished piece is here:


And below are two close-ups--


The stencil Queen Anne's Lace looks like this:


Do I have any more flowers to show today, you ask?  Now that you ask, yes, actually, I do!


Above:  I did the first print with a part of my 3-part 9" x 12" mask Blooming Where Planted.  That mask in its entirety looks like this--


Over that first print, I did a second print using another 9" x 12" stencil of mine, Thistle.  This particular plant -- considered a weed by some! -- is also available in 6" x 6" size, Small Thistles, shown below.


 My thistles series even comes in a mini (ATC) size, as one of the nine stencils that make up my 9" x 12" ATC Mixup Swatton #2 --


All three of these differently-sized thistles are similar enough so that they can be used in combination.  However, they are not identical in size, arrangement, or detail.


Today's last flower image is one that you could call a hybrid.  Its background was printed, in the usual manual way, with my 6" x 6" mask Sassy Spray.  

In contrast to that, the silhouetted flower was first printed on reddish paper with my 6" x 6" stencil Silhouette of a Wildflower Bouquet.  Then I scanned that print into my PC, and used Photoshop to stretch the flower-and-leaves shape.  

I call this a hybrid because the background was created in the usual way and looks exactly like its mask, Sassy Spray.  But the red-and-white image -- altho made from the  6" x 6" stencil Silhouette of a Wildflower Bouquet -- is a vertically stretched version.  Just for the fun of it! 


Thanks for stopping by here today!  To scroll thru all my StencilGirl stencils and masks, please start here.

Tuesday, March 24, 2020

My ATC Stencils and Masks -- Their Original Inspirations


A little over a month ago, my two 9"x 12" sheets of ATC-sized stencils were released. 


 https://www.stencilgirlproducts.com/stencils-cecilia-swatton-s/1832.htm

The majority of the new stencils and masks had been inspired by larger stencils and masks that I'd designed previously.  

Today's post features some art samples created with just a few of those original stencils and masks.


Ski Lift Works (6" x 6") was the mask I put to work in creating this image on the photo of an old calendar page.

Fantasia (9" x 12") was used to print this image on an old sheet of newspaper.

Hot Air Balloon (6" x 6")

This print, made with 6" x 6" Osprey Wings, was printed with alcohol inks on a background previously coated with pearl "metallic" acrylic paint.

Printed with 6" x 6" Ornamental Iron Curls on a substrate that was a blueprint.


Mikki's Flowers Stencil (6" x 6") was used to make this print on an old calendar page photo.

Sprigs (6" x 6") was the mask I used in making the above print.

In earlier posts I've shown some of the fun I've had pairing the original-sized stencils and masks with the newer ATC-sized ones -- which are similar to the originals, while not identical with them.


ATC Mixup Swatton #1 (which includes CatsSki Lift Works and Fantasia, all in the brand-new ATC sizes.) 


ATC Mixup Swatton #2 (which includes ATC-sized Mikki's Flowers (as a mask),Sprigs and Ornamental Iron Curls, all in the brand-new ATC sizes.) .
   
Thanks  for coming to check out my blog today!  To scroll thru all the pages of my StencilGirl stencils and masks, please start here.

Saturday, March 21, 2020

A Post for Fellow Cat Lovers

In loving memory of a gentle and loving spirit ...


You can tell I didn't use my T-square to create this journal page, but even if there are a couple of images with unwelcome tilt, I prize it for its sentimental value.  

Of the 5 silhouette-poses of felines in my 6"X 6" Cats Stencil , 4 are based on photos I had taken, years ago, of my late and dear companion, Kitty...


My daughter and our Kitty 1991


It's been several years now since Kitty made that crossing over that "Rainbow Bridge."  I still get teary when I see images of her.  But I see this pang of sorrow as a tribute to the love that my daughter and I shared with her.  It was deep and lasting.

Below is a collage made from my Cats Stencil (6"x 6") .... First, I enlarged some of the shapes on my PC.  Then I cut out and used those enlargements to trace their shapes on assorted papers (some of which were translucent so as to show whatever lies beneath them.)


Cats Stencil (6"x 6") itself looks like this:


Much more recently, I designed an ATC sheet of stencils that measures 9" x 12" before being cut into ATC sizes.  This is it--


ATC Mixup Swatton # 1

As you can see, this sheet gives you three cat shapes both as stencils and as masks.  The cats are very similar to the ones in Cats Stencil (6"x 6") -- but they are not identical, nor is any of them the same size as what's included in Cats Stencil.

One final art sample for today:


Thank you for stopping by!  To scroll thru the pages of my StencilGirl stencils and masks, please start here.

Wednesday, March 18, 2020

Continuing the Parade of Artists Using Stencils

Artist Jennifer Armstrong has blown me away with her cyanotype (sun print) technique -- she not only uses stencils to make cyanotypes, as I've posted about in the past, but she tops the usual technique by taking two steps beyond the norm:  She adds (1) drops of water and (2) sprinkles of turmeric spice to the light-sensitive photo paper before adding the stencil and exposing it to light.  

Here is a fantastic result she achieved using my 6" x 6" stencil Pressed Leaves --


To see more of Jennifer's way-beyond gorgeous artwork, check her out on Instagram -- @jennitoga  Thank you, Jennifer, for allowing me to show your artwork here today!

Want to know more?  To check out the start-to-finish traditional way of creating sun prints, please check here.   

To scroll thru the pages of my StencilGirl stencils and masks, please start here.

Sunday, March 15, 2020

Part Two -- Parade of Artist-Stars using Stencils and Masks

Launching today's post is the artist Karen P. Johnson, who tickled me in commenting that my 9" x 12" mask Prayer Flags is an art-tool that "covers a multitude of sins!"  Karen used this stencil in creating the two-page art journal spread below.  Be sure to click on this image to better see its details -- and to better enjoy the rich color blends that Karen has achieved!  (She makes it look easy!)  


Karen created another delicious color-blend in developing this art --


-- and once more, I encourage clicking on this image to enlarge it and better see details.  Here Karen used my 6" x 6" Palm Fronds Silhouette Small in addition to other stencils and masks available at StencilGirlProducts.com.  Karen's artworks were done in her 11 3/4" x 17 3/4" moleskin art journal.  (Would I ever love to get my hands on that!)  

Notice how Karen has made her colors almost literally shine!

Moving happily onward...

Professional photographer Kim Ross doubles an artist; it was she who made the indigo-and-white print in the lower right of the photo below.  The photo, taken by a fellow member of StencilGirl's StencilClub, Teri O'Neill, shows Kim Ross' gift to Terri as part of the 2019 StencilGirl StencilClub Secret Santa exchange.  My 9" x 12" mask Garden Montage is the art-tool Kim used in making this print:     


Garden Montage was also the mask of choice used by star-artist Lisa Dobry when she created the art journal cover highlighted in the next three photos -- 


This is Lisa Dobry's Gelli Plate print in its original form.  Notice the overlay-prints that create a rich depth!  Lisa used 2 acrylic Golden brand paints, Sepia and Burnt Sienna. 

Below are Lisa's two photos of the outside of the finished journal:

  
The front of Lisa's journal.  Notice the sari ribbon that Lisa used as the icing on a wonderful cake!


The back of Lisa's journal.

To follow Lisa Dobry's art-making adventures, please check here.

Nancy Curry Sanderson, another of my all-time favorite artists and art teachers, has created the fantastic imagery below.  I'm flattered that in doing so, Nancy started this masterpiece by using my 6" x 6" stencil Dance of the Courting Cranes.


Above:  Nancy created a limited number of matted prints featuring this gorgeous artwork of hers.


At this address, under NANCY CURRY ART, you can find the process Nancy followed in creating the Dancing Cranes artwork. 

And here, you can watch a short visual festival of artworks by Nancy.  This video is an absolute must-see!

Below is an art journal page crafted by artist Sherie Weiser Eddy, who used my 6" x 6" Silhouette of a Wildflower Bouquet.  Please do click on this image to enlarge it and better see the wonderful details!  Sherie's approach was to create a page of wildly happy colors spattered together at random; then she placed Silhouette of a Wildflower Bouquet atop that riot of colors and used black paint to fill in the empty areas around the design.  I love this image so much that I intend to be a copycat one of these days!  


Today's happy parade of artists ends with a focus on Shel Cee, who used modeling paste in working with my stencil Pressed Leaves (6" x 6") to build a delightful background in this artwork --


-- and you can watch her process here.

Many thanks for coming to see what's happening here on my blog today!  To scroll thru the pages of my StencilGirl stencils and masks, please start here