
Ready to have fun?
Today's post includes both Christmas giftbags and Christmas cards. And I had fun making them!
First up: For background I chose a Christmas-themed page from an out-of-date hymnal; after cutting it out with decorative Fiskars, I watercolored it green.
Atop that, I added stencil-printed paper cut into shapes that, once assembled, form a Christmas tree.

Below: a close-up of the collage .....

Stencils that I used in printing the paper for forming the tree:


For the following two Christmas cards, I cut my Christmas tree and candle shapes from prints made with the same two stencils shown above.
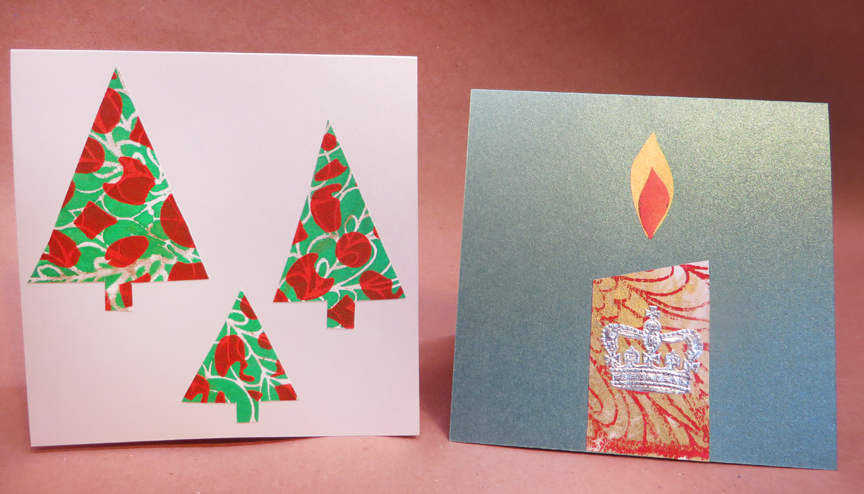
Close-ups:


At one time I bought my cardstock blanks from JAMPaper.com; most of those had a built-in metallic sheen, like the green card above. (Now I have to search farther afield to find foldover cardstock blanks for my greeting card projects.)
The silver crown comes from a collection of similar decorations given to me a long time ago by a dear friend who has since passed away.
Swinging back to giftbags: I made the candle below by cutting paper printed with my 6" x 6" stencil Mimosa 6 s126--
The silver crown comes from a collection of similar decorations given to me a long time ago by a dear friend who has since passed away.
Swinging back to giftbags: I made the candle below by cutting paper printed with my 6" x 6" stencil Mimosa 6 s126--


I buy my blank giftbags here.
Today's giftbags are lined with plain white tissue paper, but to have more fun, I suggest printing your tissue paper using stencils -- but be careful to sparingly use heavy-body acrylic paint (plain or "metallic.") Giftwrap tissue is flimsy, so make your prints as gently as you can! (If you end up with a few torn scraps, save them for your future collage projects!)
Thanks for visiting my blog today! To scroll thru the pages of my stencils and masks at StencilGirlProducts.com, please start here.
No comments:
Post a Comment