Monday, July 10, 2017

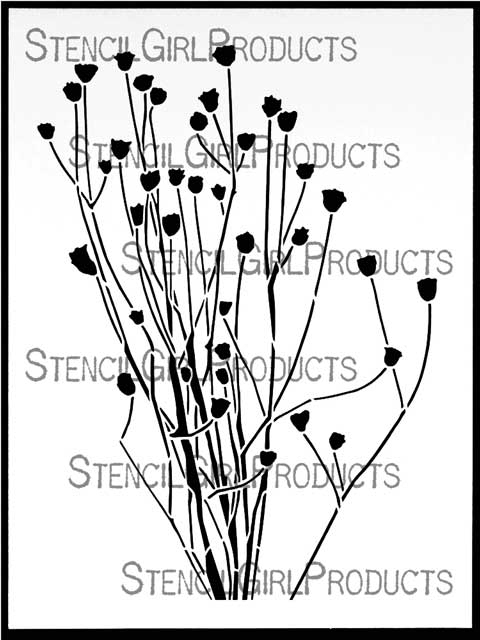
TANGLED PODS and DANGLED PODS 9" x 12" Stencils


I created today's artworks with Tangled Pods stencil (9" x 12") on stretched canvas.  In making most of them, I followed directions given by Pat Dews in her DVD Designing Great Starts with Texture and Form.


Using the same stencil -- and sometimes adding the opposite-image stencil Dangled Pods -- I've created other artworks, including:


The above collage was not made with the same technique as the other pieces shown here today.  It was made with Gelli Plate prints.


The last artwork here, shown directly above, is one of three similar pieces (all made with these two 9" x 12" stencils) that hung for a month in the gallery at my local guild, before being chosen to hang as one of our off-site locations.  In this case, it was Central Jersey Blood Center.   Having been a donor there myself, I know it's nice to have distractions of artwork to enjoy during the process.

Thanks for visiting today!

To see my full line of stencils, just click here.

Saturday, July 8, 2017

More Black, White and Grey Prints with Stencils


Since my online black-and-white class with Jane Davies will be starting soon, I've been making more black-and-white prints.  I'm thinking that these will be torn and/or cut to go into collages for some of her class assignments.  But if it turns out my guess is wrong, I'll brayer or brush over the prints with translucent acrylic paints, to add color to the white areas and interesting tints to the black and grey areas.  Then they'll end up in my own independent collages of merged colors.

To make today's prints, I used the sponge brayer method that's so quick and easy for me.


I had no black papers on hand, so I created some with black gesso.  After those papers dried, I switched from black gesso (pictured above) to Titanium White heavy-body acrylic paint.  

The first image below appears to have a brown tint but is actually dark grey.  The uppermost print was made with my 9" x 12" stencil Blooming Where Planted (which I've cut into three separate sections.)  Beneath this print is an earlier one made with another 9" x 12" stencil, Prayer Flags.  Clicking on the photo to enlarge it, you can better see subtle results from the earlier print.


Above:  another print made with Blooming Where Planted.

Above:  a print made with Fantasia (9" x 12" stencil).  An earlier print made with another stencil lies beneath this top layer.

Above: an experiment -- printing on a sheet of foreign newsprint with my 9" x 12" stencil Vases. 


Above:  This subtle imprint was made with another StencilGirl stencil, 6' x 6" Puddles, by Rae Missigman. 

Thanks for visiting my blog today!  If interested in following it by email, just sign up in the upper right sidebar.

To see all my stencils, please visit here.

Monday, July 3, 2017

A Special Presentation Coming & Today's Black-and-White Stencil Prints


A special technique for art made with the help of stencils will appear July 5, 6 and 7 on my other blog --

http://heartworkbycecilia.blogspot.com

--and will include step-by-step photos alongside directions.

Hope you can make a visit there!  And many thanks to my friends Mary Ann and Julie, whose talented hands will appear in these photos!

Today's post focuses on my own black-and-white prints made for a black-and-white art-making online class with Jane Davies.  

Note:  If you haven't yet bought Jane's new book on abstracts, burn rubber to get it!  The book covers topics valuable for both representational and abstract artists.  I think that Jane writes in a lucid way that's more easily understood than what you may find elsewhere.

This new book of Jane's concentrates on color, but today's prints are black and white because that's what I think we students will need for this particular online workshop.  (Jane offers a wide variety of workshops, both live and online.  Check out her website.)

For my prints today, I started with white paper.  I used a sponge brayer and black gesso to convert some of the papers to black.  Then, with either black gesso or Titanium White acrylic paint, I used the brayer to make these prints with stencils --


Above:  Most of the prints are shown here.  A few more are included in the close-ups below.

Above Left:2 prints with 4" x 4" Palm Fronds Silhouette Mini.  Right: Sassy Spray. 

4" x 4" stencil Palm Fronds Silhouette Mini. 

Above Left:  6" x 6" Palm Fronds Silhouette Small. Right: 4" x 4" Palm Fronds Silhouette Mini. 

6" x 6" Ferns stencil.
6" x 6" stencil Sassy Spray.


6" x 6" stencil Swatton Grid.

6" x 6" stencil Swatton Grid.

 6" x 6" stencil Swatton Grid.

6" x 6" stencil Swatton Links.

I'm guessing that in this workshop of Jane's, we may be creating additional black-and-white patterns, then cutting or tearing them for building collages.  

If it turns out I'm wrong, I'll be brayering over these prints with translucent acrylic paints to fill the white areas with rainbows of color.  The black areas will appear different, too, once they've been coated with translucent color.  Then they will become fodder for collage.

To see all my stencils, please visit here. 

Thanks for stopping by here today!

Sunday, July 2, 2017

To Follow This Blog by Email ...


...please use the Follow by Email option in the right sidebar.  Thanks!  

Friday, June 30, 2017

Artist Gwen Lafleur and NOSEGAY STENCIL


Artist Gwen Lafleur, one of my fellow designers at StencilGirlProducts, has delighted me by choosing -- among many of the StencilGirl choices -- my 9" x 12" Nosegay Stencil in a unique way, which I'm happy to share here.


In the first shot below, Gwen shows her application of gold metallic acrylic paint through selected areas of my stencil; her surface is an elaborate artwork-in-progress showing intricate detail -- which she has created using several StencilGirl stencils. 


Above and below are close-up details showing flowers and stalks made with my stencil.


To see Gwen's full-length step-by-step demo of the technique she used to develop this gorgeous artwork, visit here.

Nosegay Stencil itself looks like this:


You can follow Gwen Lafleur here ... and you can see my full line of stencils here.

Thanks for your visit here today! 

Wednesday, June 28, 2017


They Wuz Framed!


Kids on summer vacation will want something to do on rainy days ... and alternatives to electronic games exist.

Papercraft picture frames, available online from retail outlets like Oriental Trading -- http://www.orientaltrading.com/diy-picture-frames-a2-48_1491.fltr?prodCatId=550188 -- come ready to be decorated.  The type I have on hand is an older style than what is pictured at the above link, with a sturdy cardboard back and a "puffy paper" front, and a built-in easel-prop in the back.  But the process of transformation is the same, regardless of the type of craft frame used.


My first step, shown above,  was to stuff a folded sheet of deli wrap into the frame to protect the inner area while paint is being applied.


Above:  I've used a 1-inch sponge brayer to apply a base boat of acrylic paint.

Looking for a stencil that would yield small areas of color, I auditioned two of my 6"X6" stencils, Marbles 6 (shown on the left, below) and Seaweed 6 (shown on the right, below.)


After choosing Marbles 6 (above left), I got out a color dauber as well as a selection of metallic acrylic paints.


Above:  I've started to apply metallic paint thru the stencil.


Above:  the frame after the first application of metallic acrylic paint.

Above:  A close-up shot during early stages in multiple applications of metallic paint.

Above:  This shot was taken later, as I continued applying paints.


Above:  The final product, after I subdued the metallic paints with another layer of the same acrylic paint used for the base color.  I've added decorative metallic self-adhesive strips and a handmade heart.  This was a birthday gift for a family friend who's an honorary aunt to my grandchildren.  Altho I'm an adult  -- at least in theory! -- this project could easily have been done by children.

Monday, November 2, 2015

"Swatton Flowers Version 1 Stencil"


Somewhere, flowers are still blooming ... and I made this birthday card to celebrate them, using part of one of my 6"x6" flower stencils:

Available here:http://www.stencilgirlproducts.com/product-p/s078.htm

 To section off part of this stencil, I used masking tape, covering the areas I didn't want to print--


Above:  Click on this photo to enlarge it, to better see the area masked off.  The remainder of the stencil extends past the greeting card cover, resting under the lid of the light modeling paste (upper right corner.)

I chose to use white modeling paste, right from the jar, but had I wanted a colored paste, I would have mixed acrylic paint with the light modeling paste before spreading it over the stencil.

The photo below shows the final greeting card, given the final touches of glitter glue and a butterfly cut-out. 


Thanks for visiting!

Thursday, October 22, 2015

New Ways to use Your Stencil-Printed Papers


Looking for new ways to use your beautiful stencil-printed papers? 

See Gwen Lafleur's post here:

 http://www.stencilgirltalk.com/2015/10/gwens-gems-october-2015.html!

Or consider going in a completely different direction, with the quick and easy technique of fan-folding.  Photos below show, step by step, a fan-folding project that used a print made with my stencil Nosegay.


Above: a narrow strip of self-adhesive metallic tape is used to bind the bottom of the fan-fold.

Above:  The taping is finished and the fan is ready to be glued to its green cardstock background.

Above:  heavy gel is applied with a cotton swab (far right) to the back of the fan.

 Above is the finished project -- glued to a cardstock background, the fan is added to the top of a wooden box, spray-painted black in advance.

Thursday, October 8, 2015

TANGLED PODS ... a Stencil to Celebrate the Bauty of the Japanese Pagoda Tree


Tangled Pods remains one of my all-time go-to stencils.  Below are 5 close-ups of a canvas I just completed.  Under the 5 close-ups is a shot of the entire piece.


To create this artwork, I started with the stencil-and-stain technique that I love, relying on my faithful Golden High Flow acrylics.  I used that technique as well as the reduction/subtractive technique to build up layers.  More layers were added with the use of Krink and Shiva pigment crayons.  And still more layers were added when I cut a heavily-stained Tangled Pods stencil into several pieces, then added them (with heavy matte medium) as a next-to-last layer.  My very last step was to come in with acrylic paints to do touch-ups on the collaged stencil pieces. 

Here is one of my earlier posts showing the stencil-and-stain technique step-by-step; at that time, I used liquid watercolors.  Those watercolors work beautifully, but now I rely on Golden High Flow acrylics because, being acrylic, they don't re-hydrate nearly as much as watercolors will. 

The subtractive/reductive technique has been demonstrated here.  And here.  And here.  As these earlier posts show, the basic technique is the same, but there are many ways to introduce variety.  Besides Jenn Mason, another artist who has taught me this technique is my friend Cindy Powell.

My 9"X12" stencil Tangled Pods looks like this before it's been stained and cut into pieces:


The view above is actually a sideways view (of the pods that hang from the Japanese Pagoda Tree) but like all stencils, Tangled Pods can be turned in any direction.