Saturday, May 28, 2022

Karen Hale ... and a Wide Array of SASSY SPRAY S465 Artwork

I've been an enthusiastic fan of artwork by the professional painter Karen Hale for many years.

So imagine my jolt of surprised delight when I ran across this painting of hers!

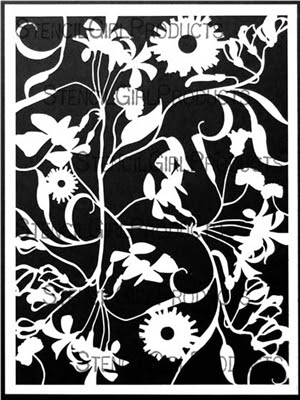
Immediately I recognized that, as a last step in creating this artwork, Karen had applied a thin, white top layer of paint over a portion of my 6" x 6" Sassy Spray s465.

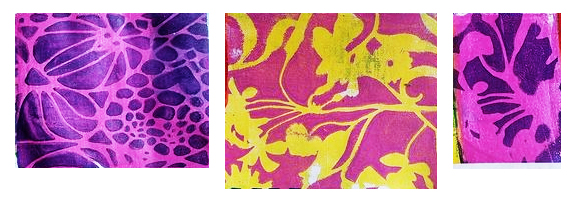
In its entirety, Sassy Spray s465 looks like this --


And altho Karen's artistry casts a powerful shadow on my own humble art samples, today's post includes two other art samples developed with help from this mask.  My artwork on stretched canvas looks like this --


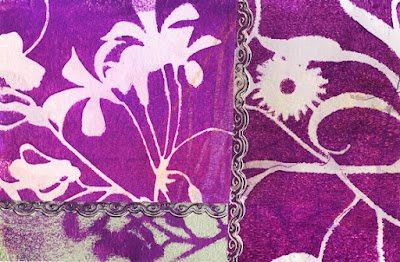
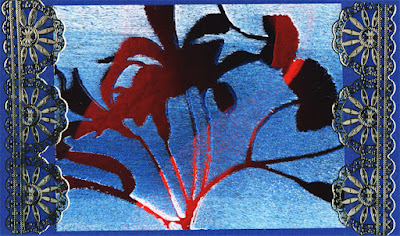
Above:  my Sassy Spray s465 and Trish McKinney's Criss-Cross Ribbon Swirls L557


-- and a duo of close-ups look like this:


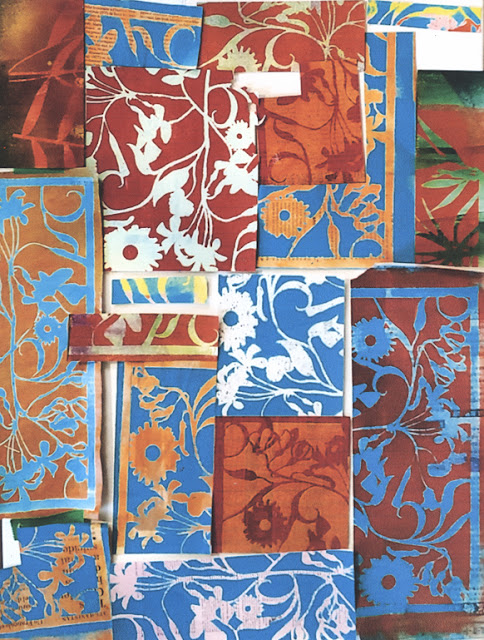
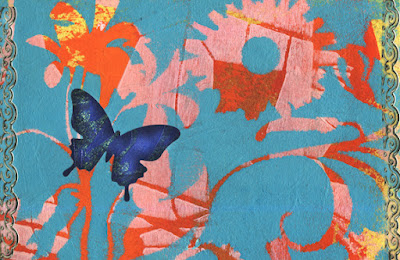
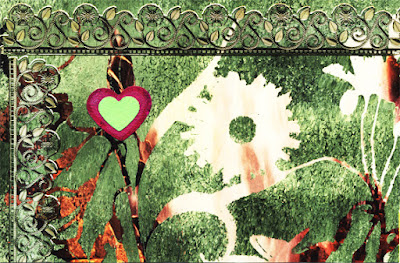
Above:  Sassy Spray s465 was used in the upper left


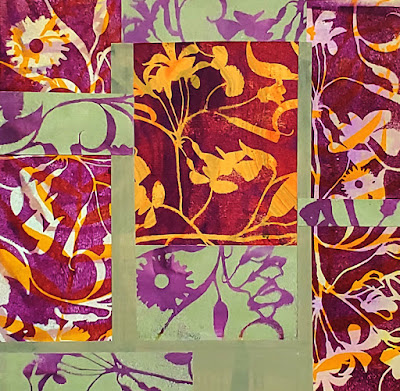
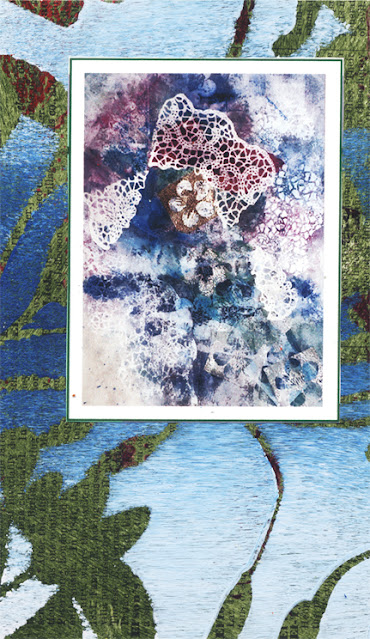
Above:  Sassy Spray s465 was used in the central area and in the upper left, Criss-Cross Ribbon Swirls L557 was used.


As those close-up shots show, I spread modeling paste and crackle past on my stretched canvas as a first step.  After that had dried, I spattered on some Golden High Flow Acrylics and sprayed them with a little water. My last step was to add gold glitter gel (Golden Paints) with a small plastic art spatula.   

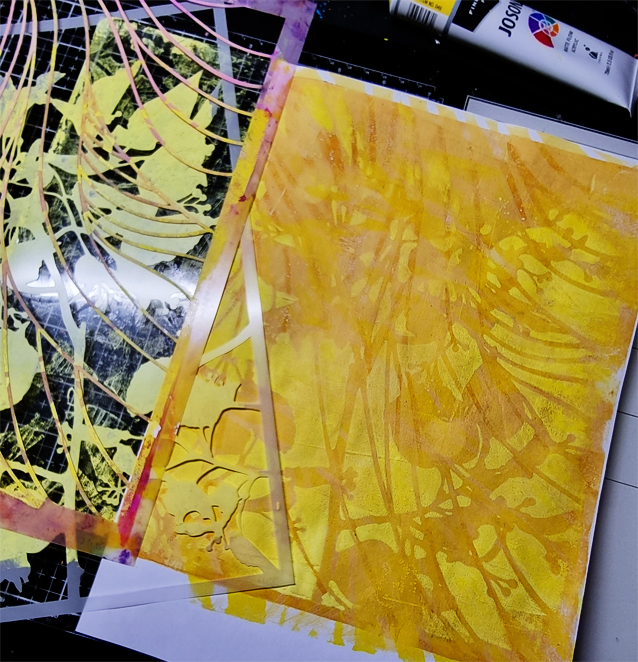
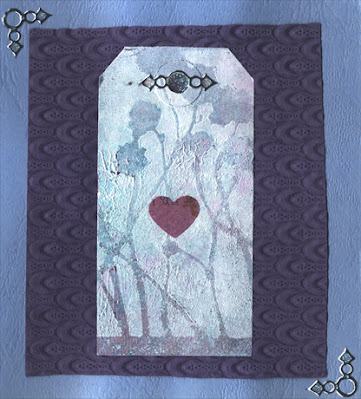
Today's post offers one last print made with 6" x 6" Sassy Spray s465 mask.  In this case, I started with a substrate of an old calendar page ....


... which I covered with a translucent layer of lavender acrylic paint.  After that'd dried, I set the mask into place and, holding it securely with one hand, used a sponge brayer and this mask to add a topcoat of filmy white layer of water-thinned acrylic paint. 

I thank you sincerely for checking out my blog post today!  To scroll thru the pages of my stencils and masks at StencilGirlProducts.com, please start here. 

Tuesday, May 24, 2022

Artist Shel Cee with 3 of my Stencils

I was delighted to see this write-up by artist Shel Cee!  It first appeared in the blog StencilGirl Talk last year.

Shel Cee used three of my stencils and masks in presenting this great idea for art-adventuring--


Winter Berry mask L677 (9" x 12") 

Longwood Florals mask L675 (9" x 12")

Pressed Leaves stencil s277 (6" x 6")


To keep up with Shel Cee, check here.

To scroll thru the pages of my stencils and masks at StencilGirl  Products, please start here.

Many thanks for taking time to stop here at my blog today!

Friday, May 20, 2022

An Idea for Father's Day Cards

 Ready to try something new with your masks?


Both of the paint-on-paper prints above were created using 9" x 12" Prayer Flags L371.

But that was the backgrounds.  How did these 3-dimensional embellishments happen?

First step:  Prayer Flags L371 had, fortunately, become paint-stained blue-and-green during a previous art adventure.  Fortunate, because that tinting meant the mask stayed clearly visible after I covered it with deli paper, waxed side up.  See below....  


Second step:  Working on the waxed side of the deli paper and using 3-dimensional fabric/craft paint -- as you can see below -- I traced some of the lines and geometric shapes that are part of Prayer Flags L371.  I made sure that all my tracing lines were connected to one another, and that all of them were thick and sturdy.  This meant going back over the design in some areas. 


After the 3-dimensional paint had dried, I very carefully pried the design up off the deli paper.  

I then used acrylic matte gel medium to attach the 3-dimensional designs onto the tops of the prints shown at the top of this post.  These two prints became greeting card covers.  Very little gel medium was needed.  I applied it with a cotton swab.

It would be possible to do the same thing with a stencil, but with a stencil, it'd be necessary to draw your own lines across the  "bridges" that hold the stencils' designs together.  A mask works better because all of the connecting lines are there already; no guesswork needed.

Thanks for visiting here today!  To scroll thru the pages of my StencilGirl masks and stencils, please start here.

Monday, May 16, 2022

Fun with Stenciled Papers in Collage

Stencil- and mask-printed papers push the door wide open to many possible applications ... new adventures and explorations.  

One of my favorite applications is in developing collage.  

Two of my recent collages were compiled using (for the most part) papers printed with my 9" x 12" Garden Montage L652.  Both collages were assembled on 12" x 12" stretched canvases.

However!  Before I started on those stretched canvases, I needed to take a good look at what I had to work with.  I'd made such a number of prints with Garden Montage L652 that I'd lost track of everything still on hand.  Those papers had been cut into pieces of various sizes because they were leftovers from earlier projects.  

While scouring my studio to collect these printed scraps, I decided to include a few papers printed with other stencils, as long as they fit into the botanical theme. 

started by spreading these botanical papers across my tabletop: 


Above:  In the upper left, I included part of a red and green print made with 9" x 12" Longwood Florals Mask L675In the upper right sits another partial print, this one made using 6" x 6" Garden at Nemours Mask s658. Those two pieces were auditioned by didn't make it into either of the final collages.


It's my practice to spread the available papers across a flat horizontal surface, but in creating the actual collages, I work vertically on an easel.

Vertical composition is a challenge, so most often use a glue-stick of temporary adhesive to tack papers in place while I'm auditioning them.  Temporary tacking means I can still move papers around as I experiment with their placements in the composition.  Having these temporary try-outs means that some papers will make it into the final collage, while others will be left on the table for another day.


The temporary glue-stick brand that I use now is Scotch, shown above.  (Behind this glue-stick are scraps printed with three 9" x 12" stencils -- on the left side,  Looking Up Through Trees L753; on the lower right side, Tangled Pods L344 ; and in the upper right, Nosegay Stencil L335.)


After paper auditions, I'm ready to make my arrangements permanent with acrylic medium -- either matte or gloss, depending on the project at hand.  

I use extra-heavy-body gel medium when working with thick, stiff papers.  When working with lightweight papers, I use liquid acrylic medium.

Below are my two completed collages compiled mostly of prints from 9" x 12" Garden Montage L652 ....


Above:  This collage uses only prints made with Garden Montage L652, but the pieces on the far left and far right were printed atop earlier prints that had been made with Longwood Florals Mask L675.  This double-print adds complexity that I like.


Above:  This collage, on the lower left, includes a partial print created with 6" x 6" Quilted Flower Garden s237.


Garden Montage L652 in its entirety looks like this....


9" x 12" Garden Montage L652


The other botanical-themed stencils mentioned in today's post are the following ...


Bouquets of thank-you's to you, for checking out my blog today!
To scroll thru the pages of my stencils and masks at StencilGirl Products, please start here.


Thursday, May 12, 2022

 Here's a parade of beautiful stencil-art prints by artist Sylvia Lokhoff de Bruijn !  Most of Sylvia's art is created on a gel plate using a variety of media.


Above:  This lovely gold and yellow combination print was created using 9" x 12" Flowing Ribbon Swirls L556, designed by Trish McKinney, and my 9" x 12" Fire Cherries Mask L879.  Sylvia's stroke of genius was to combine these two designs in a way that brings out the best of both!


Below:  The first two prints below, in warm earth tones, were created with 9" x 12" Mimosa 9 L141....


Above:  The bottom print was developed by using 9" x 12" Palm Fronds Silhouettes L791 in rotation.  After making the gel plate first print, Sylvia turned the stencil 180 degrees and made a second print over the first.  The resulting complexity is compelling!


Above:  Like me, Sylvia has a special love for richy earthy hues.  Here she has used glittery embossing powder, spreading it in an even layer thru part of my 6" x 6" Sassy Spray s465; she followed this by using a heat gun to make the powder puff up into 3-dimensional art.


Above:  Sylvia used 9" x 12" Fire Cherries Mask L879 atop an earlier print, resulting with a nicely layered abstracted combination that hints as mystery.


Above:  Here Sylvia has created a pleasing pattern by repeatedly applying monochromatic yellows thru one of the 9 Artist Trading Card-sized stencils that's included in my 9" x 12" Swatton ATC Mixup # 1 L768.


Above:  Sylvia used her gel plate to create a cloudy sky behind the tree.  Stencil used:  9" x 12" Branching Blossoms Silhouette L284.


Above:  Sylvia's art print, on a yellow background, combines a green layer printed with 9" x 12" Longwood Florals Stencil L676 and another layer (dark red) printed using 6" x 6" Swatton Flowers Version 1 s078.


Today's parade of colorful prints ends with Sylvia's snippet-prints  below --


Above far left:  printed with portions of  9" x 12" Blooming Where Planted L449. Middle and far right:  9" x 12"  Garden Montage L652.


My 9" x 12" Blooming Where Planted L449, in its entirety, looks like this:


Other stencils and masks used:


9" x 12" Garden Montage L652 ....


9" x 12" Swatton ATC Mixup # 1 L768....


9" x 12" Mimosa 9 L141 --


6" x 6" Sassy Spray s465 ....


6" x 6" Swatton Flowers Version 1 s078:


9" x 12" Palm Fronds Silhouettes L791 --


Palm Fronds Silhouettes L791 is third in a series; the other two are:


Palm Fronds Silhouette Mini (4" x 4")


Palm Fronds Silhouettes Small (6" x 6")


Thank you for stopping here at my blog today! -- and thank you to Sylvia Lokhoff de Bruijn for sharing her art prints with us!  To scroll thru the pages of my stencils and masks at StencilGirlProducts.com, please start here.

Wednesday, May 4, 2022

You Still Have a Few More Days....

Multiple art projects, over time, leave me with an overabundance of stencil-printed papers, and many of them are leftover bits and pieces.  

When I sort thru the papers, they wake up my brain and ignite ideas. 

I suggest you challenge yourself, right along with me, asking  "What happens if I pair this with that?"  Outside-the-box thinking is fun!

That in mind, I offer today more ideas for Mother's Day greeting cards.  (Keep in mind you can send, or hand over, cards to your daughters, daughters-in-law and stepdaughters if you have them.  Each of these cards pairs nicely with a bouquet of fresh flowers!)


Above:  I used my 6" x 6" Mikki's Flowers Mask s605 with red acrylic paint over a whitewashed page from an old encyclopedia that had a floral image of its own.  The foil trims here and on all cards below are from Paper Wishes.


Above:  a collage card cover that brings together 3 partial prints, all created with my 9" x 12" Garden Montage L652.


Above:  This tag was transformed from plain to pleasing with textured acrylic paint and part of my 6" x 6" Mikki's Flowers Mask s605.


Above:  a card cover that uses a partial print made using my 9" x 12" Garden Montage L652 as the top-layer print.  The bottom layer was created with my 9" x 12" Prayer Flags L371.  To my eye, doing one print over another adds pizzazz without completely removing the3 image of flowers.  The butterfly was made with a hole punch.


All of the following Mother's Day card covers were developed using partial prints made with 
9" x 12" Prayer Flags L371 -- 


Above:  The background print was made using my 9" x 12" Nosegay Stencil L335.


Note:  The insert is a photo of a painting I did years ago. (In a future post I'll show how I incorporated this piece into a larger greeting card cover.)


Note:  The background for this green print was part of a picture calendar page.


Thanks sincerely for coming to see my blog today!  To scroll thru the pages of my stencils and masks at StencilGirl Products, please start here.