Friday, December 30, 2022

A Karen Hale Video!

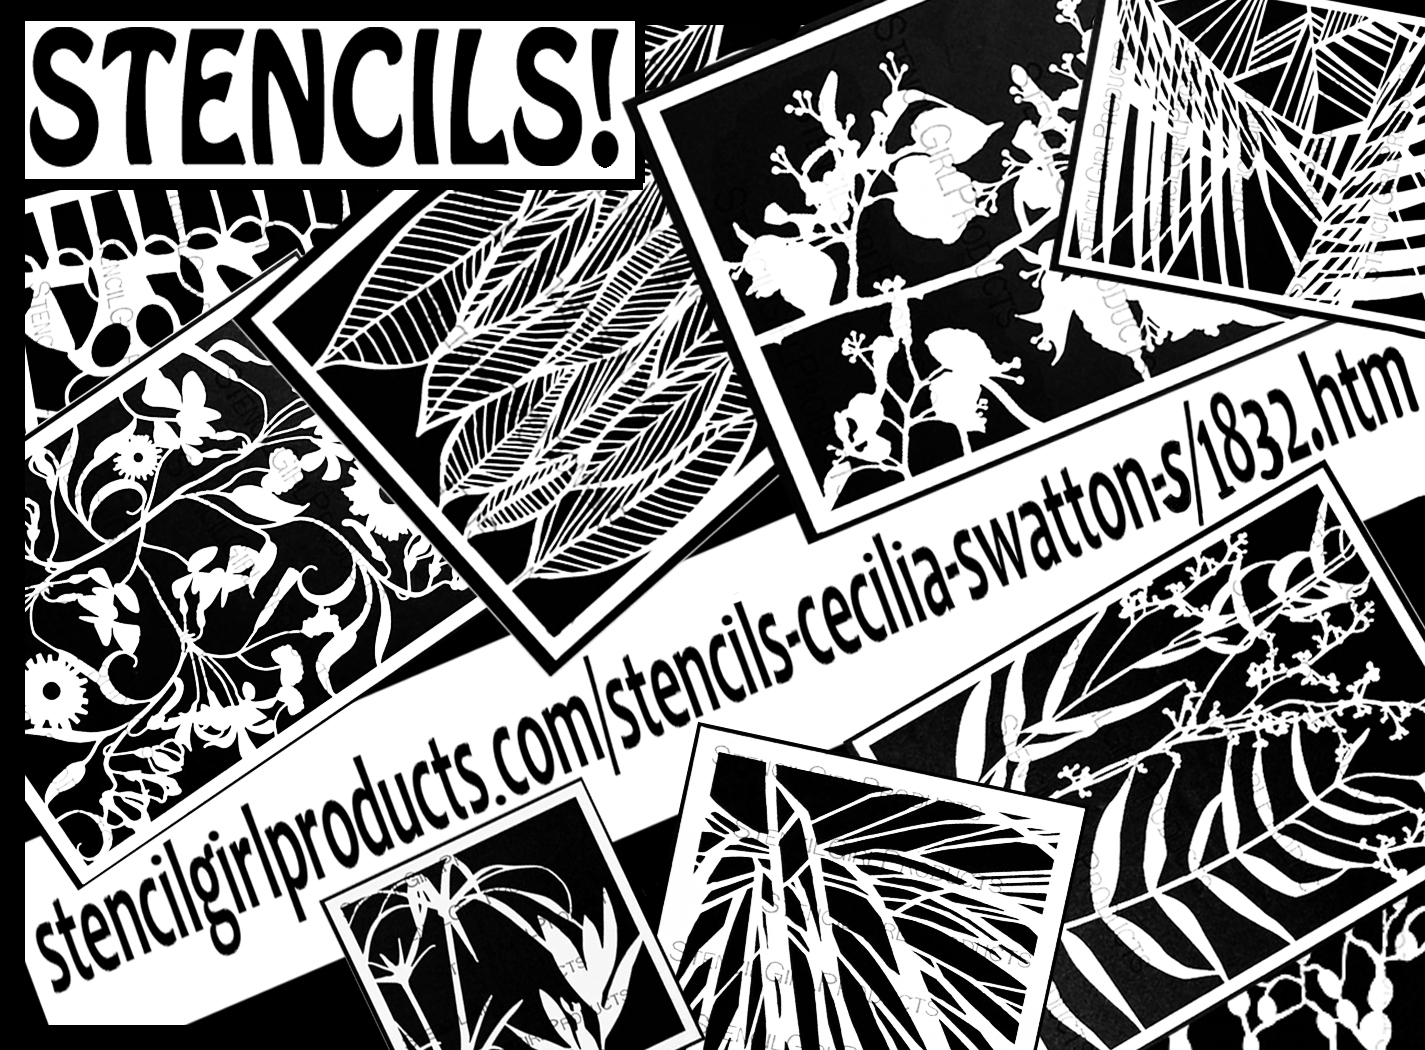
Happy dance!  Karen Hale has once again delighted me by using one of my masks in developing a series of paintings -- 9" x 12" Prayer Flags L371.


9" x 12" Prayer Flags L371


For starters in today's post, here are three of the four in Karen's new series: Remnant of the Past 1, Remnant of the Past 2 and Remnant of the Past 3:


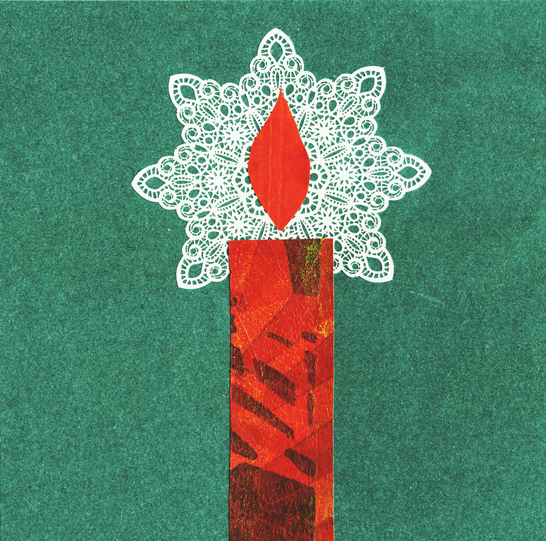
Above:  Karen used the mask in the upper central area , starting at the with a fairly bold print, then moving down thru the central area with a subtle print. I like the "echo effect" that Karen's achieved this way; to my eye, it helps unify the piece.


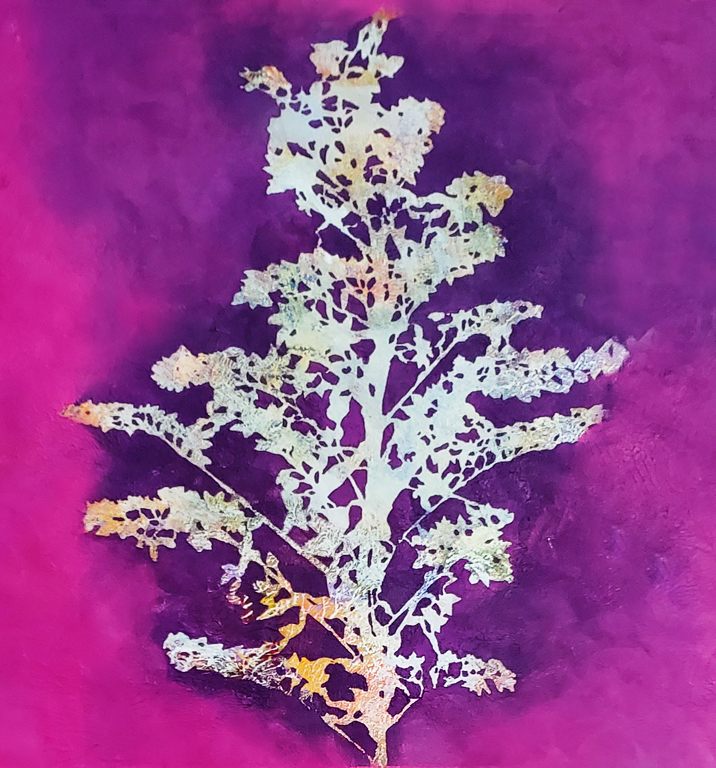
Above:  Karen used the mask in the central area with a subtle print -- and combined it with other intriguing shapes that were achieved in a surprising way. (More info on that, in a minute!)


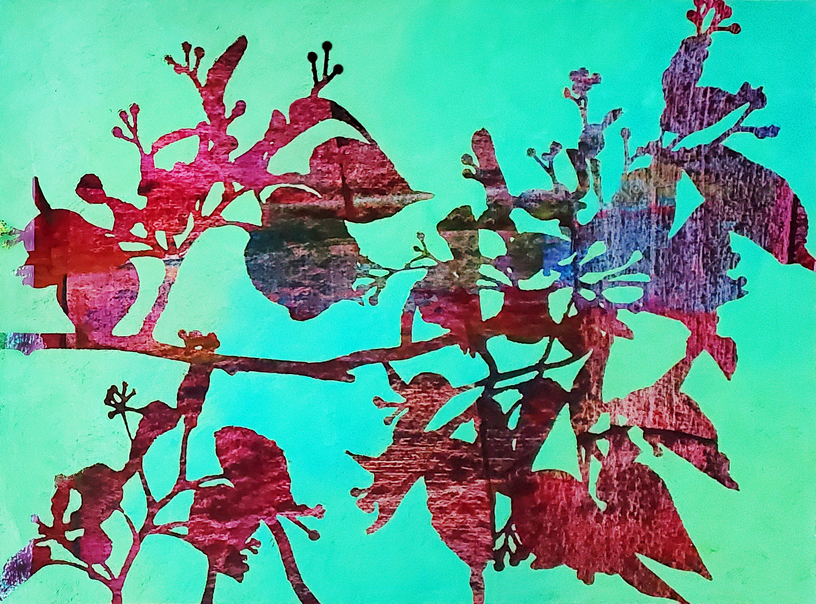
Above:  Here, Karen has used the mask in the most subtle way of all, hinting of its imagery in the central left area, while again combining it with mysterious squares that enrich the overall painting.


Here comes the best part of today's post!  

I'll share a video made by Karen. It's a long video -- well worth every minute.

Karen takes an intuitive approach to developing her abstracts, but years of professional experience fuels her intuition. 

Notice in the video that she starts with a base that represents a version of each of the primary colors:  yellow, blue and red.

Notice also, later in the video, that she uses a T-square to line up the mica tiles

Altho it's not shown in the video, I speculate that as a nearly last step, Karen adds another partial layer of thick, near-white medium and, while it's still wet, presses in part of Prayer Flags L371.  You can see the results by taking another look at the three paintings at the top of this post.  Karen's subtle touch with this mask makes these artworks sing!

Okay!  Here's a video made by Karen to feature part of her painting process.  Notice that, periodically, helpful blurbs appear as the video moves along.

Please note that these paintings of Karen's are available for purchase! Click here --  karenhalepaintings.com

Please let Karen know if you have any questions: karenhale@karenhale.com

Thanks for visiting my blog today! To scroll thru my stencils and masks at StencilGirlProducts.com, please start here.   

Sunday, December 11, 2022

A New Year's Greeting by Judi Kauffman

 Dangled Pods L490 is the 9" x 12" stencil that was picked by my friend Judi Kauffman when she set out to make her 2023  mailings to friends and family.  Instead of sending cards in December, Judi sends calendar cards in early January, wishing the lucky recipients "Happy New Year!"  

This stencil, used with gold metallic paint, is Judi's starting point on this project.

Sturdy black cardstock supports each piece and doubles as a frame slightly thinner than 1/8 inch.  The star feature of each piece is a small calendar from Vippies.com, and in supporting decorative roles are dragonfly brads (available at many online venues; shop around!) 

Judi punched a hanging hole at the top of each piece, making it display-ready for those who want to display it on a wall. Some recipients use a magnet to cover that hole when they put their calendars on their refrigerators.  And because she has a few friends who ask for easel backs, some of her mailings arrive with them.

Feast your eyes:  


Notice the gold flitter surrounding the calendar.


Now for the detailed close-ups:


My sincere thanks to Judi for sending these photos and describing her unique project!  Happy 2023, everyone!

 Dangled Pods L490 (9" x 12") -- one of four in my pods series of stencils and masks -- looks like this....


To scroll thru the pages of my stencils and masks at StencilGirlProducts.com, please start here.

Wednesday, December 7, 2022

A Tom-Tom for Christmas

When I told my daughter my plan to repurpose an old cardboard canister, decorating it to become a tom-tom for my one-year-old grandson, she asked  "What's a tom-tom?"

Some of America's Indigenous People once made simple drums that, when played, created a sound somewhat like a vocalized "tom-tom."


The cardboard canister, ready to be repurposed.


To make art that commands attention, an important guideline is contrast.

And contrast of bright colors especially delights young ones learning about the world around them.

With contrast as my guiding star, I sorted thru a pile of stencil-printed papers in search of bright colors and contrasting designs.  

My chosen papers got cut into strips.  With masking tape I hung the strips all around the rim of the canister.  For contrast, papers dominated by warm colors (yellows and reds) were placed beside papers dominated by cool colors (greens and blues.)


I used heavy-body medium gel to glue the strips into place.  As a final touch, I used punches to cut circles from other stencil-printed papers, and when I added them, I continued to be guided by color-contrast in choosing placement of each circle.


Many thanks for stopping by today!  To scroll thru the pages of my stencils and masks at StencilGirlProducts.com, please start here.

Sunday, December 4, 2022

Sidestep Out!

 Take a sidestep out of the season's hustle and bustle -- for a few minutes of creative fun that's going to rejuvenate you! 

Below is a print I made years ago with light molding paste and my 6" x 6" stencil Heron S175; the background was scrap paper previously used to blot excess paints from other surfaces.


Above:  The heron is barely visible!


Today I got out Golden High Flow Turquoise (Phalto) acrylic paint and a small brush.  I dipped the brush into full-strength paint and swept that along the inner edges of the long-ago-dried molding paste.  While that outlining paint was still wet, I dipped the brush into plain water and used it to tease the color away from the edges and toward the center of the heron.  As the plain water gave the paint permission to flow, the color faded.  This way I added definition to the edges while also reducing the translucency at the center of the heron.  Although I used High Flow acrylics, watercolor would have been my second choice and I would have used it the same way.


Above:  Notice how some of the mottled color of the background remains visible in the center of the image.  To make the image stand out even more, I coated the rest of the background with translucent zinc white acrylic paint.

Thanks for checking out my blog today!  Merry Christmas!  

To scroll thru the pages of my stencils and masks at StencilGirlProducts.com, please start here.

Thursday, December 1, 2022

 Here is where I believe I bought the lacy doily starring in my first Christmas card of the day. However, a quick check has shown that this specific design is no longer available there.  However! Type "paper doilies" into your browser and one click will bring up more sizes, designs and colors than you ever could have envisioned for lacy papers!


L791 Palm Fronds Silhouettes Large is one mask among others that I used with heavy body red acrylic paint in printing a large sheet of paper that later got fed to the scissors.  One remaining scrap peeked up at me from the haphazard pile, begging to become a candle on a Christmas card. So:


The remainder of today's Christmas cards came from thinking outside the box ... using un-Christmassy-looking stencils with a several types of media, including glitter glue for highlights, on dark bronze backgrounds.  If I'd had a do-over, I would have chosen a deep dark royal blue for the backgrounds.


The card above was made with heavy body silver metallic acrylic paint my 6"x 6" stencil Budding Branches s249.


The above Christmas card was made with coarse modeling paste and my 6"x 6" stencil Swaying Grasses s276.


The above card was made with part of my 9" x 12" stencil Queen Anne's Lace L229.


My approach to the card made with a portion of Queen Anne's Lace L229, was to spray acrylic paint thru the stencil openings.  Since this stencil measures 9"x 12", I masked off portions of it before using the spray.

For spraying this particular card, I chose the old-fashioned way of creating my own custom blended colors for spraying.  I use small spray bottles bought at drug stores' traveling supplies section or at art supply stores.  I fill them with a mix of acrylic liquid paint, water and airbrush medium.  The ratio of water to acrylic liquid paint varies, depending on whether I want to end up with a heavy spray or a light one.  The amount of airbrush medium never varies -- it's always just a few drops per spray bottle.  I clean the spray nozzles after each use.  But if they clog between uses, anyway, then I use rubbing alcohol to clear them.


At times, I fall back on the old way of preparing spray paints that's detailed above; it's less convenient but less expensive than my newer approach.

This newcomer calls for the same spray bottles, but they are filled with Golden High Flow Acrylics.  

The high flows resemble color inks but they are pigment-based whereas I'm told that many inks are dye-based.  I've worked with inks but my personal preference is for high flows.

Now that Golden has released a huge number of new color blends in their high flow line, there's much less need for making my own custom mixes.  I can still use an eye-dropper to alter tones among the Golden color blends, but for the most part they've done the work for me.  I don't get paid to say this, but I love these thin paints from Golden and I love that it's a 100 percent employee-owned company.  Kudos to them!

Check with the Postal Service before mailing greeting cards if yours, like mine, are of "unusual" size; there's a "non-machinable" surcharge for sending some sizes.

Thanks for visiting my blog!  To scroll through the pages of my stencils and masks at StencilGirlProducts.com, please start 
here.

Tuesday, November 29, 2022

Last Day of This Year's Only Sale on Stencils

 Today's your last chance!


Have you had your eyes on a stencil or two or more ...?  


Created with 9" x 12" Branching Blossoms Silhouette L284 


Today you can fill your cart at StencilGirlProducts.com and take advantage of the only sale this year!  Have fun shopping here


Sunday, November 27 until 11:59 p.m. CST on Tuesday, November 29, 2021, is your chance to get 25% off StencilGirl’s stencils!


The discount is automatically taken at checkout!
There is no discount code to enter.


If you buy 6 stencils of the same size StencilGirl’s 10% everyday discount is automatically applied to those stencils. This discount is taken before your 25% off.


There are FREEBIES to be had!

  • $100+ Exclusive 7-Pattern Stencil by Mary Beth Shaw will be automatically included in your order.
  • $500+ a piece of original art by Mary Beth Shaw and the Exclusive Stencil!


Please note: Freebies are calculated after the discounts are applied. International shipping does not count toward freebies.


Have fun shopping here!  

Monday, November 28, 2022

Day 2 of This Year's Only Sale

 Want to treat yourself or someone else with brand-new stencils?


L791 Palm Fronds Silhouette Large (9" x 12") was used in making the prints for this collage. (Note: This design also comes in sizes 6" x 6" and 4" x 4".)


Today you can fill your cart at StencilGirlProducts.com and take advantage of the only sale this year!  Have fun shopping here


Sunday, November 27 until 11:59 p.m. CST on Tuesday, November 29, 2021, is your chance to get 25% off StencilGirl’s stencils!


The discount is automatically taken at checkout!
There is no discount code to enter.


If you buy 6 stencils of the same size StencilGirl’s 10% everyday discount is automatically applied to those stencils. This discount is taken before your 25% off.


There are FREEBIES to be had!

  • $100+ Exclusive 7-Pattern Stencil by Mary Beth Shaw will be automatically included in your order.
  • $500+ a piece of original art by Mary Beth Shaw and the Exclusive Stencil!


Please note: Freebies are calculated after the discounts are applied. International shipping does not count toward freebies.


Have fun shopping here!  

Sunday, November 27, 2022

StencilGirl's Only Sale of the Year Starts Today!

 Ready, set, go...


Want to add something fresh and new to your stencil collection?  Or start a collection? Stencils = a quick, fun and easy way to make art!


Above: created with 9" x 12" Fire Cherries L879 


Today you can fill your cart at StencilGirlProducts.com and take advantage of the only sale this year!  Have fun shopping here


Sunday, November 27 until 11:59 p.m. CST on Tuesday, November 29, 2021, is your chance to get 25% off StencilGirl’s stencils!


The discount is automatically taken at checkout!
There is no discount code to enter.


If you buy 6 stencils of the same size StencilGirl’s 10% everyday discount is automatically applied to those stencils. This discount is taken before your 25% off.


There are FREEBIES to be had!

  • $100+ Exclusive 7-Pattern Stencil by Mary Beth Shaw will be automatically included in your order.
  • $500+ a piece of original art by Mary Beth Shaw and the Exclusive Stencil!


Please note: Freebies are calculated after the discounts are applied. International shipping does not count toward freebies.


Have fun shopping here!  

Saturday, November 26, 2022

Starts Tomorrow: My Stencils and Masks -- Sale of the Year !

  Attention!


StencilGirlProducts’ only sale of this year starts tomorrow! 

That's right! My StencilGirl stencils and masks are going on sale!

Get ready to load your cart here !


Above:  Created with 9" x 12" Longwood Florals Mask L657


9" x 12" Longwood Florals Mask L657


This design also comes in a stencil version:


This special sale will run November 27 (tomorrow!) - 29.  It's not time yet to place your order, but you can start browsing here !


Get ready to fill up your cart here !

Friday, November 25, 2022

Christmas Cards/Gift-tags/Hanging Ornaments


Although today's post limits itself to the making of Christmas cards, the same approach works beautifully for crafting your own personal and unique gift-tags and hanging ornaments.


Above:  One of my favorite stencils for making Christmas cards is my 6" x 6" Quilted Flower Garden s237.  Its repeating pattern reminds me of poinsettia blooms...


Another reason I like it is that its built-in lines mean I can easily cut the prints into strips.....


Above:  a minimalist Christmas card, with a column three poinsettia blooms centered on the face.


Above:  One of many cards I've made with the theme of Christmas candles


Fold-over-style greeting card blanks made from sturdy cardstock are available here as well as from other vendors. I strongly recommend buying card blanks cut from sturdy heavyweight cardstock.  They cost more but they can stand up to any kind of decorations you create.

3D Christmas stickers similar to those shown in this post are available in a wide variety of colors and designs.  One example is shown here.

Merry Christmas! -- and thanks for stopping by here today!

To scroll thru the pages of my stencils and masks at  StencilGirlProducts.com, please start here.

Wednesday, November 23, 2022

 Attention!


StencilGirlProducts’ only sale of this year starts November 27th. 

That's right! My StencilGirl stencils and masks are going on sale!

Get ready to load your cart here !


Above:  A mixed-media collage starring Clustered Leaves L433 (9" x 12") and Loopy Ladders L434 9" x 12").


The sale will run November 27 - 29.  It's not time yet to place your order, but you can start browsing here !


Get ready to fill up your cart here !

Tuesday, November 22, 2022

Christmas Stocking Stuffers, Mica Tiles and More!

Before we get started, a few words about supplies:

Fold-over-style greeting card blanks made from sturdy cardstock are available here as well as from other vendors. I highly recommend buying card blanks cut from sturdy heavyweight cardstock.  They cost more but they can stand up to any kind of decorations you create.

Spiral-bound blank journals, similar to those shown in today's post, are available here and probably elsewhere.   

3D Christmas stickers similar to those shown in this post are available in a wide variety of colors and designs.  One example is shown here.

Glitter glue, likewise, is easy to find; one example is here.


To make the card above, I printed a mica tile with silver metallic acrylic heavy-body paint and my 9" x 12" Clustered Leaves L433.  Once that dried, I used red ink (Sharpie pen) to highlight the lines that had been created by the stencil.     


Making a quick detour from Christmas cards to Christmas stocking-stuffer gifts, I used another 3D Christmas sticker as my final touch on the cover of the pocket-sized journal below.  The front of this journal had already been printed with a portion of my 6" x 6" stencil Ornamental Iron Curls s462.  I had masked off the edges of the journal cover with masking tape so that only the central area received the print.


Once again, Ornamental Iron Curls s462 teamed up with green acrylic paint, as I veered back to Christmas card-making.....


Pillar candles are among my fun, favorite and fast ways to create a series of Christmas cards.  (The same goes for birthday cards, any time of the year!)

I cut my candle flames from orange paper scraps and finish them off with glitter glue.

Merry Christmas! -- and thanks for stopping by here today!


To scroll thru the pages of my stencils and masks at  StencilGirlProducts.com, please start here.