Saturday, March 18, 2023

Other Artists Using My Stencils

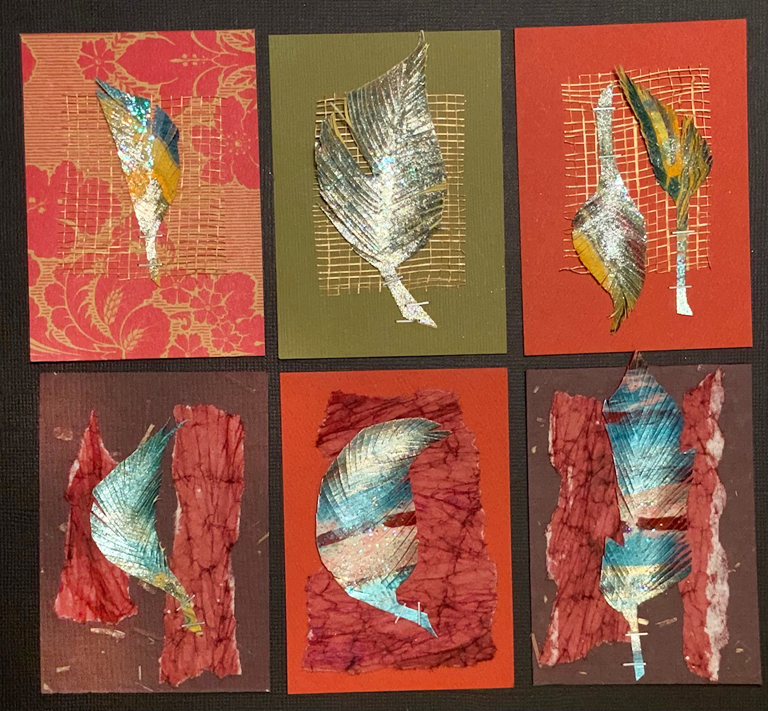
Today's post launches with cheerful, color-rich artwork by Claudia Holland, using my 9" x12" Facets L283 --


Moving forward ...

Each of us has indelible memories from the year 2020.  

One of the ways of coping was to record feelings in art journals, using imagery sometimes supported by words. 


One day that year, Linda Edkins Wyatt -- a designer at StencilGirlProducts.com -- recorded her feelings in developing the image above.  Her color scheme is showcased in the bar at the far right.  The stencil used in creating the background was my 9" x 12" Vintage Script L267, which looks like this:


Karen Hale is a professional artist I've tremendously admired  for a good number of years.  She's used a couple of my stencils or masks in her art-making; here is one of those paintings, entitled What Is Hidden:


In the painting above, Karen has used both a checkerboard stencil (source unknown) and my 9" x 12" Prayer Flags L371, which looks like this --


You can check out stencils designed by Linda Edkins Wyatt here.

Karen Hale's artwork can be viewed here, a website that I visit often, when wanting to take a visual joyride!

Thanks for checking out my blog today! To scroll thru the pages of my stencils and masks at StencilGirlProducts.com, please start here.

Sunday, March 12, 2023

Have You Thought of These Ways to Use Stencil Prints?

 In a recent post, I had mentioned that my designer friend Judi Kauffman was really good at using a circle cutter for her “Welcome” sign, but she let me know she’d used dies! She used dies for the word Welcome and her birds as well (but hand-cut the feathers they hold in their beaks). She has quite a collection of shapes ranging from simple ovals, circles, and squares to intricate frames, words, and flowers. She uses an AccuCut GrandeMARK for cutting multiple layers, heavier materials and large shapes, and either her beloved vintage Cuttlebug or a Spellbinders Platinum machine for the wafer dies - one layer at a time.

Thank you, Judi, for this education!  There's still a whole lot I don't understand, but I feel I'm inching my way in the right direction on the topic of die cuts!

Something else Judi's taught me has arrived as answer to a long-asked question of mine: "What are more ways to use stencil prints?"

As if reading my mind, Judi shared with me a collection of her artworks made by cutting feather shapes from printed papers, then making cuts all along the edges, leaving central strips to become quills.

Some of Judi's sparkling feathers adorn card fronts and ATCs; others are hanging ornaments; and in the first example below, they glitter inside a 12" x 12" shadowbox frame.


I never would have thought of this way to use stencil-printed papers and I'm delighted not only with what Judi's done but also her precision.

I'll end today's post with yet another way to use stencil prints -- as bookmarks.  The photo below shows a beautiful laminated bookmark that Judi gave me.  In printing, she used aqua and metallic gold paints; in my photo below, the metallic gold appears as yellow --


In making this bookmark, Judi used my 9" x 12" Dangled Pods L490. 


My sincere thanks to Judi and everyone stopping here at my blog today!  To scroll thru the pages of my stencils and masks at StencilGirlProducts.com, please start here.

Monday, March 6, 2023

Unique Idea! Judi Kauffman and Clustered Leaves

My friend Judi Kauffman handed me a wonderful surprise!  She came up with a collection of birds using my 9" x 12" Clustered Leaves L433 with gold metallic acrylic paint -- yes, birds!  Only a clever and creative mind like hers would ever look at Clustered Leaves L433 and say,  "Ah-ha!  Birds!"


Above is 9" x 12" L433 Clustered Leaves ...as I originally viewed the design.  

What Judi did was to give it a 90-degree turn, then turn her imagination loose with that gold metallic acrylic paint on sturdy dark paper.


And here's a close-up:


Notice the feathery cuts on the prize (far left) being flown home by this bird!


Here are two more pieces of Judi's eye candy--


Want to make your own birds and need "eyes" for them?  One place among many to find them is here.

Yes, Judi took me by surprise with her whimsical birds, but, upon sharing these with me, she stirred my memory.  I checked my older file photos to happily find this:


The above hanging ornament was the first artwork by Judi that I had ever shown here.  At that time I hadn't even known who she was.  Judi has mastered the art of cutting "difficult" papers with circle cutters -- a skill that has always eluded me!  Her twin circles came out perfectly.  The red frame is an outstanding way to showcase the inner circle, which Julie cut from a print she made using 9" x 12" L433 Clustered Leaves A welcome message, rubber stamped across the print, is the finishing touch.

Thank you, Judi, for generously sharing your art!  And for showing us how to think outside the box -- so we too can see birds in the clustered leaves!