

Stencils, Masks and Techniques ... Please scroll down the right sidebar to see a line-up of my stencils and masks.
Sunday, October 29, 2017
TIGER LILY, One of Four New Stencils at StencilGirlProducts.com
Today's post focuses on Tiger Lily, one of my just-released 6" x 6" stencils. Here are prints I've made with it --


The three prints above show Tiger Lily used alone. Below are prints showing combinations with other stencils ...
 |
| Tiger Lily and Two Vases |
 |
| Tiger Lily (top) and Medallion (bottom) |
 |
| Tiger Lily (bottom) and Tangled Pods |
Thanks for coming by to see my blog today!
Thursday, October 26, 2017
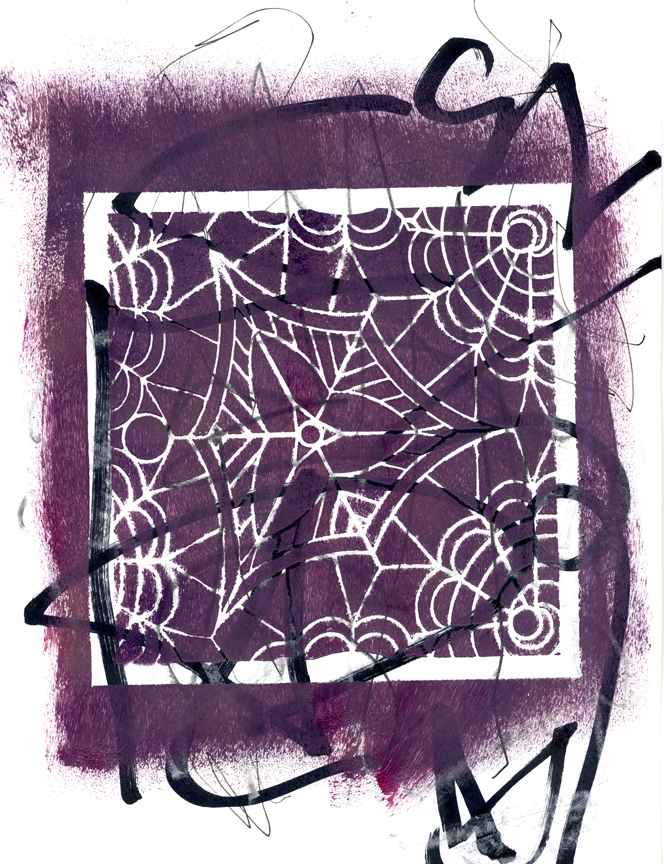
WEBBED MEDALLION, A Just-Released 6" x 6" Stencil at StencilGirlProducts.com
I found a piece of marbled paper to use as the background for today's first print, made with my new 6" x 6" stencil Webbed Medallion --


Thank you for stopping by my blog today!
Monday, October 23, 2017
Sherry Canino and FERNS 6
Sunday, October 22, 2017
Still Highlighting New Stencils -- This Time, Used with Earlier Releases
To create the print below, I went with a simple way of layering -- just three coats of paint, stacked one atop the next, each used with a different stencil.
The middle layer -- translucent white -- was printed with Mimosa Stencil, also 9" x 12". (Mimosa also comes in a 6" x 6" version.)

Thank you for taking time to visit my blog today!
Saturday, October 21, 2017
THISTLES, a Just-Released Stencil at StencilGirlProducts.com
55 years ago, my farmer-father loaded up the pickup with us kids and a collection of sharp, long-handled tools. He drove us to pasture land that lay at a distance from our home farm.
As soon as the pasture came into view, I exclaimed, "Look at all those pretty flowers!"
To this day, my three-years-younger brother will tell this story with glee.
The "pretty flowers" -- I was quickly informed -- were thistles in bloom.
And we had arrived in this pasture to level them with weed-whackers!
Well, I maintain one person's weed can be another person's pretty flower -- and my fascination with thistles has never waned.
One day an idea marched into my head -- why not make a thistle stencil?
So I did.
Here are prints I've made with my fourth just-released stencil --
 |
| Above: (foreground) Thistle Stencil and (background) Mimosa Stencil (both 9" x 12") |
 |
| Above: (foreground) Thistle and (background) Mimosa Stencil (both 9" x 12") |
 |
| Above: (foreground) Thistle Stencil; (background) Loopy Ladders (both 9" x 12") Stencil; (central background) Ornamental Iron Curls Stencil (6" x 6") |
 |
Above: Thistle and (background) Vases (both 9" x 12") |
 |
| Above: (blue foreground) Thistle Stencil; (distant yellow background) Mimosa Stencil; (gray background) Loopy Ladders (both 9" x 12") |
 |
| Above: (foreground) Thistle Stencil; (background) Tangled Pods Stencil (both 9" x 12"); (background) Tiger Lily Stencil (6" x 6") |
 |
| Above: a greeting card cover collaged with a partial print that was made with (background) 9" x 12" Prayer Flags Stencil and (foreground) 9" x 12" Thistle Stencil. |
In its entirety, Prayer Flags Stencil looks like this:

Thank you for taking time to visit here today!
Friday, October 20, 2017
TIGER LILY, Third Brand-New Stencil at StencilGirlProducts.com
The July/August 2017 Somerset Studio magazine carried Mary Beth Shaw's write-up about using silhouette stencils with patterned stencils.
Following Mary Beth's directions, I came up with this:

The "silhouette" stencil in this case is my 9" x 12" stencil Fantasia. It left unpainted areas on the substrate (a colorful old map.)
The two 6" x 6" stencils that I paired with Fantasia are brand-new releases -- Sprigs (topmost in the image above) and Tiger Lily (bottom).
Mary Beth's technique is quick and easy:
(1) Secure the substrate to the work area with masking tape;
(2) use the same tape to layer the "silhouette" stencil atop the substrate. (In the magazine article, Mary Beth used my Heron stencil and my Osprey Wings stencil -- both of which are closer to what we think of when we say "silhouette." Here however, I chose to use Fantasia because I was curious to discover what the result would be.)
(3) Add a layer of acrylic paint over the stencil that's fastened to the substrate under it. (For this, I used a sponge brayer loaded with heavy-body blue paint.)
(4) After that paint dries, add one or more stencils with densely figured patterns; use masking tape to hold them down, if desired.
(5) Using a different color acrylic paint, go over the top layer of stencils. (I used another sponge brayer, loaded with heavy-body white paint .)
Here are two close-ups of the above print:


Thanks for visiting my blog today!
Tuesday, October 17, 2017
Second of Four Just-Released Stencils at StencilGirl.Com
Today's post features the second of four just-released stencils, all available here.
s523 Sprigs, my second new stencil measuring 6" x 6", has already been used in so many of my artworks that I will need to spread the photos over two days.


Thank you for visiting my blog today! In my next post, I'll show more artworks made with Sprigs. After that I will post art created with the other brand-new stencils -- Tiger Lily (6" x 6") and Thistle (9" x 12") and Webbed Medallion.
Saturday, October 14, 2017
Four Brand-New Stencils Released Today at StencilGirl.com!
Happy to announce today's debut of four new stencils -- all of which appear here.
This post will showcase art samples made with the first of them -- s522 Medallion --


My next post will introduce the second of my four brand-new stencils -- s523 Sprigs.
Below is a sneak-peek at another new stencil -- part of 9" x 12" Thistles -- on a background printed with part of Prayer Flags stencil (also 9" x 12".)
|
Above: a greeting card cover collaged with a partial print that was made with (background) 9" x 12" Prayer Flags Stencil and (foreground) 9" x 12" Thistle Stencil. |
Wednesday, October 11, 2017
More Collages Made with Original Drawings for Stencils
During the summer just ended, I had the pleasure of taking an online art class under Jane Davies that focused on black-and-white art.
For some of her weekly exercises, I created collages using cut-outs from drawings I had previously developed; drawings that had become stencils.

 |
| Loopy Ladders |

Again, the cut-out above is color-reversed from the stencil itself, which looks like this --
 |
| Clustered Leaves |
To see all my stencils, please visit here.
If you'd like to subscribe to this blog via email, just fill out that option in the upper right sidebar.
Thanks for your visit here today!
Sunday, October 8, 2017
Small-Art Focus on SASSY SPRAY and other StencilGirl Stencils
Check here for a step-by-step demo first shown in StencilGirl Talk.
Below are just a few of the photos taken by artist Louise Nelson
as she went thru the steps of this project, developing Artist Trading Cards and other small artworks.


To see my complete collection of stencils, please visit here.
Thank you for taking time to visit my blog today! If interested in subscribing by email, please use that option in the upper right sidebar.
Subscribe to:
Posts (Atom)