Friday, January 28, 2022

Traditional Valentines ....


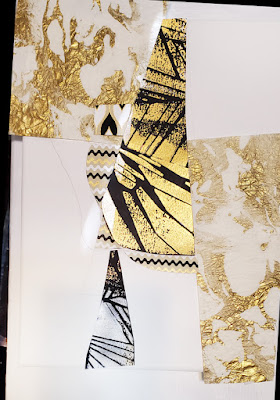
Above:  The heart was cut from a print made with Quilted Flower Garden s237.  The background is textured gold foil laminated onto sturdy paper.


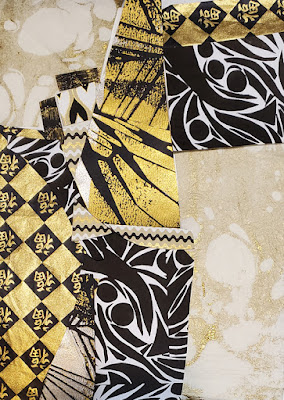
Quilted Flower Garden s237 measures 6" x 6" and looks like this in its entirety --


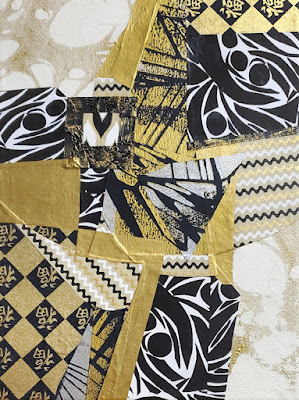
The "scrap" leftover from today's first Valentine worked as a frame on a different card, shown below ...


The central red mini-heart was created with one of the paper-crafting  shape-punches by Marvy.

The greeting card blanks that I've used here came from JamPaper.com, but this company no longer offers a 6" x 6" greeting card blank in the metallic/reflective white version I'm showing here.  As I write this, at least one other color is still available in this size.

Thank you for visiting my blog today!

The multiple web pages showing my StencilGirl Products masks and stencils begin here.


Do you know about this?  If you enjoy making cards the way I do, your production may exceed your needs.  If that happens, isn't it wonderful that you can send your beautiful greeting cards to an organization that makes good use of them?  I think so! 

Monday, January 24, 2022

More Valentines!

Today's Valentines use textured foil gold paper cut into heart shapes. 

After making a freehand drawing of a heart on scratch-paper, I cut out that pattern and traced along its edges on the back-side of the gold textured paper.

With two larger heart patterns, I traced another pair of hearts onto red paper, cut them out, and glued them under the gold hearts to create the red outlines shown below. 


Above:  To the right of the heart, I made a print using part of my 6" x 6" stencil Swatton Flowers Version 1 s078.


Above:  Around the heart, I made aprint with my 6" x 6" stencil Ivy Frame 6 s096.  (This design also comes in a 9" x 12" stencil.)


In its entirety, Swatton Flowers Version 1 s078 looks like this:


In making the print on the first card in today's post, I used the right side of this stencil, masking off the rest with masking tape.

To scroll thru the pages of my stencils and masks at StencilGirl Products, please start here.

Do you know about this?  If you enjoy making cards the way I do, your production may exceed your needs.  If that happens, isn't it wonderful that you can send your beautiful greeting cards to an organization that makes good use of them?  I think so! 

Thanks for your visit to my blog today!

Thursday, January 20, 2022

Pair o' Parrots s395 is a 6" x 6" stencil that I designed with romance in mind.  So it was natural to use this stencil in making two Valentine cards ...


Both of the above cards were made the same way.  First on red paper, then on gold textured paper, I traced the parrot silhouette shapes of the stencil.  I cut out all four shapes using fine-detail scissors.  

After gluing the cut-outs to their backgrounds, I added hearts created with a Marvy heart-shaped paper-crafts punch.

Do you know about this?  If you enjoy making cards the way I do, your production may exceed your needs.  If that happens, isn't it wonderful that you can send your beautiful greeting cards to an organization that makes good use of them?  I think so! 

Thanks for spending time on my blog today!


To scroll thru the pages of my stencils and masks at StencilGirl Products, please start here.

Wednesday, January 19, 2022

Just a word ...

Here is a great resource -- a summary of 2021's best write-ups in Just Paint, the e-bulletin of Golden Paints.

Monday, January 17, 2022

Professionally and domestically, it really is a whole new year for me, a year of transition.  

When my beautiful grandson was born, November 16, 2021, my transition began.

This New Year month, half over, has already launched me into a new, two-pronged direction ... a setting aside of time to spend with my grandson (which includes a lot of traveling) and a return to developing large-scale abstract paintings and collages.

Never one to make New Year's resolutions, nevertheless I've made one this year by returning to something I had forsaken way too long ago:  the everyday practice of private journal-writing.

I've used two mask prints to decorate the cover of one of my several new journals.  Both prints were made with heavy body acrylic paints using 9" x 12" Garden Montage L652.  This is by far the simplest journal cover I've ever made ...


... but its simplicity is significant to me. 

I will continue making blog posts "for some little while," to quote one of my (fun-loving) neighbors.  I may even make it to the end of 2022, but if not, that's okay with me too.

To scroll thru the pages of my stencils and masks at StencilGirl Products, please start here -- and thank you for having joined me here at my blog.

Sunday, January 16, 2022

Unconventional Valentine Imagery -- Made with Stencils

Must every Valentine sport the traditional colors?  I've decided to break free from that idea now and then.  Do you sometimes feel this way too?  Maybe you'll find some new ideas here today.  Go rogue!  At least, some of the time!

My one rule for myself is to incorporate a heart into every design.


Above:  This tag centerpiece was printed using modeling paste mixed with tiny amounts of blue and violet acrylic paints.  6" x 6" Mikki's Flowers Mask s605.  The small foil embellishments are from Paper Wishes and I used a paper punch to create the heart.


Above:  Central image was printed with pink heavy-body acrylic  using one of nine Artist Trading Card-sized stencils in my 9" x 12" ATC Mixup Swatton #1 L768.  The foil embellishments came from Paper Wishes and I used a paper punch to create the heart.


Above:  Central image was printed with heavy-body blue interference acrylic paint using one of nine Artist Trading Card-sized stencils in my 9" x 12" ATC Mixup Swatton #1 L768The flower embellishments came from InLoveArtsShop and I used a paper punch to create the heart.


Above:  On blue paper, I traced the central image above using my 6" x 6" Dance of the Courting Cranes s394. I cut out the traced shape with fine-detail Fiskars scissors, then mounted the cutting onto a pink background. I used a paper punch to create the heart.


The same paper punch gave me the heart on the Valentine below.  Its blue and green background came from printing with 6" x 6" Looking Up Through Trees Small s793, in multiple  applications.  With each application, I turned the paper 90 degrees; this produced an all-over, many-faceted final print. 


Above:  The green vases are cut from a 9" x 12" print made using Vases L144, shown below.... 


Vases L144


Above: The orange and purple centerpiece was cut from a 9" x 12" print made on marbled paper using Garden Montage L652. The foil embellishments came from Paper Wishes and I used a paper punch to create the heart.  The border background is a print made from an old photo.


Above: Background print made using part of 6" x 6" Quilted Flower Garden s237.  The red paper is origami paper and the heart is the "negative" that's left when a heart-shaped paper punch is used.


Above:  Background is part of a print made using 6" x 6" Abstract Composition Backbones Mask 1 s864.  The small backdrop behind the green heart is cut from a print made with 9" x 12" Wrought Iron Gate L224.


Above:  The heart was printed using heavy-body orange acrylic paint with Ornamental Iron Curls s462 (6" x 6") ... which in its entirety looks like this:


Ornamental Iron Curls s462


Below is a card with a purple and beige background cut from a 9" x 12" print made with  Vases L144, a stencil shown earlier in this post.


Above:  This aqua and orange heart was cut from a print made with Wrought Iron Gate L224, a 9" x 12" stencil that contains several built-in heart-shapes not obvious at first glance. 


Wrought Iron Gate L224, in its entirety, is shown below; can you find the not-so-obvious heart-shapes?  Some are upside-down and others are right-side-up.


Above:  9" x 12"Wrought Iron Gate L224


Other stencils and masks highlighted in today's post:


6" x 6" Mikki's Flowers Mask s605


Above:  9" x 12" ATC Mixup Swatton #1 L768.


Above:  6" x 6" Looking Up Through Trees Small s793


Above:  9" x 12" Garden Montage L652


Above:  6" x 6" Quilted Flower Garden s237


Thank you for visiting my blog today!
The multiple web pages of my StencilGirl Products masks and stencils start here.

Wednesday, January 12, 2022

Judi Kauffman and FIRE CHERRIES MASK

I received a wonderful surprise from artist Judi Kauffman -- and I'm here today to share it with everyone kind enough to stop and check out my blog post today!

One kind of art-making takes the form of pocket cards.  Judi tells me that the pocket-blanks she used for this project have been discontinued, but that it's easy to find library pocket-style dies as well as pre-made pockets.  I'm sure that's true; I have a cousin who also makes and shares card-and-pocket artworks.  

Get ready to be awed by Judi's art!  I'm so grateful that she not only sent me the photos that she had taken but also sent me the artworks themselves!

First, I'll show the card-and-pocket sets before Judi added embellishments, a few at a time and then the entire collection.  The close-ups will show the cards before they're slipped into the pockets and the final grouping will show them inside their pockets.


The cards and pockets above were sprayed with bright colors before stenciling -- a delicious blend of orange, red, yellow, blue and purple.  

After the pockets were stenciled with black, using Wendy Brightbill's 9" x 12" Wildflower Lace Mask, Judi added some white dry-brushing.  

The card inserts were stenciled with white using my 9" x 12" Fire Cherries Mask L879.

Next, I'll show the card-and-pocket pairs after Judi had embellished them with cancelled floral postal stamps and rubber stamping.  As I did before, I'll show close-ups of the sets followed by a photo of the entire group.  The close-ups show the cards before they're slipped into the pockets and the final grouping shows them inside their pockets.


Wow!  I hope you're awed by these card-and-pocket sets because I certainly am!

Judi has generously sent me a beautiful collection of paper goodies shown in the photo below ...


To close out today's post, I'll show close-ups of two of Judi's prints on 12" x 12" scrapbook papers (shown above, but in less detail.)  In developing these prints, Judi moved the mask around to get cherry clusters here; this movement created an eye-pleasing pattern. 


Above: This scrapbook paper was originally printed with a pattern of wooden boards and vintage script.


Above: This scrapbook paper was originally printed with vintage script and a different pattern of wooden boards.  Notice how these backgrounds added dimension and interest to the finished artworks!


Above:  My 9" x 12" Fire Cherries Mask L879.

Thank you for visiting my blog today!  To scroll thru the pages of my stencils and masks designed for StencilGirl Products, please start here.

Tuesday, January 4, 2022

 One way to use stencil- and mask-printed papers is to cut them into random pieces, then assemble them in a collage with other papers.

Below are steps I took in developing a collage on 9" x 12" stretched canvas.  

For strength, this abstract artwork needed a "backbone" to run down the central area from top to bottom. 

My chosen "backbone" materials were papers printed with 9" x 12" Palm Fronds Silhouettes Large L791 on black cardstock using a sponge brayer loaded with heavy-body silver and gold acrylic paints.  


Above is the first phase of the project as I auditioned pieces of paper for assembling into the collage.  The central piece was printed using Palm Fronds Silhouettes Large L791while the gold and white marbled paper was a purchase, as was the paper with squiggly lines.

Below:  More papers were auditioned....


Above:  On the far left another purchased paper was auditioned. The bold black-and-white prints were born as result of my having created a simple printing plate, this way --

I cut out pieces of 1/4-inch-thick industrial foam in random shapes that included "shards" and circles.  With extra-heavy matte medium, I glued these pieces into patterns atop a sheet of extra-thick cardboard.  Next, I coated the entire piece, front and back, with two layers of acrylic matte liquid medium, allowing drying time between layers.  This coating made the printing plate more or less waterproof.  After painting the plate's raised areas  with heavy-body black acrylic paint, I pressed the plate to sheets of white paper.

When that phase of the project was done, I scanned some of the white papers printed with the printing plate, and printed the papers.  Those black-and-white prints are what I cut up to audition for placement in today's collage.

I used gel medium, both glossy and matte, to complete the collage as it appears below--


Palm Fronds Silhouette Large L791 (9" x 12")


Thanks for visiting my blog for its first post of 2022!  To scroll thru my stencils and masks at StencilGirl Products, please start here.