Today's post announces my new four-part release, Hot Air Balloons and Masks. This new release comes in two sheets -- one 6" x 6" sheet and one mini-sheet measuring 4" x 4".
Although the two sheets come in two sizes, the stencils and masks are identical in design, shown here --
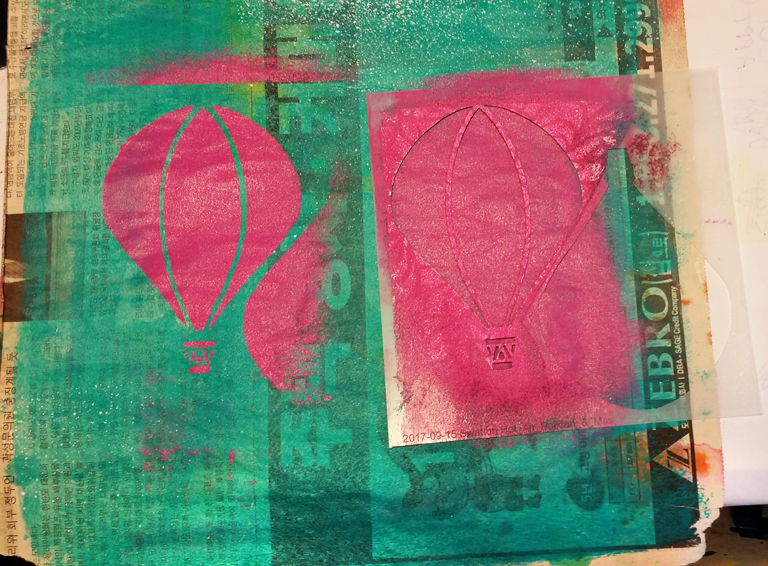
 |
| Above: the stencil is on the left. The mask is on the right. |
Note:
A mask "masks" -- that is, hides -- everything that you place under
it. The function of a stencil, on the other hand, is to give you an
imprint of an image that can contain more details than a mask can. In
this case, the image is a hot air balloon with three vertical stripes.
Today I'll show one way I've used these stencils and masks
together. Although I have used a sponge brayer, the traditional
sponge-pouncing method would work just as well.
First, I'll show the final photo -- this shows what I'm going to
end up with, following a method that I learned from Mary Beth
Shaw:
These are the steps I took to get there:
The above photo shows a black substrate. On it I've placed
both the masks. Next, I loaded a sponge brayer with heavy-body white
paint. With the brayer I added a layer of this paint over the
masks. While rolling the brayer over each mask, I held each in place with
one finger. You can even see my forefinger mark in the middle of the
larger mask above!
Below you can see the results after the two masks have been lifted
--
After the white paint had dried, I started my next step on the
left side of the print, covering the left masked-imprint with the stencil of
corresponding size (6" x 6".) As you can see below, it was at
this point that I started to use masking tape -- to make sure that the stencil
had been placed exactly where I wanted it, lining it up with the masked-imprint
below.
At this point, it was time to carefully mask off the mask half of
this new stencil set. This was to prevent the hole of the punched-out
mask from showing up in my final image. To mask off the mask-hole, I used
a different kind of masking tape. This yellow tape has a low-tack
sticking surface -- making it easier to remove and far less likely to damage
the print underneath.
You can click on the above photo to enlarge it and better see the
way I shaped pieces of the yellow masking tape to cover the mask-hole on the
far right. On the left, you can see my sponge brayer loaded with a bright
pink heavy-body acrylic paint.
The photo below is a close-up of the stencil now that the pink
heavy-body paint has been brayered over it. Notice how the yellow masking
tape on the right has prevented the paint from imprinting the right area of the
substrate.
Not shown is a view of the pink hot air balloon that appeared when
I lifted the stencil.
My following step was important to note: While keeping the Hot Air
Balloon stencil taped in place,
I waited for the pink paint to dry.
After testing the pink
paint to make sure it had dried, I placed my 6" x 6" Sprigs stencil atop the stencil. (The pink imprint is still underneath this stack of two stencils.)
Holding Sprigs with one hand, I used a fresh brayer to add a white layer of heavy-body acrylic paint. See below:
The photo below shows the results after I had lifted off the masking taped "sandwich" of the Sprigs stencil and the Hot Air Balloon stencil.
And the photo below shows, once again, the results after I had repeated this
step-by-step process with the 4" x 4" size--
Thank you for visiting here today! More art samples will be posted here tomorrow. You can follow this blog by email using the option in the upper right column.


