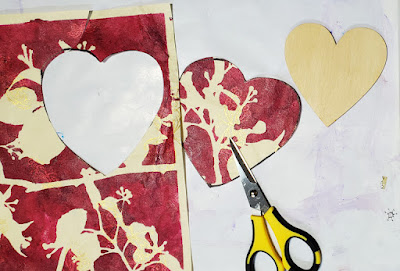
Monday, February 28, 2022

 In early March of  '21, StencilGirl Products released my 4-part series Abstract Composition Backbones Masks -- s864, s865, s866 and s867... and I did a number of write-ups, with step-by-step photos, showing some of my experiments with these masks.

Having checked old blog posts from that period, I see that not all of my experiments got covered in my blog.  Today's post changes that.

This project started with my cutting s866 from its 6" x 6" outer frame.  

Then I used green masking tape to secure it to a sheet of paper previously painted copper-and-black (with touches of blue) acrylic liquid paints.  The tape had two jobs -- to hold the mask in place while I applied fresh paints, and to establish a cruciform shape that extended above, below and on both sides of the 6" x 6" mask so that my finished project would measure 9" x 12".


Above:  the mask has been stained pink from use in a previous project. 


Above:  A layer of Titan Buff acrylic paint is being sponge-applied over the green tape and the mask s866.


The photo below shows my results after lifting off the tape and mask.


Above:  I have turned the paper 180 degrees.  I follow the practice of turning my abstracts to check their structures from different angles.  A successful abstract "reads well" when turned upside-down or flipped to either side.


In further developing the piece, I used a black felt-tip marker to strengthen some of the lines that'd been created by the mask:


Above:  Having decided to return the piece to its original orientation, I gave it another 180-degree turn.  I've drawn the black lines in the upper right in preparation to make this my focal area.  For the same reason, I used a pale pink Gellato crayon to further brighten some areas.  The pale pink next to the strong black creates a high contrast in values.  This in turn attracts the viewer's eye to the focal area.


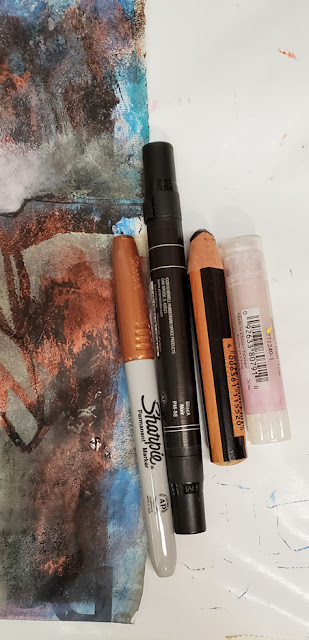
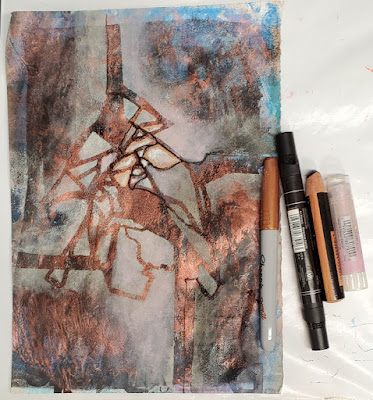
Above and below:  the pale pink Gelato crayon is on the far right.  Moving left from there is a black Stabilo pencil, a black marker and a Sharpie metallic copper marker.  The Stabilo pencil was used to add subtle smudges of black in a few areas.


As this point I called it done and set it aside to be matted.

Thanks for taking time to check out my blog today!  To scroll thru the pages of my stencils and masks at StencilGirl Products, please start here.

Sunday, February 20, 2022

 I'm always grateful and delighted when other artists use stencils and masks I've designed for StencilGirl Products.

Up first today:  Netherlands artist Sylvia Lokhoff de Bruijn, who used my 6" x 6" mask Sassy Spray s465, multiple times, with the collection of inkpads shown below.  These rich, subtle tones are a shining example of one way to use masks and stencils.  Sylvia's originality has made this art sample unique.


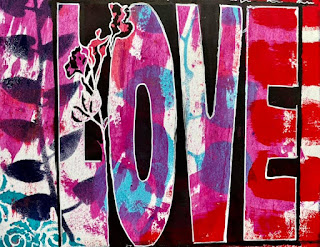
Above:  Artist Janina Byrne has put my 6" x 6" LOVE s828 to work in developing this bold statement.  The combination of these bright colors, contrasting happily with areas and outlines of white, grabs the viewer's attention.  The leaf design on the far left may have been created by another stencil designer at StencilGirl Products, but in trying to locate it to give credit due to that designer, I sadly wasn't able to find it.

Below:  This stunning page from an art journal is the work of artist Terry Lightfoot.  Notice how the double-hued background creates a lovely focal area at the top.  Pale yellow and blue being near-opposites (complements) on the color wheel means that using them side-by-side this way, an artist can really pack a punch.  The stencil Terry used is 9" x 12" Longwood Garden Florals L676, which is also available as a mask, Longwood Garden Florals Mask L675.


On the color wheel above, notice that blue, in the lower left area, appears nearly opposite the mellow shades of yellow-orange, on the upper left.
 

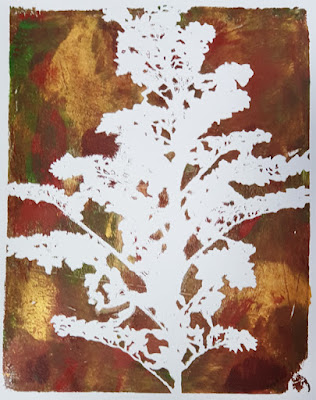
Claudia Holland, another artist living in the Netherlands, has created the beauty shown below ...


... and the mask she used is 9" x 12" Branching Blossoms Silhouette L284.  Sometime in the future, Claudia will be using more of my stencils and masks from StencilGirl Products.  I can't wait to see the magic she creates on paper.  The art sample above was created with the help of a Gelli Plate.

Thanks for taking time to check out my blog today!  To scroll thru the pages of my stencils and masks at StencilGirl Products, please start here.  Have a great day making art!

Wednesday, February 16, 2022

How did these two collages happen?


Windmills I


Windmills II


Both collages started with a pair of scissors and two 9" x 12" printed papers I'd developed with my Palm Fronds Silhouette series.  This series can be bought individually or together; they look like this--


Palm Fronds Silhouette Large L791 (9" x 12")


Palm Fronds Silhouette Small s238 (6" x 6")


Palm Fronds Silhouette Mini m050 (4" x 4")


Those two printed papers were created layer by layer, each layer a different color (heavy body acrylic paints).  I turned the paper 90 degrees before adding each new coat of paint.  This series of turns is what produced the crisscrossed lines in the two original printed papers, shown below --


Above:  Notice that in the bottom layers I used translucent paints so that each color layer remained somewhat visible.  The top yellow layer, however, was done in opaque acrylic paint.


Above:  Again in the bottom layers of the central image, I used translucent paints so that each color layer remained somewhat visible.  The top green layer, however, was done in opaque acrylic paint.


I used some of those lines to guide my scissors as I cut the two papers into pieces.

It was fun assembling the pieces on a base of watercolor paper; I tried several variations --


Above:  Windmills I in the first trial layout of papers.


Above:  Windmills I in the second trial layout of papers.


Above:  Windmills I in the last layout of papers -- the one I picked as the finalist (which you can see at the top of today's post).


I still had plenty of scraps left so I decided to make a second collage ....


Above:  Windmills II in a trial layout of papers.  The final collage appears above -- the second photo in today's post.


Moving the papers around is called auditioning.  As in the other kind of auditions, there will always be leftovers that didn't get chosen:  not necessarily because I disliked them, but because each collage has its own "voice" and knows what pieces it wants included; and where to place them as a final choice; and which pieces to be set aside for another time.

I didn't recognize that "voice" with the early collages that I made, many years ago.  For it to develop, I needed to take classes in composition ... and practice, practice, practice.

Thanks for checking out my blog today!  To scroll thru the two pages of my StencilGirl stencils and masks, please start here.

Wednesday, February 9, 2022

I like simple greeting cards that are quick and easy to make, but at the same time, eye-catching.  For me, this happens when I use stencil-printed papers.


Above:  Collage pieces cut from papers printed using 9" x 12" Boxed Vines Stencil L247 


Above:  Collage pieces cut from papers printed using 9" x 12" Boxed Vines Stencil L247 (on the left side) and 6" x 6" Kaleid s085 on the right side.


Above:  Collage piece cut from paper printed using 9" x 12" Boxed Vines Stencil L247 as a background (trimmed with Fiskars edging scissors.)


Above:  Collage pieces cut from paper printed using 9" x 12" Boxed Vines Stencil L247 (background) and 6" x 6" Kaleid s085 (foreground red heart)


Above:  Collage pieces cut from papers printed using 9" x 12" Boxed Vines Stencil L247 (on the right side, as background) and 6" x 6" Kaleid s085 on the left side (the foreground image.)


Above:  Foreground collage piece was cut from paper printed with 9" x 12" Boxed Vines Stencil L247.  Background is cut from paper printed using 6" x 6" Seaweed s099. 


Above:  Collage background was cut from paper printed using 


Stencils and masks used in making today's featured prints include --


http://www.stencilgirlproducts.com/Boxed-Vines-Stencil-Cecilia-Swatton-p/l247.htm
9" x 12" Boxed Vines Stencil L247


6" x 6" Seaweed Stencil s099


6" x 6" Kaleid s085


Thanks for visiting here today!  To scroll thru the pages of my stencils and masks at StencilGirl Products, please start here.
Saturday, February 5, 2022

Courtship Valentine

Not everyone would recognize this 6" x 6" stencil-and-mask combination for what it is --

a silhouette of cranes doing their elegant dance of courting.


Dance of the Courting Cranes s394


So, in my approach to today's Valentine, I'm emphasizing the theme of romance by using traditional Valentine colors, as well as adding a heart...


Above:  I pull out paper with a pre-printed white floral pattern on the "top" red side and plain red on the "back" side.  Having flipped the paper over to red-side-up, I place onto it the mask part of this stencil-and-mask set.  I trace the shapes with a black marker. 

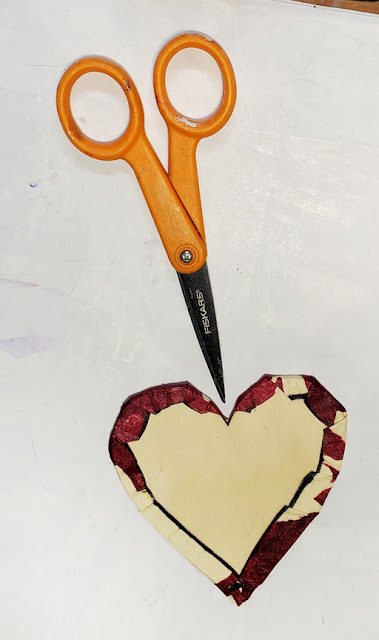
Below, I cut along the lines with Fiskars fine-detail scissors --


In the next photo, I turned the paper right-side-up ...


Below:  having used a Uhu gluestick to add the cut-out to the cover of a white blank greeting card, I get out my paper-crafting heart punch from Marvy.


For my last step, I punch out a white heart shape and glue it to the cut-out:


Thanks for stopping by my blog today!  To scroll thru the pages of my masks and stencils for StencilGirl Products, please start here.

Tuesday, February 1, 2022

3D Valentine Card

 Today's Valentine project follows a path I've taken before, but with different materials.

Both then and now, I've worked with papers printed using masks or stencils.  

What I have learned, however, from experience is this:  Avoid paper that's stiff, heavyweight or vintage.  Instead, use paper that's pliable and somewhat soft to the touch.

The paper I've chosen for today's project fits this description.  It's pale beige with a scattered pattern of metallic gold butterflies.  I printed with translucent acrylic paint to keep the butterflies somewhat visible, as shown below.


Above:  Printed using 9" x 12" Fire Cherries Mask L879


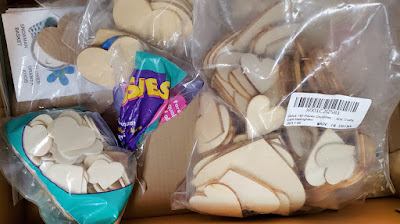
Out came wooden hearts ...


Above:  my collection of thin wooden hearts from craft stores and Amazon


... and I placed one of the large hearts atop a favorite area of the print:


Next, I brought out a black Sharpie pen --


... and, around the heart, drew a border wide enough to ensure I would have ample amount of paper to fold over the edges of the heart.


Above:  With fine detail scissors I cut out the enlarged heart shape.


With the black pen, I added a cut mark at the top center of the back of the printed paper.  This was to ease the paper as I wrapped it around the edges of the wooden heart.


 After using a Uhu gluestick to cover the back of the printed paper and one side of the wooden heart, I pressed the two glued sides together, then folded the edges of the paper around the heart.


Below:  Having turned the heart right-side-up, I've auditioned several metallic gold papers and have chosen this embossed foil laminated to sturdy paper.


Above:  Unable to find my plastic self-healing cutting board, I've substituted sturdy cardboard.  Cardboard protected my work surface while I used a craft knife to cut the paper to the 6" x 6" size of the greeting card blank. 


Above:  Having used extra heavy matte gel medium to attach the back of the heart to the cover of the card, I've completed my 3-dimensional Valentine card.


Thanks for taking time to stop at my blog today!  To scroll thru the pages of my StencilGirl Products stencils and masks, please start here.

Do you know about this?  If you enjoy making cards the way I do, your production may exceed your needs.  If that happens, isn't it wonderful that you can send your beautiful greeting cards to an organization that makes good use of them?  I think so!