
In early March of '21, StencilGirl Products released my 4-part series Abstract Composition Backbones Masks -- s864, s865, s866 and s867... and I did a number of write-ups, with step-by-step photos, showing some of my experiments with these masks.
Having checked old blog posts from that period, I see that not all of my experiments got covered in my blog. Today's post changes that.
This project started with my cutting s866 from its 6" x 6" outer frame.
Then I used green masking tape to secure it to a sheet of paper previously painted copper-and-black (with touches of blue) acrylic liquid paints. The tape had two jobs -- to hold the mask in place while I applied fresh paints, and to establish a cruciform shape that extended above, below and on both sides of the 6" x 6" mask so that my finished project would measure 9" x 12".
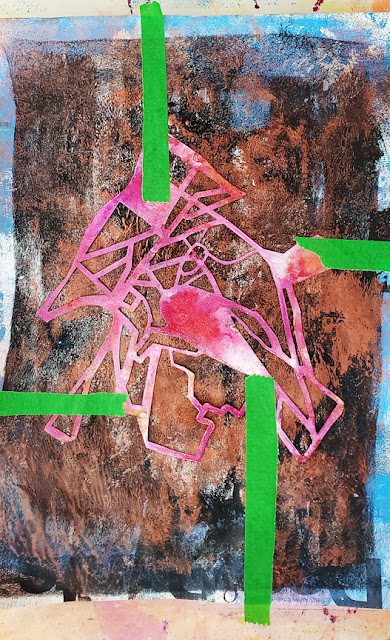 |
| Above: the mask has been stained pink from use in a previous project. |
 |
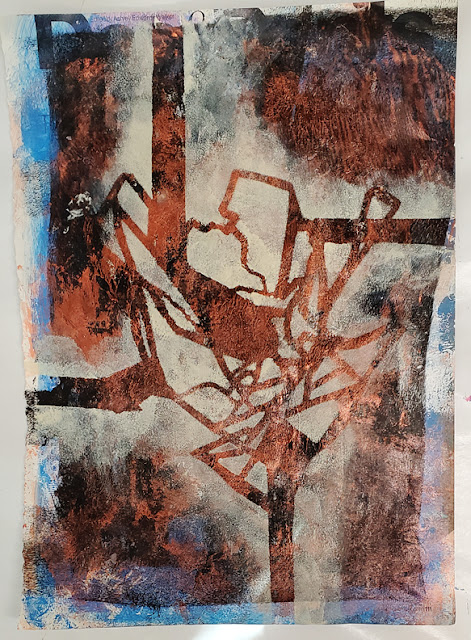
| Above: A layer of Titan Buff acrylic paint is being sponge-applied over the green tape and the mask s866. |
The photo below shows my results after lifting off the tape and mask.
 |
| Above: I have turned the paper 180 degrees. I follow the practice of turning my abstracts to check their structures from different angles. A successful abstract "reads well" when turned upside-down or flipped to either side. |
In further developing the piece, I used a black felt-tip marker to strengthen some of the lines that'd been created by the mask:
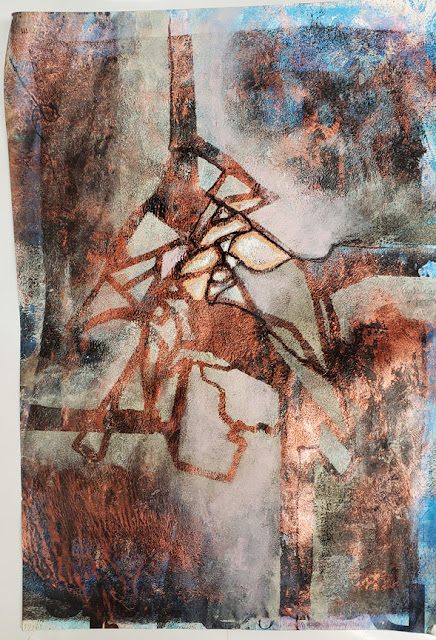 |
| Above: Having decided to return the piece to its original orientation, I gave it another 180-degree turn. I've drawn the black lines in the upper right in preparation to make this my focal area. For the same reason, I used a pale pink Gellato crayon to further brighten some areas. The pale pink next to the strong black creates a high contrast in values. This in turn attracts the viewer's eye to the focal area. |
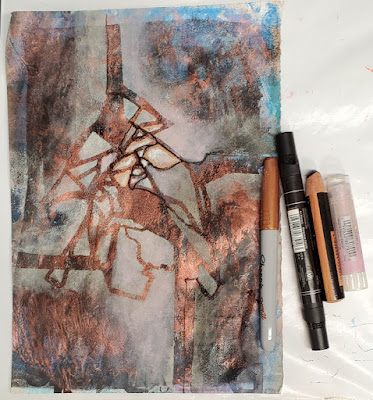
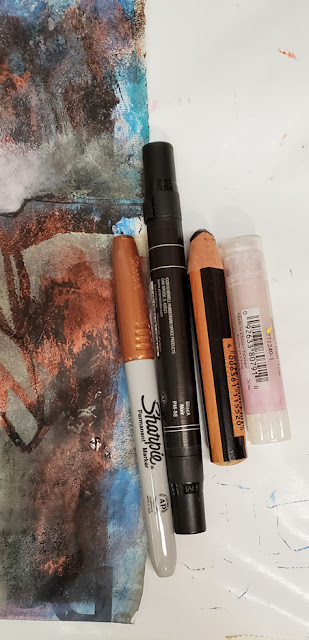 |
| Above and below: the pale pink Gelato crayon is on the far right. Moving left from there is a black Stabilo pencil, a black marker and a Sharpie metallic copper marker. The Stabilo pencil was used to add subtle smudges of black in a few areas. |
As this point I called it done and set it aside to be matted.
Thanks for taking time to check out my blog today! To scroll thru the pages of my stencils and masks at StencilGirl Products, please start here.
No comments:
Post a Comment