Monday, March 28, 2022

Judi Kaufmann's Unique Bookmarks and Pocket Cards

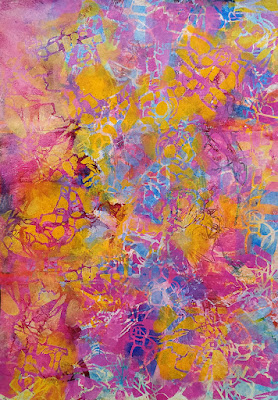
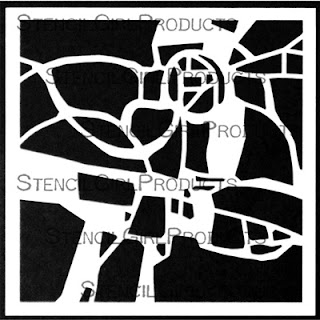
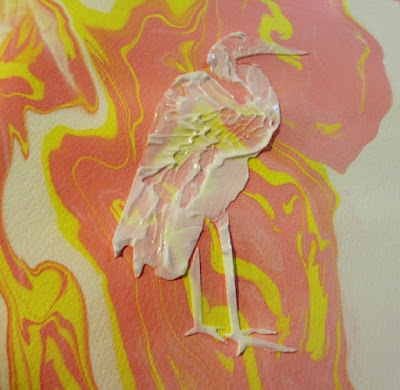
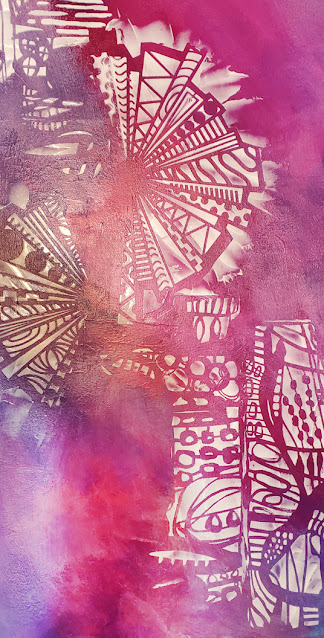
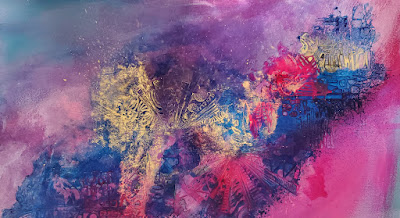
Today I'm thrilled to show artwork from the hands of career artist Judi Kauffman.  For today's focus, Judi used my 9" x 12" Fire Cherries Mask L879

The idea for today's two featured projects came to her when she was gifted some business-size envelopes.  

For both projects, Judi's first step was to seal flaps down, permanently closing each envelope that she wanted to use in this 2-pronged project.

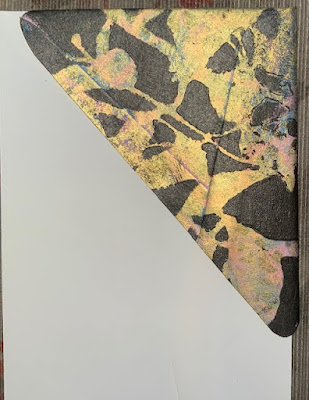
Choosing to start with making bookmarks, Judi cut each sealed envelope as shown below. 


Above:  On the far left is a diagram of one finished bookmark being used on a book page.  A photo of the same image is coming up below.


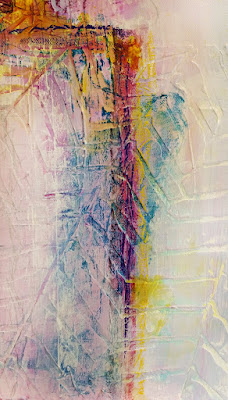
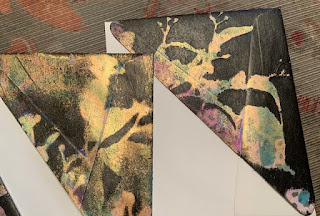
Having finished with the cutting, Judi then inserted parchment paper into each triangular pocket before painting, to keep the  matching sides of each triangular shape from sticking together during paint application.  Below:  A photo repeating what is shown at far left in the diagram above.


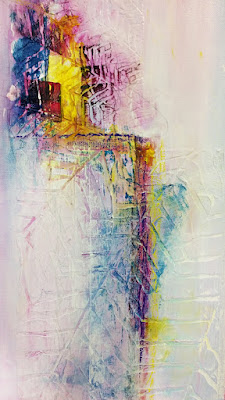
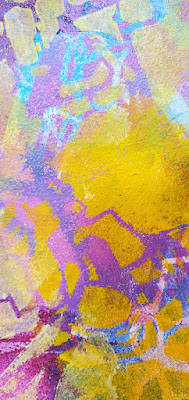
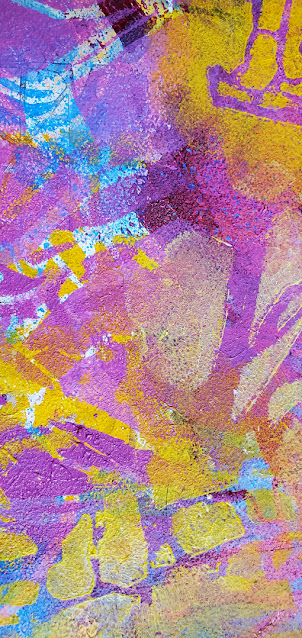
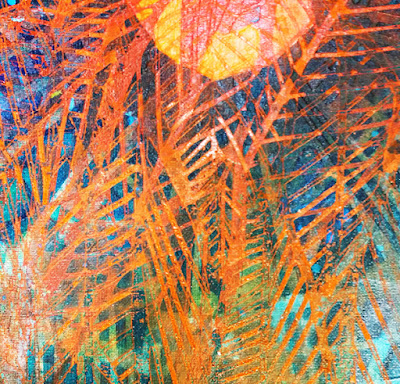
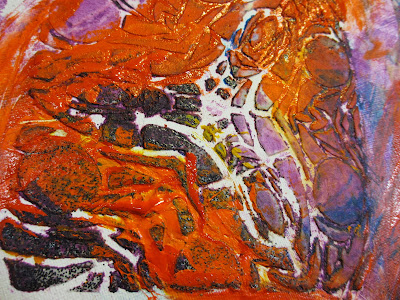
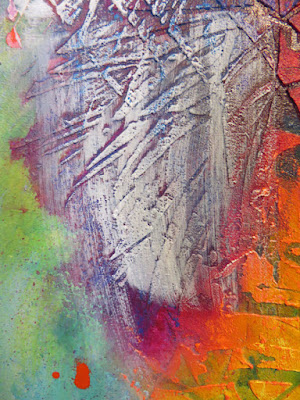
Above:  Judi used part of my Fire Cherries Mask L879 (9" x 12") in creating this clever bookmark.


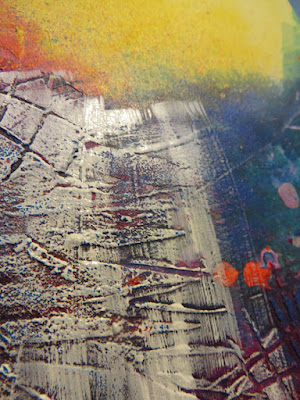
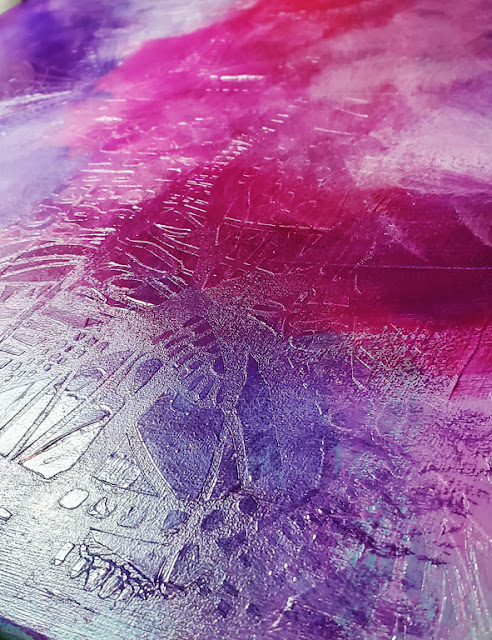
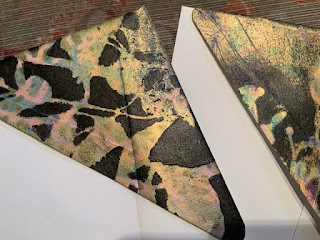
Judi started with layered purple and teal stamping inks.  Next, she used sponges to add still more layers with black acrylic paint and gold metallic acrylic paint.

Judi's photos:


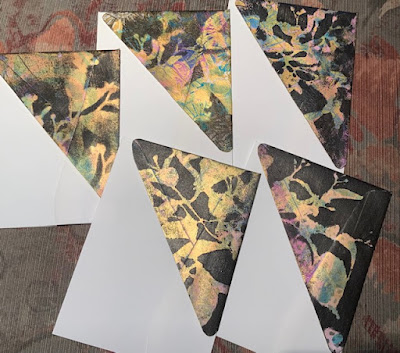
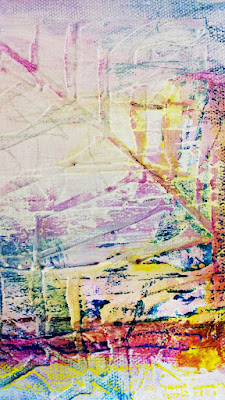
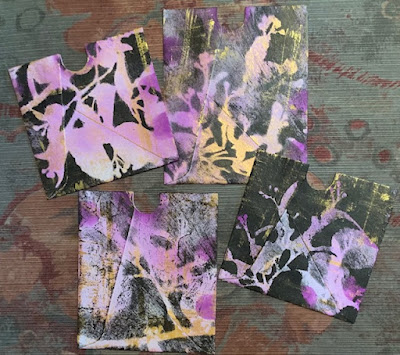
Judi's second artful way to use her sealed envelopes was to create pockets and pocket cards.  This time, Judi cut each envelope straight across ...


.... and, after again inserting parchment paper to keep the two sides from sticking together, she repeated the process of applying inks and paint in layers.

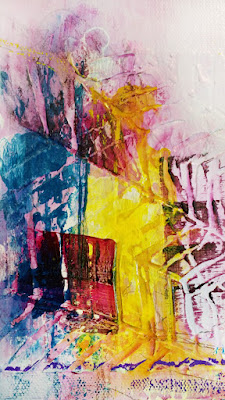
Afterward, Judi punched each pocket at the top with a tab punch.  These half-holes make it easy for a viewer to see that art pockets have contents.  This is important for artists who keep art journals, adding pockets to pages and filling them with small artsy oddments.  

The topic of art pockets is covered in this YouTube video -- a helpful resource for people like me who aren't familiar with this area of mixed media art.

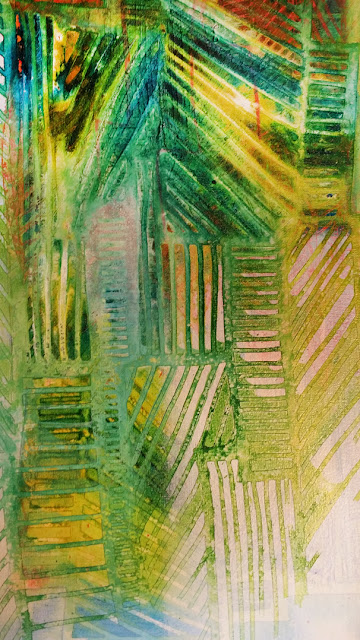
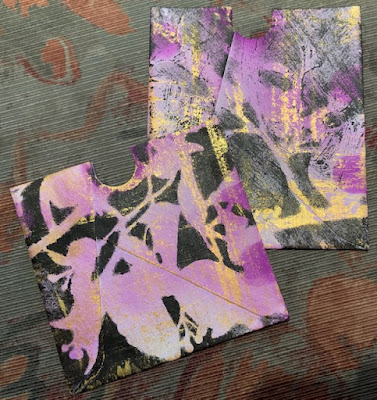
The two following photos show Judi's art pockets, ready to be used. 


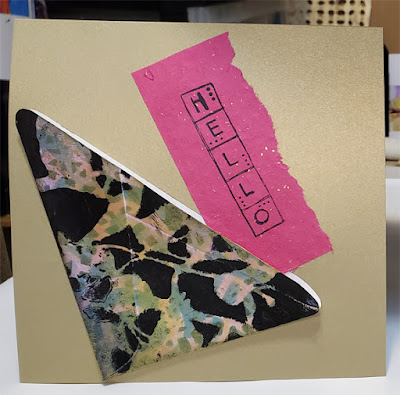
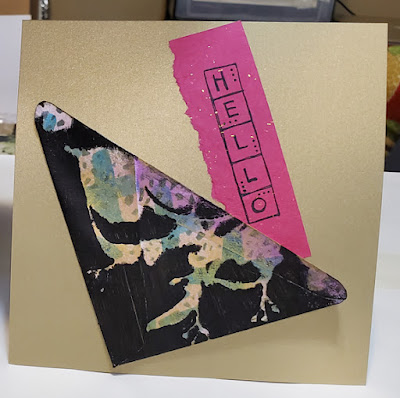
Who says Judi's kind of bookmark can't work as a pocket, too?  

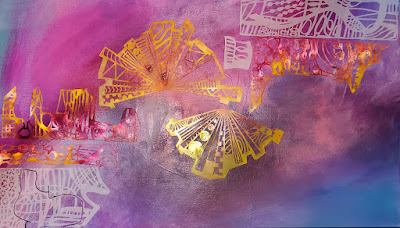
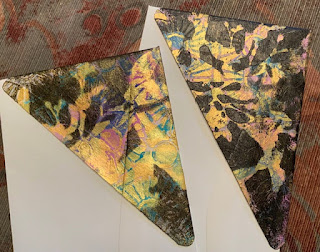
I have 6" x 6" greeting card blanks that were cut from gold metallic cardstock -- and they begged me to give this idea a spin.  

In the two photos below, notice how well the gold cardstock backgrounds go with the gold metallic paint that Judi had used in creating two of her bookmarks--


Above and below:  My two blank-inside greeting cards, ready for me to add a note inside.  I can mail the cards, or use them as oversized gift-tags on future gifts.


Please be on the lookout -- another post featuring the gorgeous artwork of Judi Kauffman will be coming up!

Thanks for stopping by here today!  To scroll thru the pages of my stencils and masks at StencilGirl Products.com, please start here.

Thursday, March 24, 2022

Texture Fun Part 3

Today's post continues showing actual texture, then segues into implied texture.

As I've said, "implied texture" is the way I describe something that tempts you to run your fingers across it, because your eye tells you that you're seeing texture.  But if your fingers go ahead and trail across that surface, you'll discover it's flat, or very nearly flat.  Both kinds of texture are fun when they show up in artwork!  They add interest and complexity.  They hold the attention of the viewer.


Above:  a full-size shot of a rectangular stretched canvas created with a basecoat layer of heavy body Titanium White acrylic paint, applied thru my two mimosa-themed stencils....


s126 Mimosa 6 Stencil (6" x 6")


L141 Mimosa Stencil (9" x 12")


The 9" x 12" stencil was used in the lower sections of this piece while the 6" x 6" stencil was used in the upper sections.

Close-ups:


Above: On this section of the piece, crayon and watercolor paint were added over the Titanium White paint after it had fully dried.


Above: Likewise, on this section of the piece, crayon and watercolor paint were added over the Titanium White paint after it had fully dried.


Above:  In this area, I brushed on generous amounts of acrylic paints.


As I steer this post toward implied texture, I'll show photos of multi-layered prints on watercolor paper created with my 6" x 6" Abstract Composition Backbones Masks s864, s865, s866 and s877.  I see these examples as saddling the line between actual texture and implied texture, because the heavy body acrylic paints that I used created subtle texture, as shown in the close-ups coming below....


Above:  the full-sized sheet of watercolor paper.


Above:  Closeup 1


Above:  Closeup 2


Above:  Closeup 3


Next up:  Examples of implied texture; each of them has been created via repeated layers of stencil prints atop one another. 


Above:  To my eye, the most successful implied texture prints are made using stencils and masks that have finely detailed, repeated patterns.  In this example, the base print of black on white was created with my 6" x 6" s077 Swatton Grid Stencil. The insert of gray paper was printed with multiple applications of red and black acrylic paint thru 6" x 6" Looking Up Through Trees s793. 


Above:  Again I've chosen to use a mask that contains finely detailed patterns.  I developed more complexity by using the same mask several times, shifting its position with each print.  Clustered Leaves L433 (9" x 12")  Visual depth and implied texture have resulted from placing orange atop blue.


Above: Today's final example of implied texture was developed using 9" x 12" Loopy Ladders L434.  Again, visual depth and implied texture were achieved by using green acrylic over earlier layers of yellow, blue, faint pink and white.


Clustered Leaves L433 (9" x 12")


6" x 6" Abstract Composition Backbones Mask 1 s864


Abstract Composition Backbones Mask 2 s865 (6" x 6")


Abstract Composition Backbones Mask 3 s866 (6" x 6")

6" x 6" Looking Up Through Trees s793. 


Bunches of thanks for stopping here today!  To scroll thru the pages of my stencils and masks at StencilGirl Products, please start here.

Sunday, March 20, 2022

Texture Fun Part 2

My last post focused on creating actual texture, as opposed to implied texture.  

Implied texture, to me, means something that tempts you to run your fingers across it, because your eye tells you that you're seeing texture.  But if your fingers trail across that surface, you'll discover it's flat, or very nearly flat.

Both kinds of texture are fun when they show up in artwork!  They add interest and complexity.  They hold the attention of the viewer.

More examples of actual texture:


Above:  A sponge stencil applicator, dipped repeatedly into a heavy body gel medium, has been used with my 6" x 6" Heron Stencil s175 on a base of marbled hot-press watercolor paper.


Above:  What appears after the stencil has been lifted.  After this gel dries, I'll come back with dry coloring media, such as Pan Pastels, to add color to this example of actual texture in artwork.


Even more examples of actual texture --


Above:  Again I chose my 6" x 6" Heron Stencil s175, but this time I used it to trace its shape onto reddish-brown lightweight cardstock.  My next step was to cut out the heron shape and add it as the top layer, over a sheet of textured paper.  That paper had started life white, but I'd crumpled it, flattened it just enough to retain wrinkles, and brushed its surface with light blue Pan Pastel.


Above:  Going back to the use of heavy body acrylic gel, I used a palate knife to spread it across the upper area of this art sample; but, on the lower area, I used acrylic black lava gel.  I spread both thru my 6" x 6" Kaleid Stencil s085After the two gels had dried, I poured assorted colors of liquid acrylic paint across the surface.  (This photo was shot at an angle.)


Next up:  Actual texture created with my 6" x 6" Palm Fronds Silhouette s238. 


In both art samples above, I'd spread heavy body gel medium through  Palm Fronds Silhouette s238, and after allowing the gel dry, I used an old credit card to scrape white paint across both these surfaces of actual texture, to make the texture stand out from the background colors.

More techniques for both actual and implied textures  will appear in my next post.  To scroll thru the pages of my stencils and masks at StencilGirl Products, please start here.  Thanks!

Saturday, March 12, 2022

Texture Fun Part 1

Often, I enjoy using stencils and masks designed by other designers at StencilGirl Products.  These creative designs fascinate me -- I wish I had designed them myself! -- but "if wishes were horses, beggars would ride; if 'ifs and ands' were pots and pans, there'd be no work for tinkers."

One of my favorite designers is Traci Bautista (whom I had the pleasure of meeting in person, many years ago.)  It was mostly her stencils -- Soulful Scribbles Let Go (9" x 12") in particular -- that I customized with scissors and used in today's project.  Another stencil I used here is Lizzie Mayne's 9" x 12" Scattered Stencil.

I'll start today's post showing my finished artwork on a large stretched canvas --


Here are the steps that I took....

Having already established a magenta-and-blue background, I moved forward by placing the scissor-customized stencils and masks in a design flowing across the width of the canvas --


Above: Some of the stencils were already paint-stained from having been used in previous projects.  


The next two photos show a pair of areas on the canvas after I've (1) secured the customized stencils and masks using green masking tape and (2) used a plastic art spatula to spread heavy body gloss gel thru all the stencil and mask pieces:


Below:  the stencils and masks have been lifted off (and placed into a water-filled basin so that the thick gel medium won't dry; heavy-body media of this kind, if allowed to dry on stencils, will clop openings.  The soak basin keeps that from happening, and holds the stencils until I have time to clean them at the end of the painting session.)


Above:  This is a close-up showing a large section of the canvas after the stencils have been lifted off.


Extra heavy-body acrylic gloss medium, white when first applied, will turn transparent after drying overnight.  This is shown in the next photo ....


Above:  a close-up showing detail after the gel has dried to transparency.


I started to pour Golden High Flow acrylics across these textured areas ....


... and, as shown above, I thinned the color in some areas and encouraged the colors to run and spread, using a water-filled mister bottle.  The photo below shows the entire canvas after this first layer of color (blue) has been added:


After the blue layer had dried, I introduced Golden High Flow metallic gold.  I took the same steps as with the blue -- tipping the canvas and water-spritzing it to keep the gold paint moving into random patterns across much of the surface. 


Above: An area of the canvas with metallic gold added. 


Above: This shot covers most of the surface area right after magenta Golden High Flow had been introduced in the upper right and allowed to move downward diagonally across the surface.  Notice there are gold spatters in the upper left.  I created them with the water spritzer bottle, hitting the gold paint at an angle to make it spatter.


The finished artwork appears at the top of this post.  To sum it up, I applied 3 layers of Golden High Flow, allowing each application to dry before adding the next -- first blue, then gold, then magenta.  

Thanks for taking time from your day to check out my blog!  To scroll thru the pages of my stencils and masks at StencilGirl Products, please start here.