Tuesday, November 13, 2018

WINTER BERRIES Christmas Cards


Below is an acrylic paint print made with Garden Montage (9" x 12") and Winter Berries Stencil (9" x 12")-- 


These two stencils by themselves look like this --


Winter Berries Stencil

Garden Montage

Winter Berries Stencil was also used in making these prints ....


My reason for making red and green prints was to bulk up my supply of papers for creating this year's collage Christmas cards --


Thanks for visiting today!

To see all my StencilGirl stencils and masks, please start here.

Saturday, November 10, 2018

Last Batch of Art Samples showing Metallics used with Stencils


Above:  another example of embossed self-adhesive foil -- this time, the embossed outlines were filled in with translucent green acrylic paint.  Dots of art glitter completed the look.  Stencil used:  6" x 6" Ferns 6 Stencil.

Above:  another example of embossed foil.  Stencil used:  9" x 12" Boxed Vines Stencil.

Above:  background made with 9" x 12" Facets stencil, on textured foil gift-wrap.  Foreground embellishment made with 6" x 6" Hot Air Balloon and Mask set.

Above:  made with 9" x 12" Mimosa stencil on gold gift-wrap tissue.

Above:  made with part of Blooming Where Planted stencil (9" x 12") on textured foil gift-wrap.


Above:  created with heavy-body gold metallic paint daubed thru my 6" x 6" stencil Quilted Flower Garden (which was then cut to size to resemble a pillar candle.)
Above:  I placed my Pair o' Parrots stencil (6" x 6") on a sheet of textured foil; I traced around each of the shapes; I used fine-detail scissors to cut out each shape; then I added both to a greeting card cover using a glue-stick.  The mini-hearts were punched from red paper using a Marvy hole-punch.
Above: one final example of paint used thru a stencil -- my 6" x 6" Mikki's Flowers stencil -- onto a background of textured foil.

 6" x 6" Ferns 6 Stencil
9" x 12" Facets stencil


Blooming Where Planted stencil (9" x 12")

6" x 6" stencil Quilted Flower Garden

9" x 12" Boxed Vines Stencil

Sincere thanks for visiting here today!  This completes my series on using metallics with stencils. 

To follow this blog by email, please use the option in the upper right.

To scroll thru my StencilGirl stencils, please visit here.

Sunday, November 4, 2018

Still More about Foil Embossing with Stencils


For today's post, I used a different source of self-adhesive aluminum --  Inkssentials self-adhesive foil from Ranger Industries.  It works the same as the aluminum foil tape but comes in a wider width.


Foil is very difficult to photograph, but I love working with this surface because embossing it is so easy and quick.  The results are subtle, not flashy. 

My first step was to measure the foil needed to cover the front of a blank greeting card--


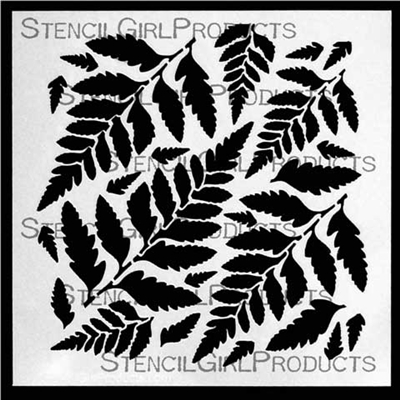
Then, I placed my 4"x 4" stencil Fern Fronds Silhouette Stencil Mini atop the foil, holding it in place as I traced the openings with a stylus...


Note: this stencil is stained green as result of a previous project.  Click on the image to enlarge it and better see the embossed lines made with the stylus.)

My 4"x 4" Fern Fronds Silhouette Stencil Mini is what I chose to use this time, but the greeting card blank was large enough for me to've used  any 6"x 6" stencil.  I buy these sturdy, square greeting card blanks from JamPaper.com.


After I lifted the stencil, its embossed outlines were revealed, as shown below.


After this, I introduced Titanium White acrylic paint -- 


 -- which I brushed across the surface.  While the paint was still tacky, I removed most of it with a paper towel -- my goal being to leave a hit-and-miss look, with foil showing thru in most areas, but with most of the paint remaining in the embossed areas:


Click on the above image to better see the remaining white paint.

Next, I got out the glitter glue (also by Ranger Industries.)  Below are two photos showing the border I created this way:


Now I wanted to add some color, so I used red glitter glue to apply dots--


Above These dots are easier to see in the finished greeting card, shown at the start of this post.

Once the glitter dried, I peeled off the foil's white backing paper and applied the foil to the front of the Christmas card -- as shown in the top photo in this post.

Check with the Postal Service before mailing 6" x 6" greeting cards -- there is a non-machinable surcharge for sending mail of these dimensions.  I use two Forever stamps, for convenience.

To scroll thru the pages of my StencilGirl stencils, please start here.

Thanks for visiting my blog today!

Saturday, October 13, 2018

PRESSED LEAVES


Pressed Leaves (6" x 6") came out for some autumn play--


Thanks for visiting here today!

Wednesday, October 3, 2018

Honored to Show Art by Fellow Stencil Designer Karen P. Johnson!


Today's featured stencil is my 9" x 12" Vintage Script. . .


I used this stencil when developing the collage below --


And artist Karen P. Johnson has delighted me by including this stencil in her stencil-tool-box when she created the two-page art journal spread below:


Karen and I ended up using the same basic color schemes.  Great minds think alike! 

Also included in Karen's StencilGirl.com collection is the StencilClub's June 2015 Stencil-of-the-Month 3-piece set, which I had the honor to design.  She used that -- along with other StencilGirl stencils -- in making the gorgeous two-page spread below.....


Be sure to visit Karen P. Johnson  to see her line of stencils!

To check out StencilClub, please go here

And to see the pages showing my full line of stencils, check here.

Thank you for taking time to come here today!


Thursday, September 27, 2018

6" x 6" Stencil WEBBED MEDALLION & 9" x 12" Stencil LOOPY LADDERS


My stencil Webbed Medallion (6" x 6") had been used in artwork that's appeared in past issues of StencilGirl Talk Blog.

The stencil itself looks like this --


Selected areas of this stencil were used by Cathy Weselby in creating the art below.  


Also appearing in a recent post at StencilGirl Talk Blog was the artwork below; the artist, Louise Nelson --


The blue background in this charmer was developed with my 9" x 12" stencil Loopy Ladders, which looks like this --


My hearty thank-you goes out to Louise Nelson and Cathy Weselby for allowing me to re-post their art here!

Be sure to check out all the stencils at StencilGirl.com!


Monday, September 24, 2018

BUDS Stencil (9' x 12") in Many Moods!


My 9" x 12" stencil Buds --


-- has volunteered to help me with making several prints on paper ...


Above:  The background on this print was created with another 9" x 12" stencil, Facets.

Above:  Part of the Buds stencil was masked off with masking tape, so that I could use just part of the stencil.


It's fun to play with different looks that can be achieved with many of the same stencils!

Thanks for visiting here today!

To see the pages of my stencils, please visit here.

Friday, September 21, 2018

BLOOMING WHERE PLANTED (9" x 12") Stencil ... and Friends


In its entirety, Blooming Where Planted looks like this --


But long ago, I cut the large left section apart from the two smaller sections on the right.  For some reason, I find myself using this section more often....


Above:  Blooming Where Planted was printed over an earlier print made with another 9" x 12" stencil, Nosegay.


Some of the above prints (made on paper) have been cut up and used as collage pieces.  

Below, the same section of Blooming Where Planted came in handy when I was making prints on stretched canvas, using heavy-body acrylic paints and a Sofft sponge.


Above: Blooming Where Planted was printed over an earlier print made with another 9" x 12" stencil, Fantasia. 

Fantasia in its entirety looks like this --


And the 9" x 12" stencil Nosegay looks like this --


Thanks for stopping by here today!

To see the multiple pages of my StencilGirl.com stencils, please go here.