
Abstract Composition Backbones Mask 2 s865 arrives in mailboxes measuring 6" x 6" ... but for today's post (and most of my other posts that focus on any mask in this set of 4 ) the mask has been scissor-customized; I've removed the square outside border.

Above: This was my original placement of the (orange-pink paint-stained) mask, on a background that had been blue, but was now mostly white. (The circular patterning came from the type of applicator I used, a sponge with a bulb shape at one end.) This original placement proved to be temporary. I decided to switch to a vertical composition, shown below:

Having switched to a vertical composition, as shown above, I've torn green masking take into strips with irregular edges and used these strips to add length and width to the design I have in mind. The mask will be the "heart" of the finished artwork, but it will benefit from the taped patterns that will help me build a the type of composition called a cruciform.
 |
| |
Above: a full-sized view of the painting in progress.

The photo above shows the start I've made, using a brush with a handle, a small sponge-topped paint applicator, and a couple of sponges that are each bulb-shaped at one end.
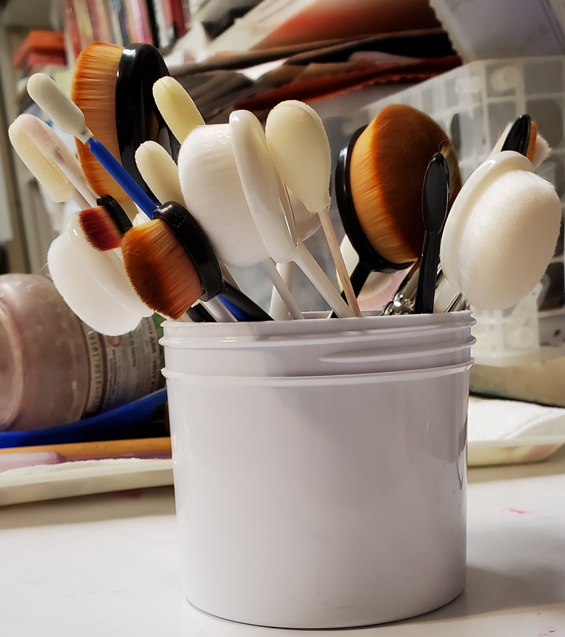
The next shot is a close-up of one of the brushes I used. These brushes, sold as cosmetic applicators, have soft, ultra-dense bristles, so they make prints very similar to the prints that come when using sponges. The main difference is that these have long plastic handles, as shown below.

Below: Another close-up, taken after I had added more of my heavy-body acrylic paints. The applicator is one of my bulb-ended sponges (which, like the ones with handles, are sold as cosmetic applicators.) At this state of the painting, the masking tape strips are still in place, so as I add paint to the substrate (an old page from a picture calendar) the tapes are keeping paint from covering the areas they cover.


Above: I've lifted off the strips of masking tape.
Below: A close-up detail of one area.


Above: This photo shows the art with two new developments. (1) With a sponge I've added, around the heart of the painting, a filmy layer of zinc white acrylic paint thinned with matte medium gel. This addition softens the lines left by the masking tape strips without totally removing the lines. When I added this mist-like layer, I used (if memory serves correctly) Sidewalk 3 of Puerto Rico s784, designed by MaryBeth Shaw. (2) I've pulled out a piece of orange "bleeding" tissue paper (shown on the far right) and have started to tear off small bits to place in some areas across the surface.

As shown above, the tissue bits have been sprayed lightly with a spray bottle. My next step will be to remove the papers themselves, after they have "bled" enough to create scattered bits of bright dark orange.
Below is the finished artwork.

Below: My collection of "cosmetic" brushes with handles (and some narrow-sponge-topped applicators with handles that are normally sold for cleaning guns -- something I will never, never use for anything other than daubing paint thru stencils and masks!)
Thanks for checking out my blog today! To scroll thru my pages of stencils and masks at StencilGirlProducts.com, please start here.
No comments:
Post a Comment